Use Google Earth for genealogy to find long-lost family locations on modern maps. Here’s how!
It can be very surprising to discover that you lived somewhere that you never knew you lived. That was the case for Professional genealogist Alvie Davidson, who recently wrote to me. He’d done some fantastic sleuthing on his own recent family history, and discovered that his family had lived in Huntsville, Alabama when he was a toddler. “This is the first I have even known they lived in Madison County, AL.” But he was not sure about how to use Google Earth to help him locate the family addresses he’d discovered.
“I have learned from the U S Government that my parents lived at (three) different addresses in Huntsville, Madison County, AL when I was a toddler in 1944….I never knew we lived in Huntsville but I learned my mother worked for munitions productions during World War II at Redstone Arsenal. She worked several months toward the end of 1944 and had to quit due to onset of pregnancy. We moved to Florida shortly after she left employment at Redstone Arsenal because we show up on the 1945 Florida State Census.”
Alvie sent me three family addresses. Then he asked for some step-by-step help instructions on how to put Google Earth to work to identify their location today.
4 Steps to Revealing More with Google Earth
1. Search each address in Google Earth. Enter the address in the search box in the upper left corner of Google Earth. If you get a hit, mark it with a placemark (clicking the button that looks like a push pin in Google Earth’s toolbar) and name it. In this case I found two of the three street addresses.
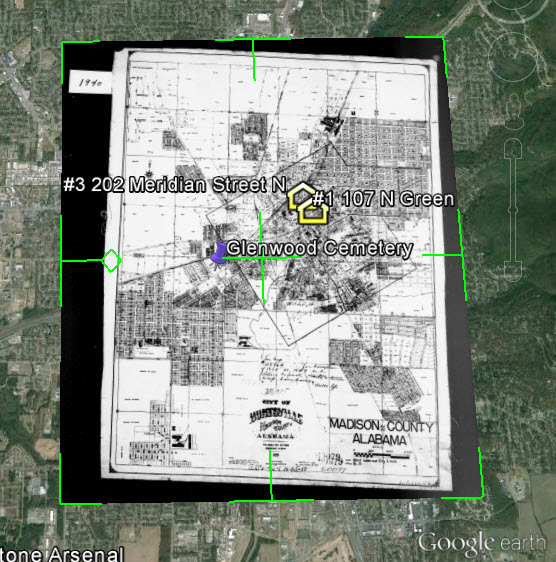
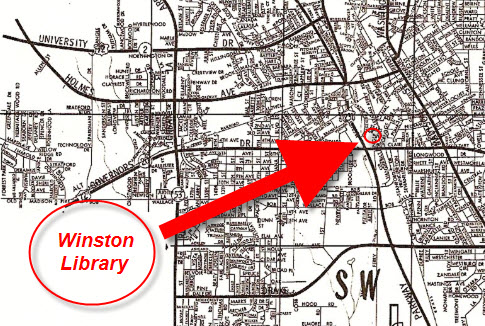
2. Locate a map of the area for the appropriate time period. With a little Google searching, I found the 1940 census enumeration map for Huntsville at the National Archives website. Here’s what that map looks like. (Image right) I then went in search of each of the three addresses on the map.
In this case, I conducted a block-by-block search of the 1940 enumeration district map for the missing address: 110 Winston Street. Unfortunately, not all the street names were clearly legible on this particular map, and I was unable to locate it.
3. Overlay and georeference the enumeration district map in Google Earth to compare the past to the present.Georeference just means to match up known landmarks on the historic map with physical locations on the modern-day map, thereby allowing you to match the two maps up together. By so doing, I was able to locate on the enumeration district map the modern-day locations of the two addresses that I found using Google Earth.
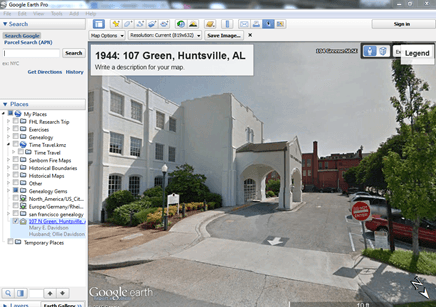
There are businesses in both locations today. Below right is a screen shot showing the current location of one of those addresses. Clearly no longer the old family home.
4. Dig deeper for addresses that have changed. As I mentioned previously, I searched for the 110 Winston Street address in Google Earth with no result. If that happens to you, remove the house number and run a second search on the street name alone. Numbers can change, but it is important to verify whether the street still exists today.
In this case, Google Earth did not locate a Winston Street in Huntsville, AL. Knowing that errors and typos can happen to the best of us, I ran a quick Google search for Huntsville, AL city directories, and verified that indeed Winston Street did exist at that time in history. So, at some point between 1940 and today, the name appears to have been changed.
I headed back to Google and ran the following search query:
“winston street” “huntsville alabama”
The quotation marks tell Google that each exact phrase must appear in all search results. The phrases will appear in bold in the snippet descriptions of each result.
The result above caught my eye because it mentions the “Winston Street Branch Library.” Even when street names change, buildings named for those streets often don’t. However, in this case, the website discusses the history of the library, and the Winston Street Elementary School. According to the website, the library “became a part of the Huntsville Public Library (now Huntsville-Madison County Public Library) in 1943. In 1947, the branch was renamed the Dulcina DeBerry Library.” Perhaps the street was renamed at that time as well.
Jumping back into Google Earth I entered “Winston Street Branch Library” in the search box, and was immediately taken to the location, which is just south of the other two known addresses! At this point I would recommend to Alvie, who is a Genealogy Gems Premium Member, to watch my video class Best Websites for Finding Historical Mapsto track down additional maps from the time frame that may have Winston Street clearly marked on the map.
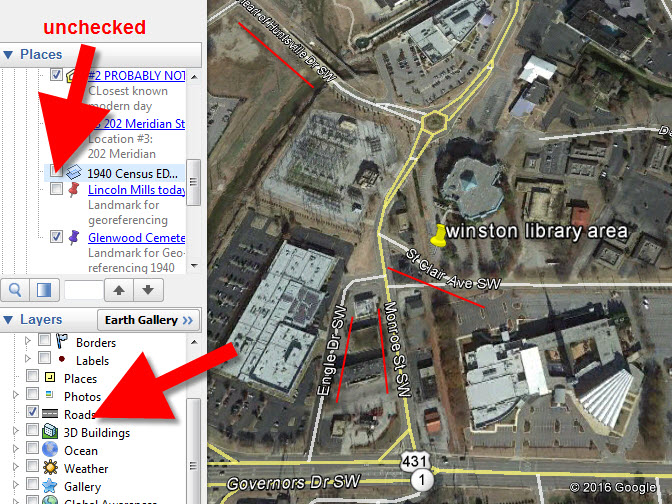
Once I identified this landmark, I then marked the location with a placemark. You can turn off the 1940 enumeration district map overlay by unchecking the box next to it in the Places Panel. Doing this revealed the location on the modern day map. Finally, I headed to the Layers panel and clicked the box next to the “Roads” overlay to reveal the modern day street names.
You can use this technique when you have more success than I did in finding an old address on an old map. Overlay the map, position a placemark on the location, and then turn the overlay off. With one click of the Roads layer you can now see the current street name for the old location you found on the map overlay.
Further digging online did deliver additional maps from the era and area:
We all have locations in our family history that have given way over time to new buildings and parking lots. By using the power of Google Earth, Google search, and historic maps, they don’t have to be lost forever.
Get Started with Google Earth for Genealogy
Learn all these Google skills–with step-by-step tutorials and video demonstrations–in Lisa’s book and Google Earth video tutorial. Click here for a special price on the bundle!
FREE video: Get Started with Google Earth for Genealogy
Google Bundle! The Genealogist’s Google Toolbox Second Edition PLUS learn how to create your own historical map overlays in my Google Earth for Genealogy 2-video CD set.
Discover the essential search strategies that every genealogist should be using when searching for records at FamilySearch.org, the popular free genealogy website. In Elevenses with Lisa episode 64 Lisa Louise Cooke discusses:
Wild cards you can use when searching FamilySearch
Search strategies to help you get more results
Advanced Search strategies
Episode 64 Show Notes
FamilySearch.org is a free genealogy records and family tree website. You will need to be logged into your free account in order to search for genealogy records.
In this video and show notes I will outline strategies for searching for people by name in genealogy records. You can then apply these techniques to your genealogy research plan. Knowing what you’re specifically looking for will give you a better chance at success.
Elevenses with Lisa episode 64 – Share on Pinterest
Starting Your Search at FamilySearch
In the menu go to Search > Records (then use the form).
Start with a broad search.
Search results ignore the order of first names but will preserve name order if there are two last names.
Click the Exact Match box to start narrowing in on specific names and spellings.
Even if you are confident that you know exact names and places try variations. For example, add or remove a name and turn on and turn off Exact Match.
Strategies for Searching Names FamilySearch:
Add or remove middle names.
Try searching for nicknames.
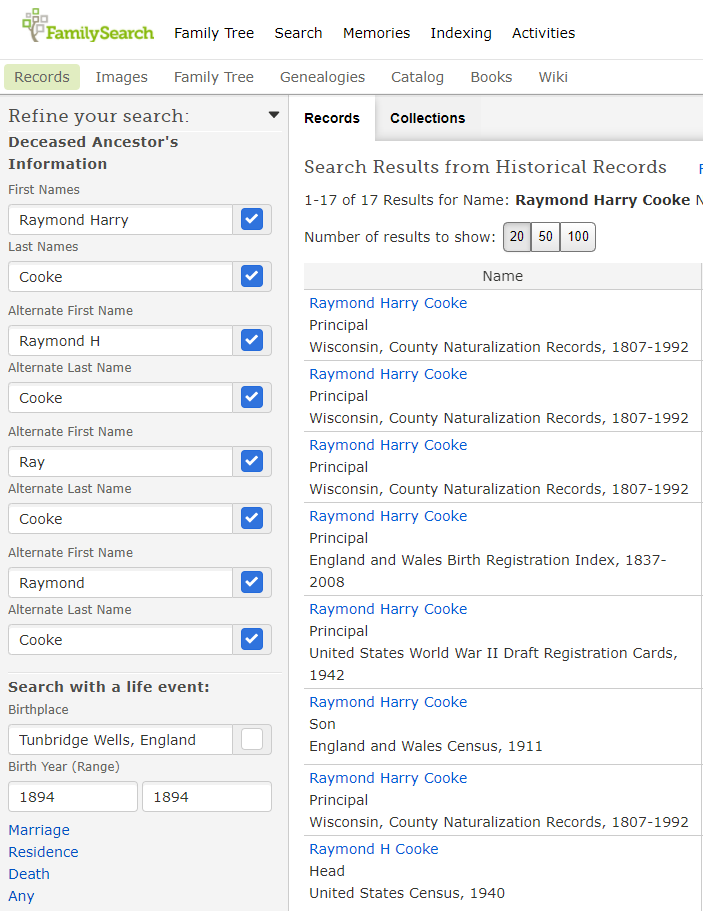
Try spelling variations. Use the AlternateName You can search up to four alternate names at a time. Try clicking the Exact Match box for each alternate name.
example of Alternate Name search at FamilySearch
Try spelling the name as it would have been spelled in the old country. (Example: Sporan / Sporowski / Sporovsky / Sporowski)
Use wildcards to help with search variations.
Asterisk (*) replaces zero or more characters.
Question mark (?) replaces a single character.
Use cluster research techniques by searching on relationships.
A few words about searching on relationships: Try searching only with your ancestor’s first name and a known relationship such as a spouse, parent or other relative. In addition to specific people, try searching for a surname associated with the family.
Over time the spelling of a last name can change in a family. It’s important, even if you receive initial successful results, to try all variations, including language variations.
In the case of women, records will be under the last name they were using at the time the record was created. Therefore, try searching for them using their maiden name and then their married name (or names if they were married multiple times.)
Try leaving the last name field blank. This can be particularly effective when searching for female ancestors. This strategy works well in conjunction with entering additional information, such as the names of the spouse or parents.
Try just surnames, unique first names, and Other Person
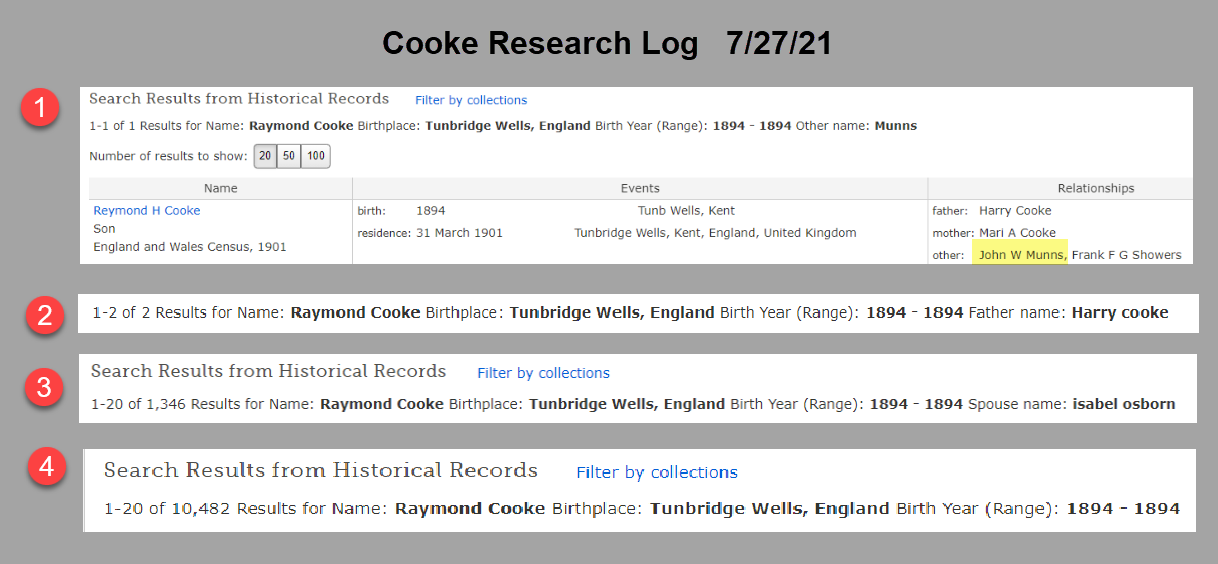
Pro Tip: Use Snagit to easily create a search log
Learn more about Snagit: How to Use Snagit for Genealogy (episode 61) Save 15% on Snagit with our exclusive discount coupon code: GENEALOGY15
Have you been using Snagit? Leave a comment
Here’s an example of a search log I created using Snagit. You can add custom text, symbols, highlighting and much more to create exactly the log that works for you.
Search log created with Snagit
Here’s how to quickly capture and keep a research log of your FamilySearch searches:
Run your search as usual.
Use Snagit to clip the number of results and the terms searched at the top of the results page. (Set Snagit to “Region” to precisely clip that portion of the screen.)
Continue searching and clipping. When done, go back to the Snagit Editor.
Click Control (Win) or Command (Mac) and click to select each clipping you made in order. You can also select all of your clippings by clicking to select the first clipping and then hold down the shift key on your keyboard and click the last clipping.
Right-click on the selected clipping to access the menu. Click Combine in Template.
In the pop-up Combinein Template box, select a template. I like to use Custom Steps for a research log.
Click the Next
Give your combined image a Title. (You can edit this again later.)
Select the font and canvas color as desired.
The NumberImages box will probably be selected. This will place a “step” number in front of each clipping showing the order in which you clipped. You can deselect this box if you don’t want to number your clippings.
Click the Combine
Edit the combined image as desired. You can click to select items to move and resize them. You may need to ensure you’re not in Text mode – click the Arrow at the top of the screen and then you’ll be able to click on items like the numbered steps and move them around. Grab the edges and drag them to crop if needed.
Save your image: File > Save As.
Search Strategy: Events
Try searching on known life events such as:
Birth
Marriage
Residence
Death
Any
Click the type of life event you want to include in your search. Enter the place and year range.
Life Events Search Tips:
Try your search with different events.
Try your search with no events.
Use the Residence option to find records identifying where a person was living. Some records contain an address or last place of residence. Birthplaces, marriage places, and death places are not the same as residence places.
Use the Any Event if you know a date and place for an event other than birth, marriage, death, or residence. For example, a search with an Any event can find dates of military enlistment or immigration.
Search Strategies: Places
In the place field try searching at a more or less specific place level. If you searched for a town, try the county, state, district or country.
Try using wildcards in place-names. (Enter * to replace zero or more characters. Enter ? to replace one character.)
Search Strategies: Years
In the year fields try adding a year before and a year after.
In the year fields, try searching with no years first, and then filter the results to narrow your search by year.
Advanced Search Strategies
Include multiple events in your search when you are looking for a record that likely contains all the events.
Death records – try searching with both birth and death events.
Birth record, include only a birth event, since birth records usually do not contain death information.
To search for a child’s birth records, enter the child’s name, then click Parents. Enter the parents’ names. If needed, try variations such as these:
Both of the parents’ full names.
The father’s full name only.
The mother’s full married name only; then her full married name only.
The father’s full name with the mother’s first name.
The mother’s full maiden name with the father’s first name.
To find all of the children in a family, leave the first and last name fields blank.
Then click Parents and conduct your search using only parents’ names. Try all the variations.
Searching for Marriage Records
To search for a marriage enter the name of one person in the first and last name fields. Click Spouses, and enter the name of the spouse. Try variations: the spouse’s first name and the wife’s maiden name. To limit your search results to marriage records only, click Type, and click the Marriage checkbox.
Search Best Practices
Have a specific search goal.
Start with a broad search. You do not have to enter information in all search fields. You often can get better results when you leave most blank, and then filter down.
FamilySearch doesn’t support Boolean Operators like Google does.
Expect records and indexes to contain errors, spelling variations, and estimations.
Try your search several times with variations.
Even if your ancestors had easy-to-spell names, expect spelling discrepancies. Anderson could be Andersen in some records. Try Anders?n in the Last Names search box.
Always look at the image, if possible. It often has more information than the index alone.
Tours are great way to see highlights in the shortest amount of time. Why not take your relatives on a virtual family history tour? You can do just that using the free Google Earth Pro software. Read more as Lisa shares some tips and strategies to use Google Earth to...
Old maps are vitally important for genealogy because the characteristics of a location can change in many ways over time. Historic maps help us understand the world as it was at the time our ancestors lived.
Here is a short list of just a few of the things that may have changed:
Street addresses
roads
town names
county boundaries
waterways that may have been filled in or opened up
railway lines
In fact, the country itself where they lived may be a completely different country. For example, my German ancestors lived in Prussia in the 19th century. Today, that area is part of Poland. Therefore, all of the village names have been changed to Polish names.
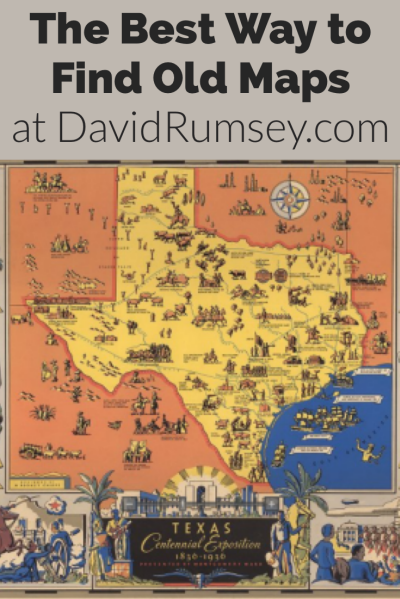
The David Rumsey Map Collection is an excellent place to go to find maps of your ancestors homeland for free.
Watch the Map Search Video
I’m going to explain the 7 steps to finding the maps you need for your genealogy research at this wonderful website! I highly recommend that you watch the short video below to see it in action as you read. The player will stay with you as you scroll down the page.
Step 1: Go to the David Rumsey Map Collection Website
The first thing you need to do is go to the David Rumsey website here. You’ll be greeted on the home page with glorious historic maps. (Stay focused because it’s easy to get distracted by all the fascinating maps!)
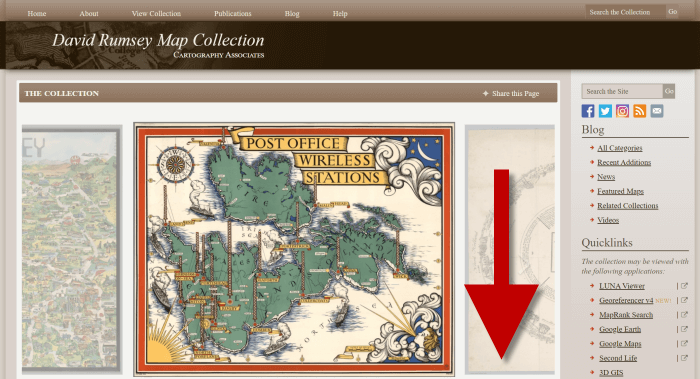
Scroll down on the David Rumsey website home page.
Step 2: Scroll Down to the Bottom of the David Rumsey Home Page
While you can search for a place name in the search box at the top of the page, there’s a better way to search. Scroll down the page until you get to Featured App: MapRank Search (it’s almost at the bottom.)
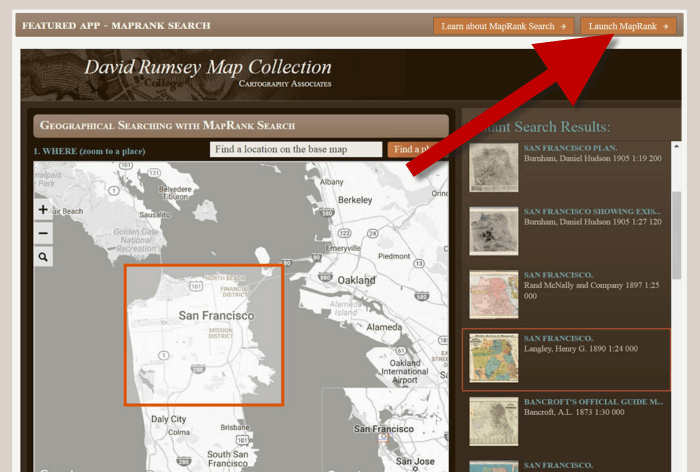
Step 3: Launch Map Rank Search
The Featured App – MapRank Search is the best place to search the website, but it’s easy to miss because it’s not at the top. So go ahead and click the Launch MapRank button in the upper corner of this section.
In the Featured App: MaprRank Search section click the Launch MapRank button
When you click the button it will open a new tab in your web browser which will take you to the Geographical Searching with MapRank Search page.
Quick Tip: The Fastest Way to MapRank Search
You can get there faster by going directly to https://rumsey.mapranksearch.com. I didn’t take you straight there from the beginning because I think it’s important to be aware of the home page and everything else it offers. However, today our focus is conducting the optimal search for old maps for you family history.
Step 4 Selecting the Map Time Frame
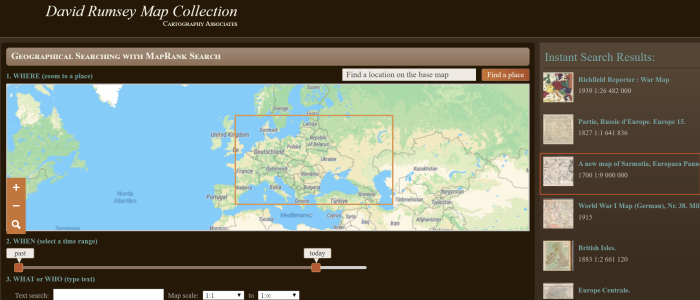
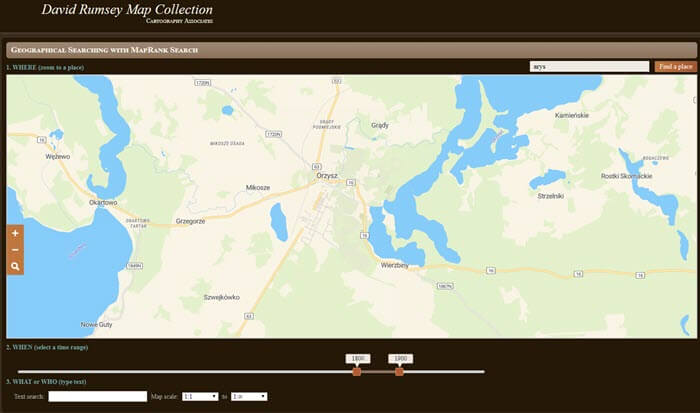
Here’s what the search page looks like.
The DavidRumsey.com search page
There are two very important features on this app page that will help you get the best results possible: the time slider and the location search box.
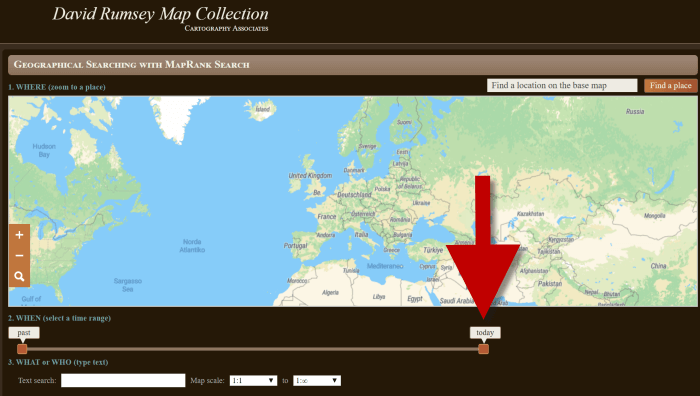
The time slider is located beneath the map:
Time Slider for searching maps by time frame
It’s important to first select the time frame that you are searching because that will dictate the results you get when you search on the location name. (We’ll get to that in just a moment.)
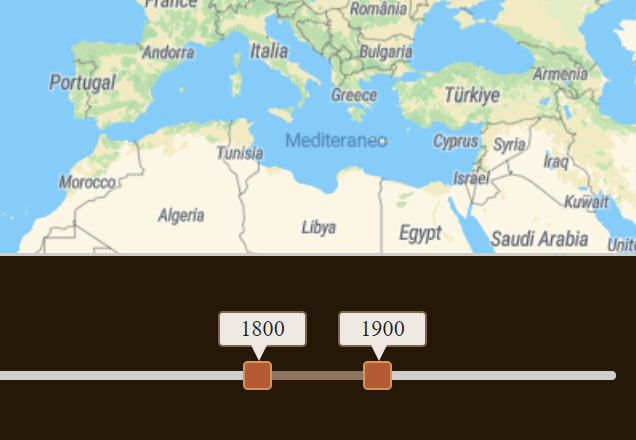
There is a slider on each end of the timeline. Slide them to specify the desired time frame. In my example below, I’m looking for maps between 1800 and 1900.
Searching for maps between 1800 and 1900
As you move the sliders, you’ll notice that the maps in the right hand column will change. This is because only maps that fall within the range you select will be offered in the Instant Search Results column. But before we look at those, we need to type in a location in the next step.
Step 5: Selecting the Location
With your time frame selected, now you’re ready to type the location in the search box.
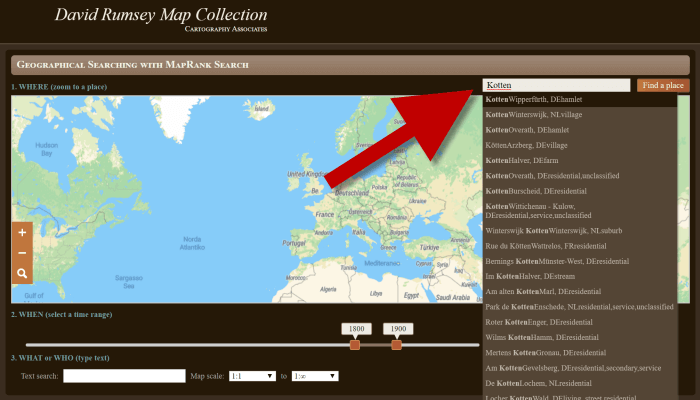
As you type, the app will make suggestions. But wait! Before you click the Find a Place button to run the search, look carefully at the list of suggested locations that may appear. Many locations names can be found in different areas. That is certainly the case with the name of the tiny village where my great grandfather was born: Kotten.
Type the location name to search the maps
In fact, the list doesn’t even include the Kotten I am looking for.
In cases like this, it is best to search a little more broadly. When Kotten was part of Prussia, it was located in Kreis Johannisburg so I could try searching for that. Even better might be to search for the largest city in the area since Kotten was such a tiny village. Arys was the largest city in the area.
Once you type in the name (and select from the suggestions if needed) click the Find a Place button just to the right of the search box.
Step 6: Analyze the Map Results
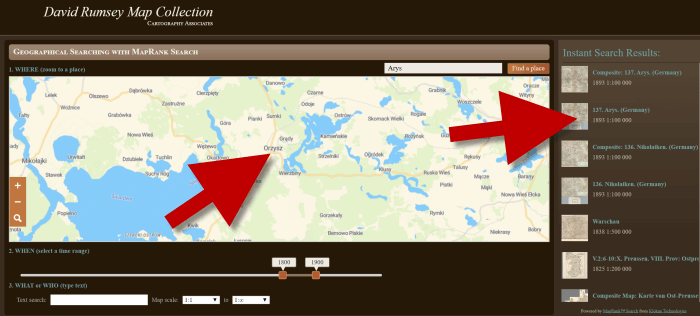
In my example of searching for the city of Arys (which is the name it was known by in the 19th century when it was part of East Prussia) the modern-day map displayed is actually Poland.
My search resulted in a map showing Orzysz, Poland
However, the David Rumsey website does a good job of cross-referencing the older German names (Arys) with the new Polish names (Orzysz). This is another reason why searching for a larger city works well. Larger cities are more likely to be in the David Rumsey system for cross-referencing, and of course they are easier to spot on the map. Generally speaking, the location you searched will be in the center of the display map.
Quick Tip: Verifying Location Names
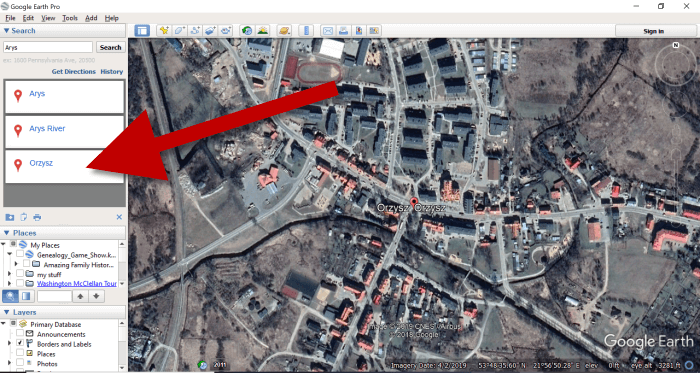
Another quick way to cross-reference location names (or verify your findings in David Rumsey) is by searching for the name in Google Earth. In the example below, I typed in the Prussian city of Arys. Google Earth will offer options if more than one matching result exists.
I was a bit surprised to see “Arys” as one of the three listed results since it is not called that today. When I clicked Arys it took me to the city of Arys in the Turkistan Region of Kazakhstan, far away from Poland! Clicking Orzysz in the results list took me to the area of Poland that was once East Prussia. This confirms the results I received at the David Rumsey website.
Now it’s time to review the map results listed in the Instant Search Results column on the right. Isn’t it fantastic that David Rumsey’s website not only presented me with the correct Polish location, but also maps published between 1800 and 1900 that include Arys? I think so!
Map results appear in the column on the right side of the page.
Click the map you think best suits your needs. The map will open in in a new tab in your web browser. (These browsers tabs provide a nice bread crumb trail for your searching activities.)
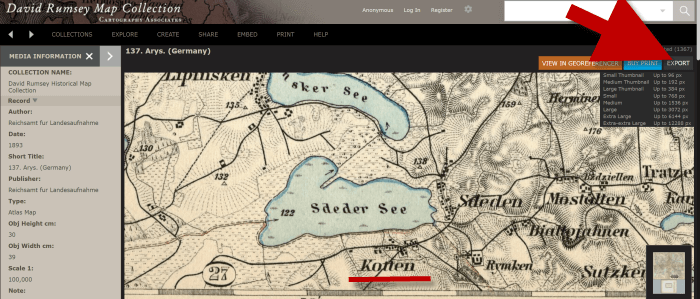
All of the source information about the historic map that you chose will appear in the column on the left. (See the image in Step 7.) If you decide to use this map you’ll definitely want to accurately cite the source. Learn more about the importance of source citations here.
Step 7: Export the Map
I was delighted to find the village of Kotten on this map of Arys published by Reichsamt fur Landesaufnahme in 1893!
When you find a map that you would like to use for your family history research, export it to your computer. To do this, click Export in the upper right corner of the map and select the desired size. You can select a size ranging from Small Thumbnail to Extra Extra Large. Keep in mind that the larger the size, the more clarity you will have as you zoom in closer and closer. This is very important if you plan on using the map in an overlay in Google Earth. You can learn how to create your own map overlays in my video tutorial series on using Google Earth for genealogy available here, and in my book The Genealogist’s Google Toolbox.
Click “Export” to save the map to your computer.
Be patient while downloading to your computer because it can take several moments to export a large map. The saved file will probably be zipped. To unzip it, on a PC right-click and select ExtractAll from the pop-up menu. This creates an open version of the folder containing the map.
Get Started Finding Your Ancestral Locations in Old Maps
With this step-by-step process you are now ready to explore any given ancestor’s world through the rich details of historic maps. I can’t wait to hear what you discover! Please be sure to leave a comment below. And if you found this tutorial helpful, will you please share it with your friends on social media so we can help even more people find the homes of their ancestors? Thank you!
You can use Google Slides for genealogy to create one-of-a-kind presentations, a virtual scrapbook, or a virtual library list…and it’s free! Here’s how to take advantage of yet another awesome Google tool.
I was recently asked if there was a software program or app, something free perhaps, to share a slideshow or create a visual presentation. There is! It’s called Google Slides. Here’s how Lisa Louise Cooke, author of The Genealogist’s Google Toolbox, explains it:
Google Slides is an online presentation application, much like Microsoft’s Powerpoint. It’s part of Google’s free office suite of tools. As a genealogist, it provides the opportunity to create and visually share your family history.
It’s a Cloud-based service and that means you can access your presentations wherever you are and on any computing device. You will sign-in to Google Slides with your personal Google account. That means you will be able to keep everything private unless you decide to share it. Although it’s Cloud-based, you can use it offline too. Any new presentations you create or changes you make will be automatically updated when you get back online. You can show your presentation at the next family reunion or genealogy society meeting even if there’s no Internet access.
There’s a lot of potential for using this powerful tool for genealogy!
With that great introduction, I’d like to share a few unique examples of how a genealogist or a genealogy society could use Google Slides.
Google Slides for the Genealogist
Google Slides is an easy way to create a fun slide show of your ancestor photos. This can be shared at family gatherings or reunions right from your laptop. You can also share the presentation with a click-able link.
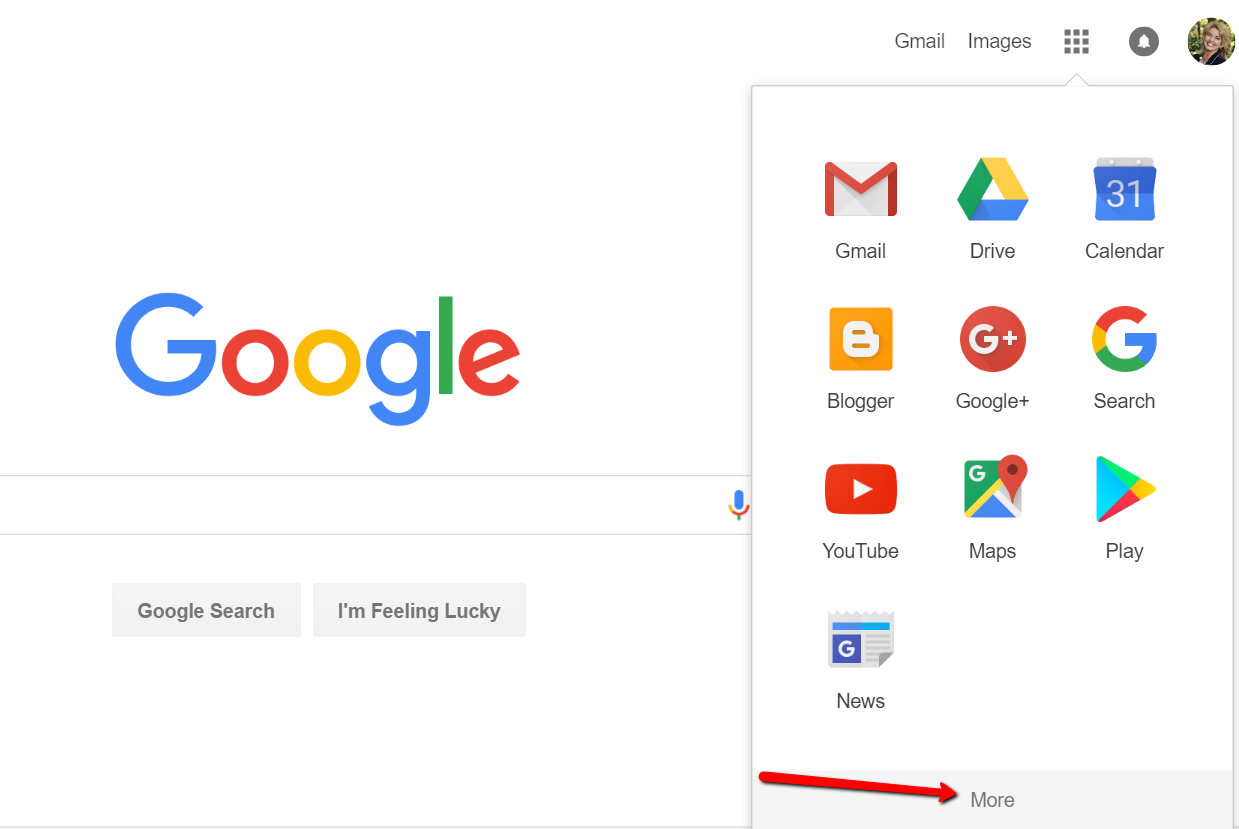
To begin, find Google Slides by going to Google.com and sign-in to your free Google account (or sign up if you don’t have one.) Click on the grid to the left of your sign-in avatar. This will bring down several options. If you don’t see Google Slides as an option, click More at the bottom.
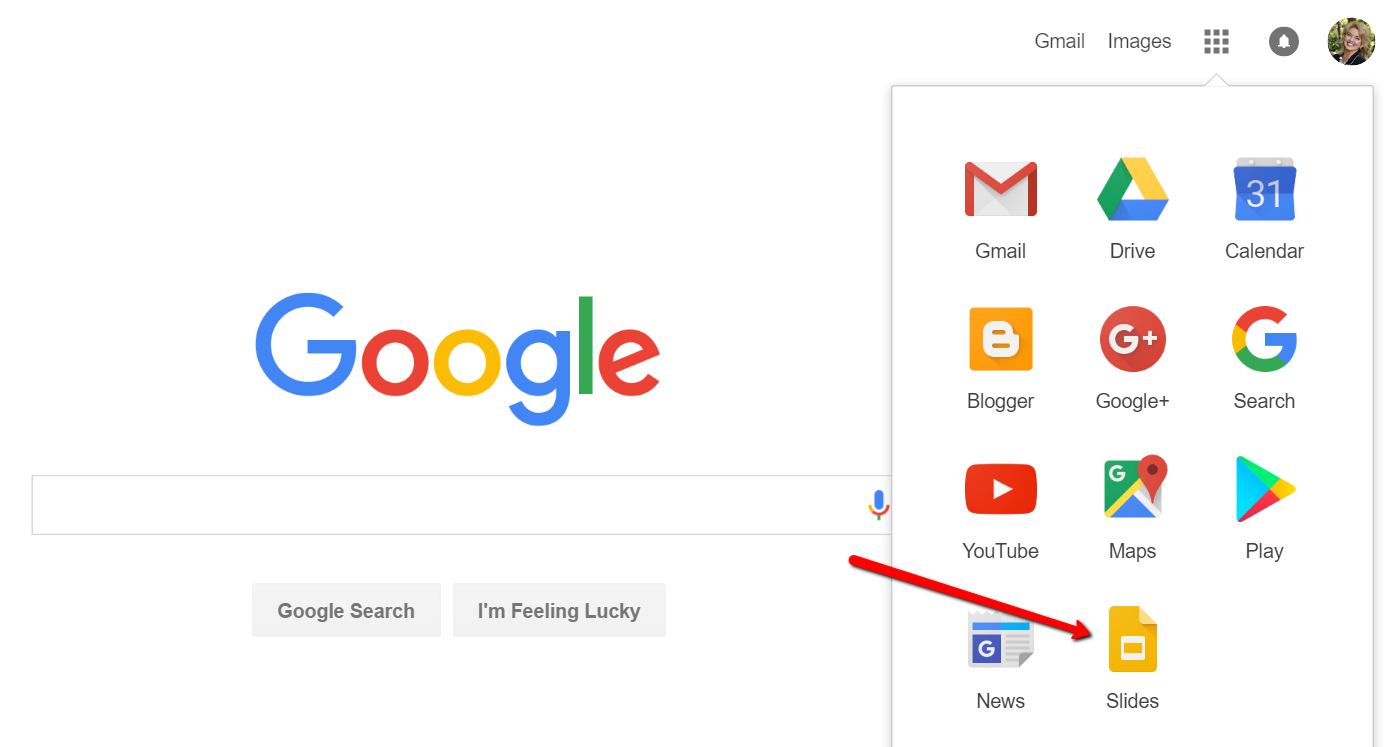
If you still don’t see Google Slides as an option, click on Even More from Google. This will take you to another screen of all sorts of Google goodies! Scroll down until you find Google Slides and click on it.
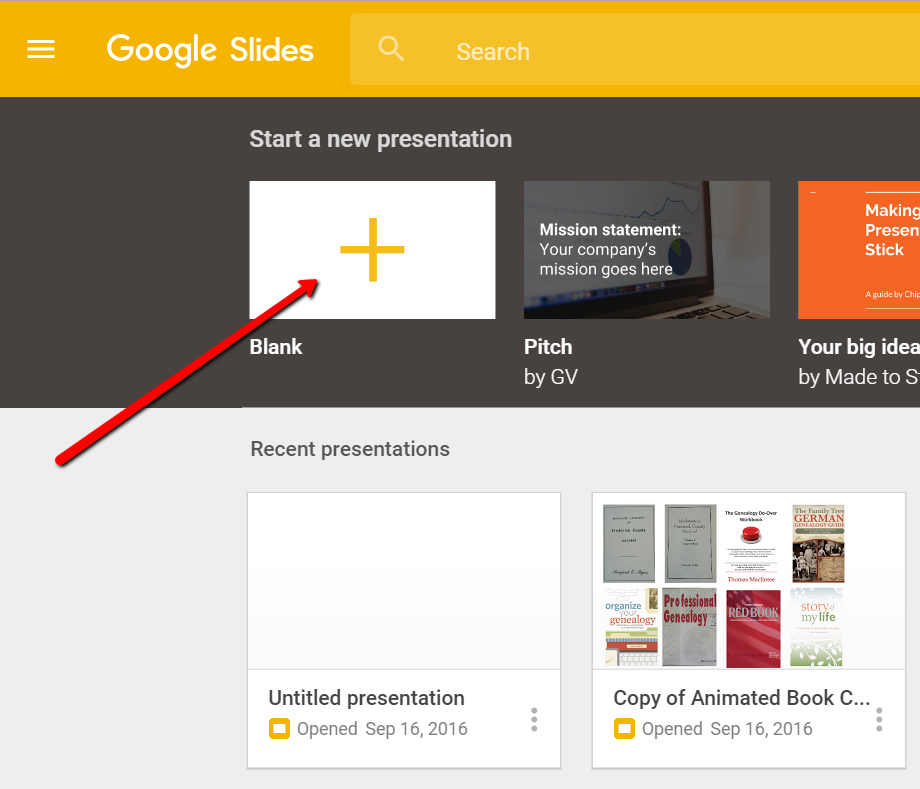
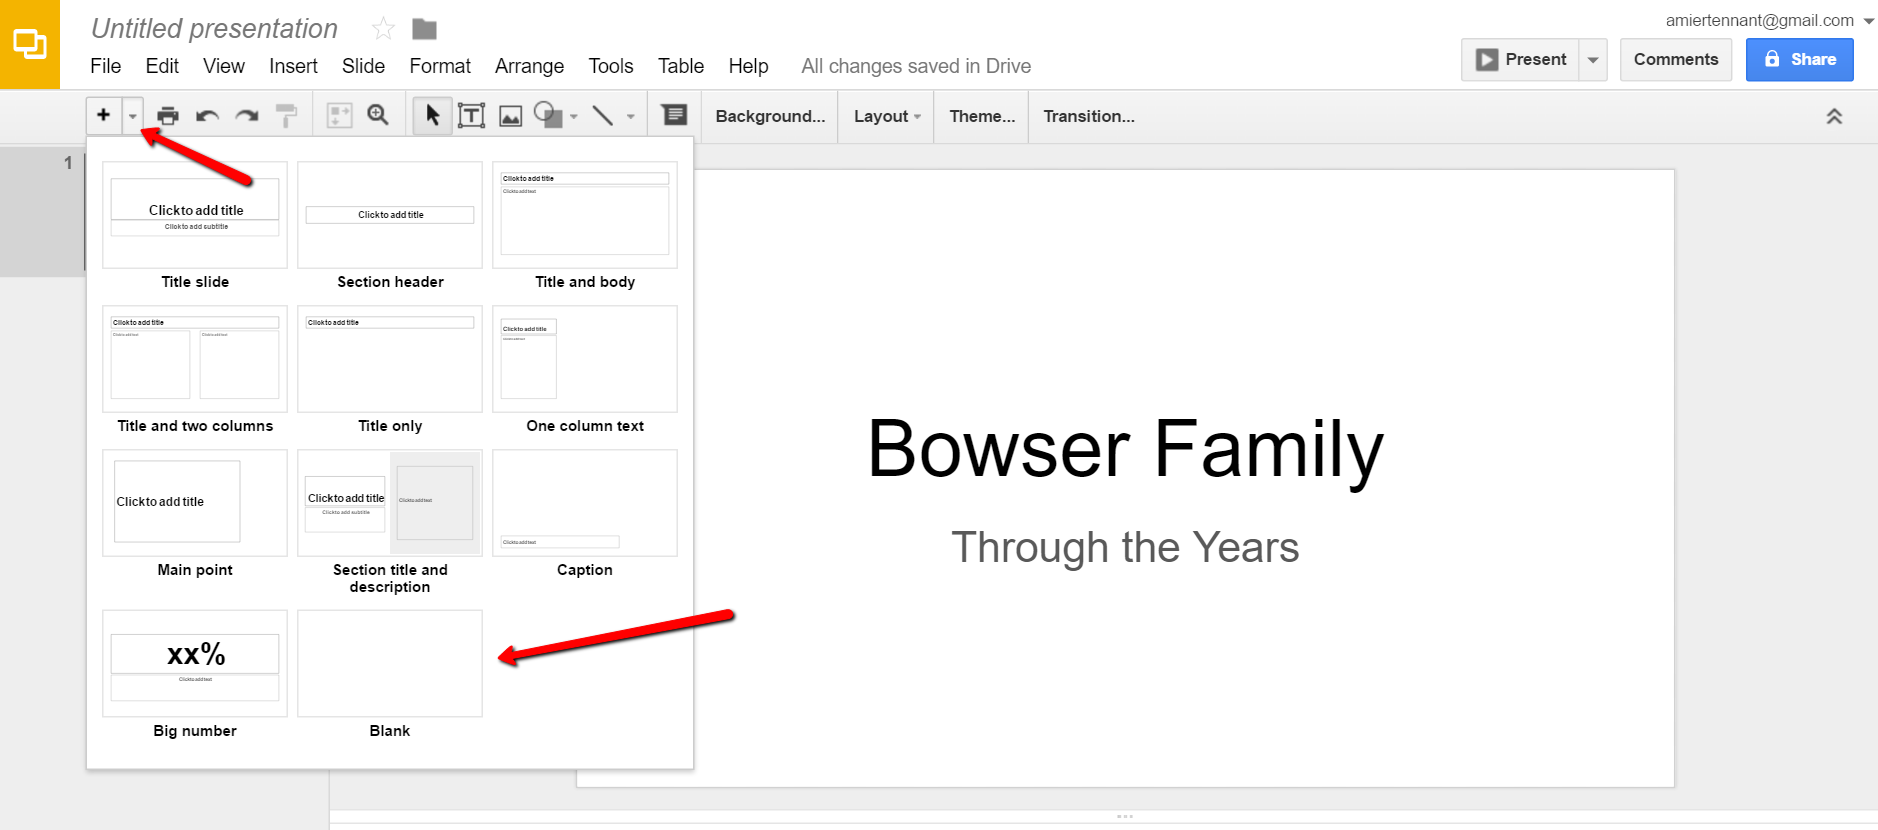
Once you have opened Google Slides, click the plus sign to begin.
I added a title and then clicked the tiny arrow to the right of the plus sign to add a new blank slide.
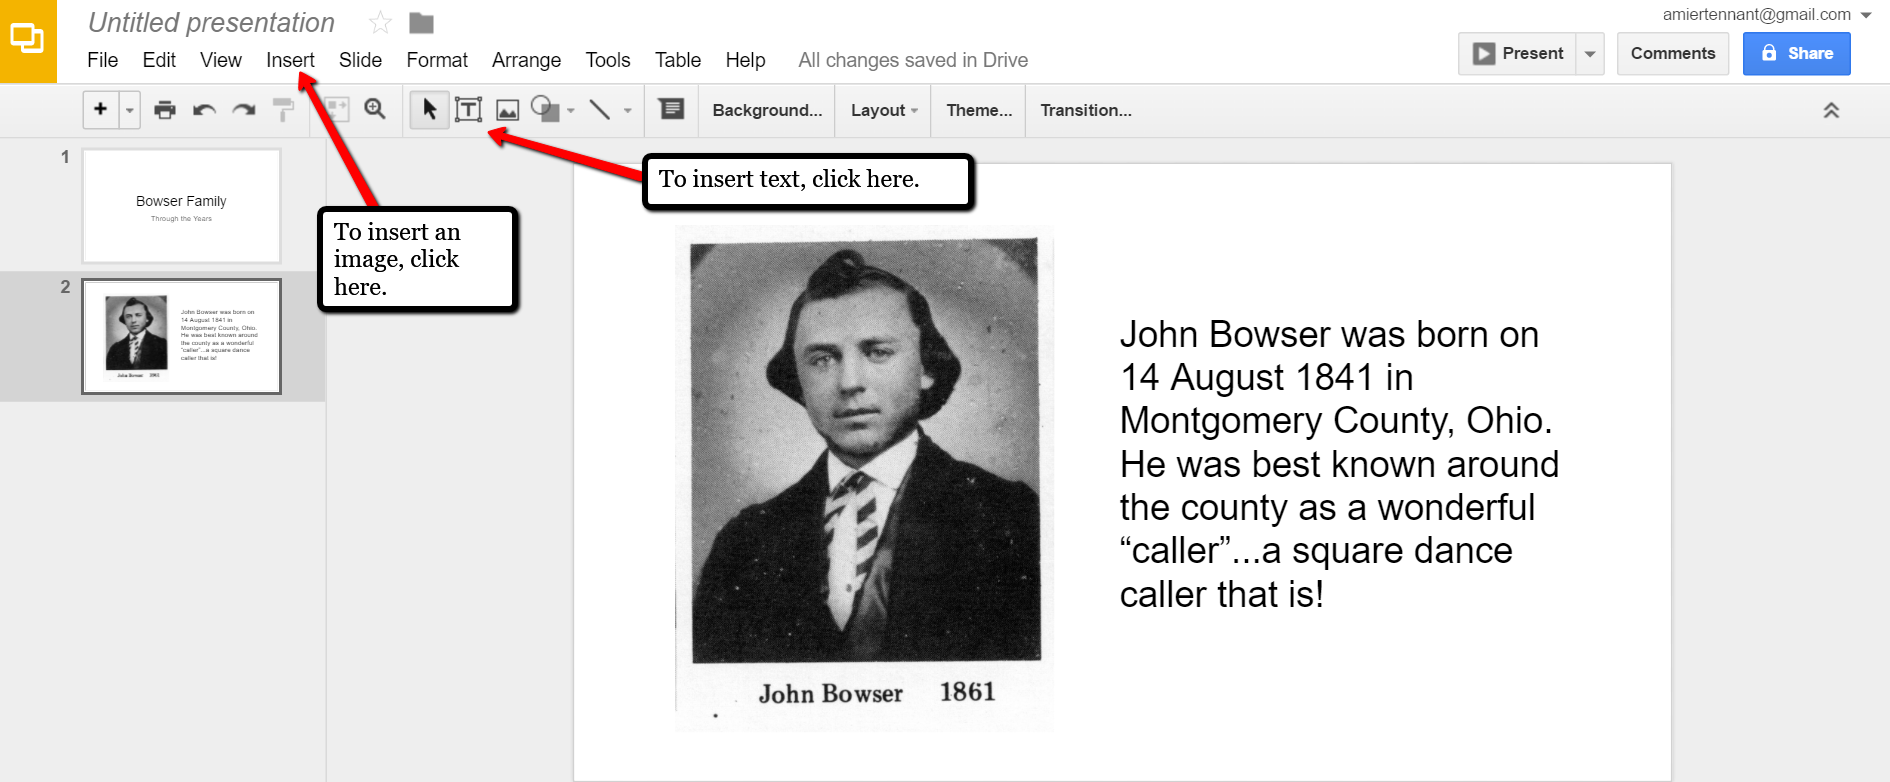
At the new slide and each additional slide, you can add a picture by first clicking Insert from the labels listed across the top, then choose Image. A pop-up window will appear and allow you to Choose an Image to Upload. You will then find the image you have saved on your computer and click Open.
Keep adding your slides until you have all of them created.
Sharing Your Google Slides Presentation
Like many of us, I like to share my ancestor photos with my family and friends. While at a family gathering of a small group, I just set my laptop up on the coffee table and we huddle around. Bring up your Google Slides presentation on your laptop or mobile device and click on Present at the top right of the screen. The computer does the rest and presents a slideshow for your viewers.
You might also wish to share your slides with family and friends far away. You can do this by sharing a link. To create a shareable link, click Share at the top right corner.
A pop-up window will appear. Click the little drop-down menu next to the words “can view.” This option allows you to choose whether you wish people to be able to edit, comment, or view only. I typically choose the “view only” option. Then, a shareable link is created for you. Click Copy link and paste that into an email directly to a family member, to your family history blog, in a Tweet, or in a Facebook post. Wa-la! You have shared your Google Slides presentation.
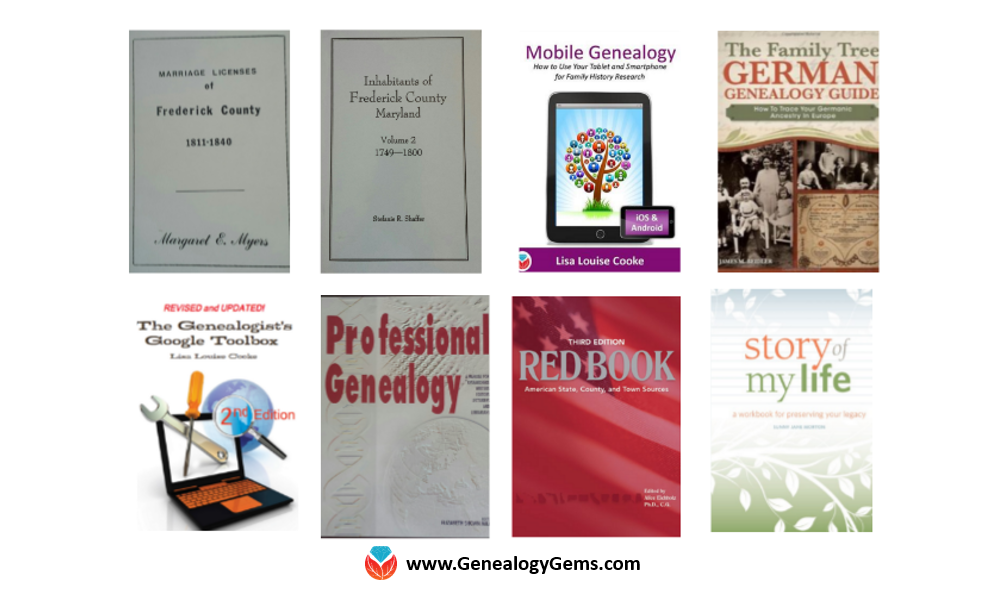
Create a Virtual Book Cover List with Google Slides
Another stellar way to use Google Slides for genealogy is to create a convenient virtual library list. A recent article found online gave me the idea of creating a library list using images of the covers of books.
For example, if you enjoy attending genealogy conferences and buying books for your society, you may get stuck wondering, “Do we already have that in our collection?” By creating a virtual book cover list, you won’t have to wonder anymore!
You will first need to begin this project by taking a picture of the covers of each of your books and saving the images to your computer or laptop. I took pictures, cropped them, and sharpened them up a bit with my smartphone. Then, I saved them to a file folder on my computer named Book Covers. [Tip:It would be an even better idea to save the Book Covers folder to your Google Drive!]
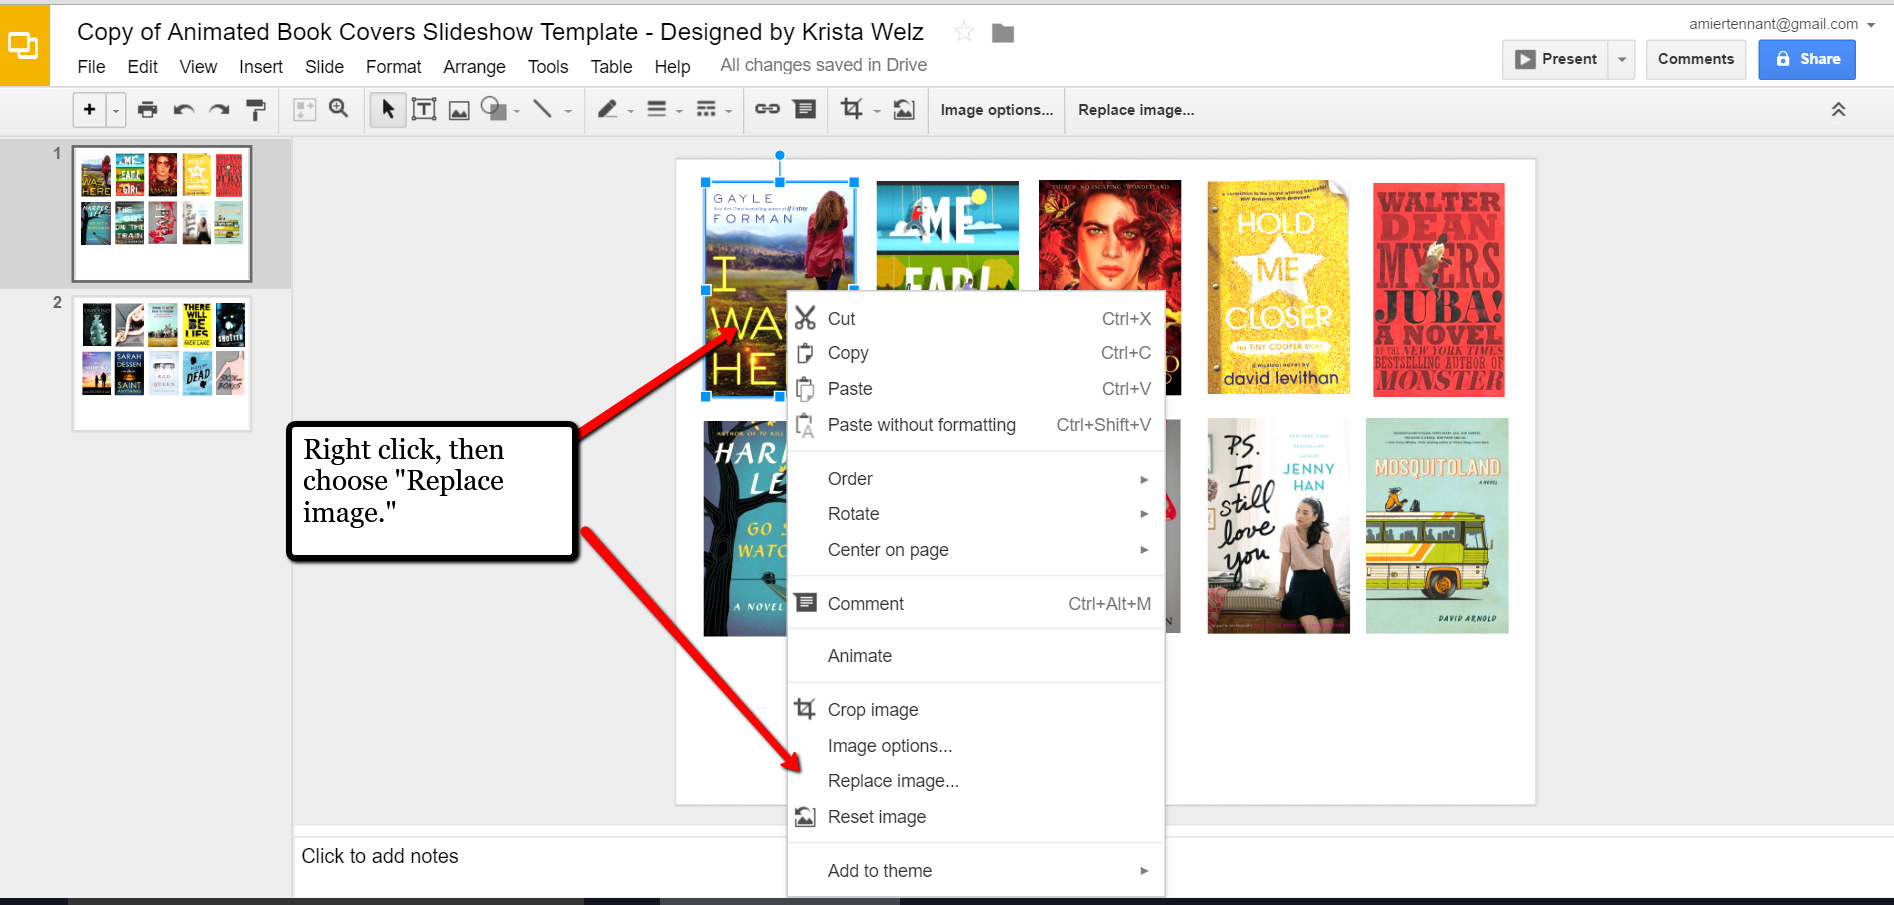
For something quick and easy, use the virtual book cover template here: Virtual Book Cover List Template. If you choose to use this link, when it opens, click Make a copy and Google Slides will open. Right click on any of the book cover images you see, a pop-up window appears. Choose Replace image and then find an image of one of your own book covers.
Once you have replaced each of the book covers with ones of your own, you can rearrange them with the click-and-drag method. You might want to put them in alphabetical order or perhaps categorize them by subject or place.
When you have finished, don’t forget to title it. There is no need to save it because Google Slides automatically saves for you. Google Slides is accessible from any of your devices and can even be viewed on-the-go from your mobile device. You’ll love this feature when you are trying to decide what books to add to your genealogy library.
How Can You Use Google Slides for Genealogy?
We are sure there are dozens of ways to use Google Slides for genealogy. Give Google Slides a try and if you think of another use for this wonderful tool, let us know about it in the comments below! Thanks for reading, friends.


 The Genealogist’s Google Toolbox