Inbox by Gmail app has some great features and if you’re willing to go all-in and are up for a big change, go for it. If not, here are some ideas for improving your regular Gmail experience.
About a year ago, Google announced the new Inbox by Gmail app. I didn’t cover it then because they had bugs to work out. But, I’ve been keeping an eye on it. It’s a bit overwhelming, however, if you are up for the change here’s a quick video summary of what it does.
As a recap, the Inbox by Gmail app can:
Bundle similar messages for you, like offers and promos;
Recognize emails about travel reservations and bundle those together; and lastly,
It allows you to browse photos in emails without opening the message.
You can also do a lot of housekeeping and organizing tasks yourself. For example, you can:
Pin messages that you want to come back to, then click on a thumbtack icon to show all pinned messages;
Snooze an email message by marking it to pop back up to the top of your list at the time and date you indicate;
Create easy reminder messages for things you need to do; and
Keyword-search your emails just like you do in Google. Sometimes, the search function is even smart enough to answer questions for you. Like when I type in “flight Indianapolis” for my upcoming trip to the Midwestern Roots conference in July, I get an email with my flight reservation in my search results. At the top, I will also see a nice summary of my flight information that Google extracted from that email and puts right in front of me.
These are pretty slick features, but they come with a price: Inbox by Gmail is a dramatic change from Gmail which some might find a difficult transition.
Improve Your Regular Gmail Experience without Using the Inbox by Gmail App
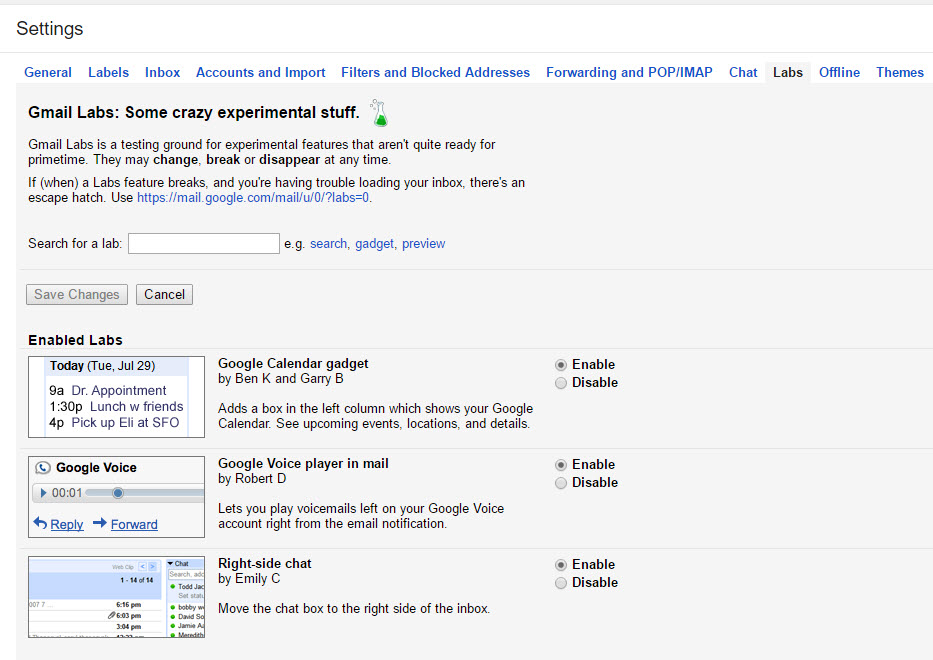
If you’re not quite ready to switch to Inbox by Gmail, there are ways to enhance and improve your experience using regular Gmail. I don’t know about you, but I don’t use the “Chat” feature on Gmail very often. However, that little chat box pops up right below the labels, and that means that when you select a label lower down on the list, it’s easy to accidentally open the chat box. Frustrating indeed!
Make your life just a little bit easier by changing the location of your chat box. Go to Settings, then click on Labs. Click to Enable the Right-side chat feature. Chat moves out of the way over to the right and the problem is solved.
For those of you who don’t use the Chat feature at all, you can completely turn it off. Simply go to Settings, Click the Labs tab, click to select Chat Off, and then click Save Changes. Ah, this gives you a cleaner, less cluttered, Gmail to work with. Nice!
An important thing to remember about changing any of your Gmail settings is that you must click the Save button on the page to apply the changes.
Switch to the new Inbox by Gmail app or just improve your existing email with this little tip, the choice is yours. Thanks for sharing this tip with your friends…it’s nice to share, isn’t it?
New technologies don’t stay new. They keep evolving. Here’s a tip for harnessing new and emerging technologies to advance family history research and stay connected with living relatives.
Last week, I was at the BYU Conference on Family History & Genealogy in Provo, Utah. What a friendly, welcoming group! (Be sure to check out the BYU Family History Library here.) All week, I taught sessions and gave a keynote address on various technologies that help our research. The week’s discussions reminded me how quickly technology moves–and how enthusiastically genealogists continue to embrace new opportunities given them by technology.
It’s part of my job to learn about these new technologies and pass the best ones–the “gems” along to you. But here’s a tip I shared during my keynote address that will help you focus on the technologies you care most about: Think about which tasks you want to accomplish with technology, rather than just learning genealogy-specific technology. Then keep up with developments in the technologies that accomplish those tasks.
For example, by now, many of us have used (or at least heard of) Google Translate. We can use it with foreign-language documents and to correspond with overseas relatives and archives. But Google Translate’s functionality keeps improving. “By the audible gasps of the audience” (during my keynote address) reported the FamilySearch blog, “most were not aware that the Google Translate app enables you to literally hold up your phone to the computer screen or typeset document, and it will translate foreign text on the fly for you—a must have free tool when dabbling in nonnative language content.”
Genealogists are really thinking about these issues. The Ancestry Insider blogged about my keynote talk, too, and my observation that genealogists haven’t been embracing digital video at the same speed at which they embrace other forms of digital media. In the comments section of that post Cathy added, “Now what we need to do is get FamilySearch to figure out a way to let us upload our URL YOUTube videos, not only for our deceased, but for our living….Our children and grandchildren don’t write letters, they email, text, instagram. They don’t write journals, they blog. They make videos of current history….We all need to look to the future and [learn] how to save the new technologies.” Cathy gets it!
A special thanks to conference organizers Stephen Young and John Best, who welcomed me and Genealogy Gems Contributing Editor Sunny Morton all week long. They did a fantastic job of organizing a large event while retaining a warm, personal environment.
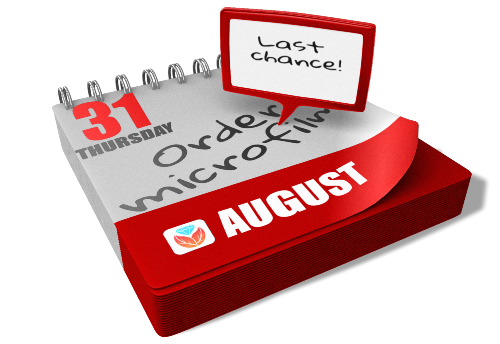
Just announced: The FamilySearch microfilm lending service will end on August 30, 2017. Let’s cover what we know so far, how it may impact you, and strategies for getting the information you need.
WHAT: FamilySearch Microfilm Lending Ends
Most of the Family History Library’s microfilm vault has already been digitized and is online–or will be within a short time. According to the website:
“Over 1.5 million microfilms (ca. 1.5 billion images) have been digitized by FamilySearch, including the most requested collections based on microfilm loan records worldwide.”
However, the world’s largest lender of microfilmed genealogical records will be discontinuing the distribution of microfilms to Family History Centers in the near future.
“On September 1, 2017, FamilySearch will discontinue its microfilm distribution services,” announced the site yesterday. “The change is the result of significant progress in FamilySearch’s microfilm digitization efforts and the obsolescence of microfilm technology. Digital imaging has made it easier to find ancestors through the internet, mobile, and other technologies.”
This means the clock is now counting down your ability to borrow microfilmed genealogical records from the Family History Library. The last day you can place an order for delivery to your local Family History Center is August 31, 2017.
It’s a change I’ve seen coming, but it’s still a little disconcerting now that it’s here. But change is the norm in today’s busy world, so let’s break down the details we know so far together.
WHY: Why are they discontinuing microfilm lending before they’re done digitizing?
It’s just too expensive. “The cost of duplicating microfilm for circulation has risen dramatically, while demand has decreased significantly,” says a FamilySearch Q&A. “At the same time, it has become increasingly difficult and costly to maintain the equipment, systems, and processes required for film duplication, distribution, and access.” FamilySearch wants to redirect its microfilm lending resources to providing more and better electronic record access.
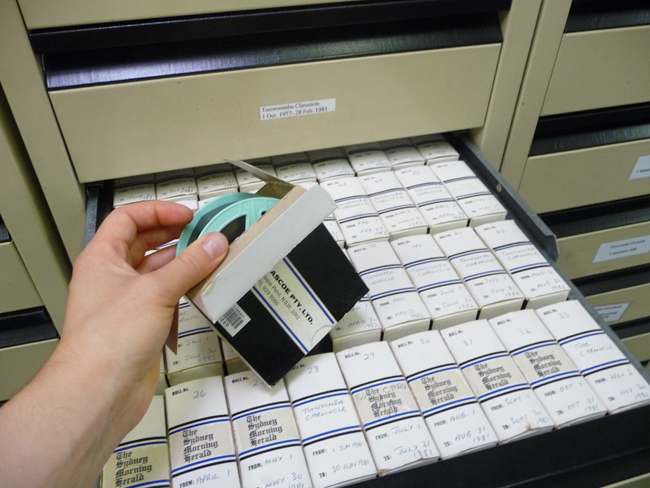
I have personally visited the microfilm distribution facility, and the best analogy I can give you is that it looks a bit like the inside of an Amazon warehouse. It’s a mammoth and expensive undertaking, certainly not something you open or close lightly. I’m thankful that in the decades before the Internet, FamilySearch devoted so many resources to helping all of us gain access to hard-to-find records from around the world.
Photo Credit: Lisa Louise Cooke
WHEN: What will be available online and when
According to FamilySearch, they hope to finish digitizing the records that they have permission to digitize, in 2020. Unfortunately, some films we will not be digitized because of contractual limitations, data privacy, or other restrictions. Look to the Catalog for access details for the records you want.
By Lhsunshine (Own work) [CC BY-SA 3.0 (http://creativecommons.org/licenses/by-sa/3.0)], via Wikimedia Commons
HOW: How to order FamilySearch microfilms between now and August 31, 2017
I encourage you to use the microfilm lending service while it is still available. While most microfilmed records will be eventually digitized, the fate of a small percentage may remain unknown for some time. Follow these steps to view them now:
1. Go to FamilySearch.org and log in, or create a free login. (You’ll need the login to order records.)
2. Under the Search menu, select Catalog.
3. Search by location, listing first the largest jurisdiction (such as the country) and proceeding to the smallest, such as “United States, Illinois, Cook, Chicago.”
4. Review search results by clicking on the record categories and then each entry. Within the entries, watch for interesting items that only list microfilm or microfiche formats.
5. Within record entries, order items you want by clicking the microfilm reel icon on the far right, under Format. Select the lending period and the correct currency. It currently costs $7.50 USD to borrow a microfilm reel for 90 days.
During the order process, you’ll select a family history center near you to receive the item(s). When your order arrives, you’ll be notified. Check the center’s schedule before visiting; most have limited hours. Centers are free to use. When you get there, identify yourself and request your film. Then put it in the microfilm reader and scroll through it until you find the item number and pages you need. (Here’s a helpful article: How to Use a Microfilm Reader.)
What about accessing microfilmed records after August 31, 2017?
You’ll still have several options. Sunny Morton, author of the quick reference guide Genealogy Giants: Comparing the 4 Major Websites, says the FamilySearch catalog will still be a go-to resource:
“At this point, the Family History Library in Salt Lake City, Utah still plans to keep on hand microfilmed copies of records that are not yet online. So your options include going to view them in person (since to the best of our knowledge the library won’t be lending them), arrange for someone else to view them (such as through the Random Acts of Genealogical Kindness Facebook group), or use the FamilySearch Catalog to identify the records and then attempt to locate them through other repositories and websites.
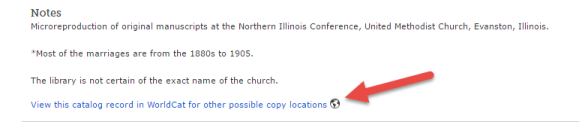
To find records you may borrow from other sources, click where it says ‘View this catalog record in WorldCat for other possible copy locations’ [see screenshot below]. This will take you directly to this item’s listings in WorldCat, which is the enormous, free multi-library online catalog. Look either for a copy at a library near you, or a copy at a facility that participates in inter-library loan. (This is the same process you already have to use to find copies of books you can borrow, since the Family History Library doesn’t lend these, either.)”
What about accessing the digitized records?
After August 31, 2017 many genealogists will be turning to the online FamilySearch catalog and Family History Center Portal. (Learn more about the Portal at the FamilySearch Wiki.) As you attempt to view records through the portal, you may be prompted to go to a Family History Center to view the record, and the site will link you to a map of all locations. It’s important to understand the difference between an official Family History Center and an Affiliate Center. We’ve learned that Affiliate Centers do not have access to what is called the Family History Portal. That portal is only accessible from an officially designated Family History Center.
So how do you know which location on the map is official, and which is an affiliate? I turned to genealogy blogger and friend of Genealogy Gems Amie Tennant for clarification:
The (online) FamilySearch map of Family History Centers is not accurate. With the new changes to microfilm loans, this is going to be a big problem. In other words…if a person assumes all FHCenters are the same and travels to the nearest one, they will be sorely disappointed to realize that this one will NOT have access to all the digitized microfilm. (Researchers) should call ahead to confirm whether the center they see on this map is an affiliate or a full FHC with access to the portal.
I’ve reached out to FamilySearch for additional official information on this and several other important questions that have arisen with the discontinuation of microfilm lending. I’ll report to you here on the Genealogy Gems blog and the podcast as more information becomes available. Check out Amie’s article for more information on the various levels of access.
What do you think?
The end of the FamilySearch microfilm lending service is a major milestone. It signals exciting future online access, but provides obstacles for the next few years. What suggestions do you have for researchers to gain additional access to essential microfilm? Please share with the Genealogy Gems community in the Comments below.
Original manuscript records may reveal genealogical gems about your ancestors. Find these old records in archives around the country using this little-known, free online tool: ArchiveGrid.
Manuscript records such as old diaries, letters, vital record collections, military documents, church registers, store ledgers, school and even business records can be genealogical gems. But finding original manuscript collections in archives and libraries can be difficult. Which archive has it? What’s the collection called? How can you access it?
ArchiveGrid can help
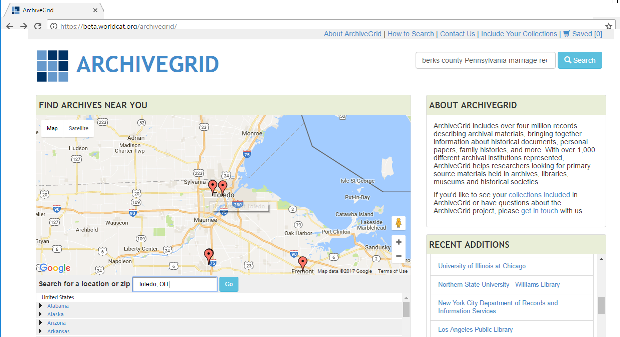
A little-known free website can help you locate old documents and manuscript items available in over 1,500 different archival collections. It’s called ArchiveGrid, and it currently includes close to 5 million archival item entries!
ArchiveGrid is a companion website to WorldCat, the free online catalog of millions of library items from thousands of libraries. The difference is that ArchiveGrid focuses not on published items but (generally-speaking) on unpublished ones.
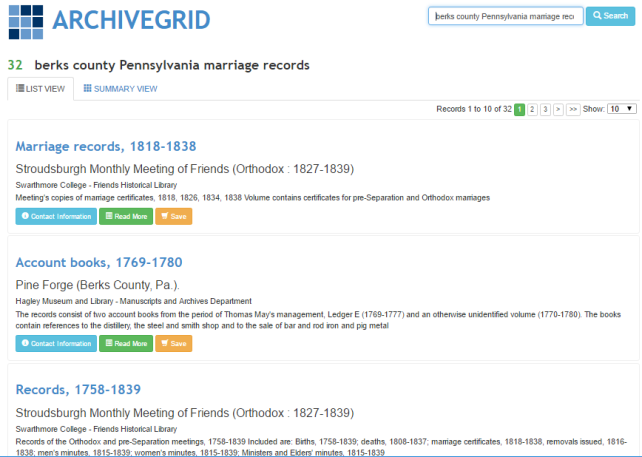
Use the map view, shown above on the left side, to identify archival collections that are near your ancestors’ home. These archives may hold materials related to your ancestors’ communities. Hover over the red markers to see the names of institutions. Click on them to find contact information and search their collections.
Search for specific manuscript items in ArchiveGrid
1. In the search box in the upper right part of the ArchiveGrid home page, enter search terms related to the manuscript items you hope to find, such as berks county pennsylvania marriage records. Then click Search. You’ll see a list of search results, such as these:
2. Browse search results. If you need to narrow or broaden your results, you can scroll to the bottom of the search results page and click the options you want.
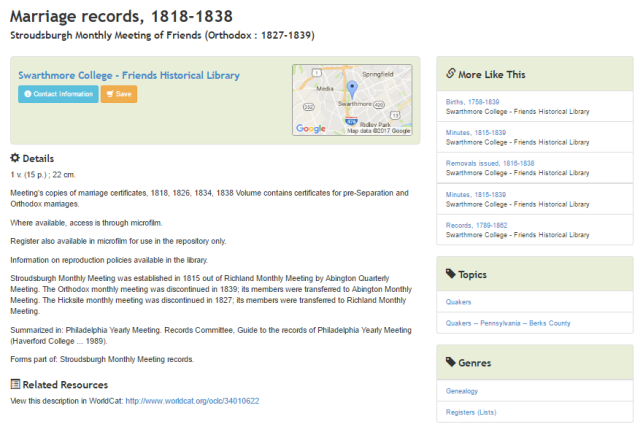
3. Click on items of interest to read more about them. Here’s what a typical ArchiveGrid catalog entry looks like:
The entry tells you more about the individual item. You may see when it was created, a physical description of it, who or what organization created it, and even brief historical background. You’ll see what repository holds it–and you can click under the name of that repository for its contact information. You may be able to order copies, visit to view the item in person, or hire a local researcher to do that for you.
As you can see, a sidebar to the right of this catalog entry says More Like This, with categories like people, places, groups, or topics. These links point to additional catalog items that are related in some way to the one you’re looking at—it’s something like browsing the stacks by topic at a library. (You can also sort all your search results this way from the main list of search results by clicking on Summary View.)
Now that the Family History Library is discontinuing its microfilm lending program, you may find yourself increasingly searching for original manuscript items that aren’t available online. And now that you know how to use ArchiveGrid, you may find yourself wanting to seek out these genealogical gems even more!
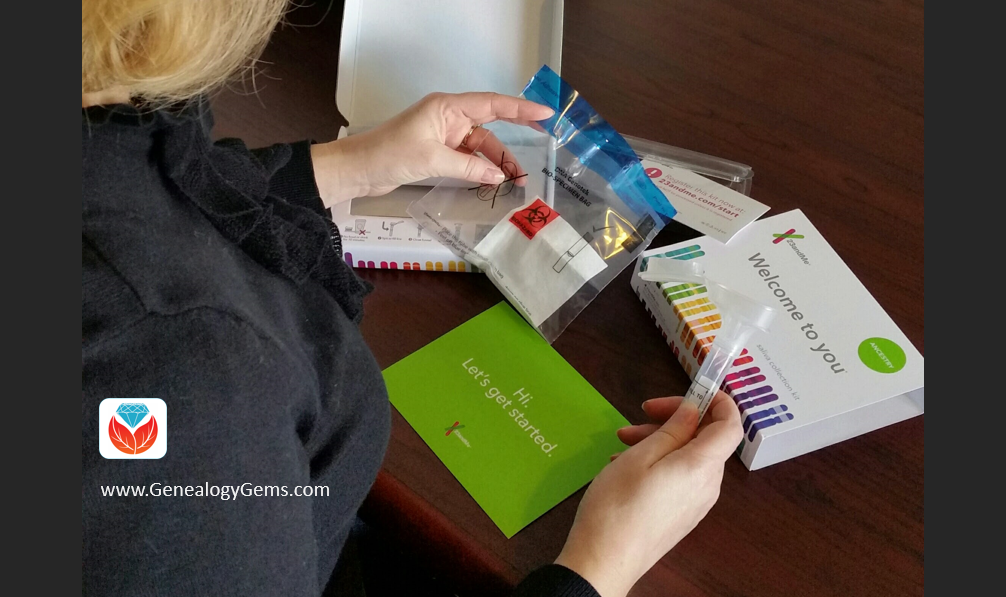
Here’s what you need to know before you encourage your relatives to join you on your genetic genealogy journey. There are a few things to think about before they spit in that tube and our DNA Guide, Diahan Southard, is here to help!
Did you see those holiday price wars on DNA testing over the holidays? I’m guessing we haven’t seen the end of these now that it’s becoming so trendy! Genealogists are seeing the research payoffs of DNA testing and now another major genealogy website (MyHeritage) is offering testing services, as well.
As the prices and sales generally become more attractive, more of you will want to expand your personal genetic database to include aunts, uncles, and cousins. But what is the best way to proceed? How exactly do you ask someone for his or her DNA? You may just have one shot at this. If so, which test? Which company? Here are three tips to consider before spitting into the tube!
Tip One: Test the Eldest Generation First
You likely have a limited amount of funds with which to populate your family genetic database, so you’ll want to use them wisely. Anyone who does not have both parents living should be tested first. Here’s what I suggest:
ordering an autosomal DNA test for everyone
ordering a YDNA for one male delegate for each surname you want represented
As for the testing company, you now have four choices:
1. FTDNA
2. 23andMe
3. AncestryDNA
4. MyHeritage
While there are several factors to consider when choosing a company, database size is probably the number one factor. Currently, AncestryDNA has the largest DNA database. The reason this is important is because your DNA will be matched and compared to others who have taken a DNA test. By testing with a company that has done lots of tests, your chance of finding matches goes up tremendously. You can also go to the International Society of Genetic Genealogy’s wiki for a full list of characteristics of each company.
Tip Two: Take Care of Everything for the Person Being Tested
Depending on the needs and interest of your relative, you can handle everything from ordering, payment, to even correspondence. All they have to do is spit or swab! This will often alleviate feelings of trepidation on part of the person being tested, especially if they aren’t really into this genealogy craze in the first place. Here are my recommendations:
If testing at Family Tree DNA: You will need to keep track of the log-in credentials for each relative.
If testing at AncestryDNA: Make sure all kits are registered under your account. The easiest way to do this is to have the family member take a photo of the activation code on the sample collection tube and send it to you so you can register it after you have logged into your Ancestry account. Hint: Register everyone’s DNA test results under the family member who has a subscription to Ancestry!
If testing at MyHeritage: Make sure that all kits are registered under your account. To the best of my knowledge, you order the kit under your account.
If your relative does want to be involved, all the better! You can have them share their Family Tree DNA or 23andMe login with you, or they can share their AncestryDNA results with you. To share their AncestryDNA results with you, visit my website at https://www.yourdnaguide.com/sharing-ancestrydna.
If you haven’t tested with a particular company yourself, familiarize yourself with the sample collection so you can be helpful when they have questions:
First of all, nothing speaks louder than your own experience. Before asking your relative to take a test, consider starting with a short summary of your own DNA journey. Keep in mind what might interest them – do they like deep history? If yes, you could share the ethnicity results of your own test. Did they have a special connection to Great-grandpa Joe? In this case, you could show how your DNA connected to a 2nd cousin who was also a descendant of Joe. Maybe you could bust out the photo album. Remind them that while Joe is gone, there are threads of DNA that can speak for him and we need as many of his descendants as possible to be tested in order to preserve his genetic legacy and unravel the mystery of his past.
Disclosure: This article contains affiliate links and Genealogy Gems will be compensated if you make a purchase after clicking on these links (at no additional cost to you). Thank you for supporting Genealogy Gems!


 “On September 1, 2017, FamilySearch will discontinue its microfilm distribution services,”
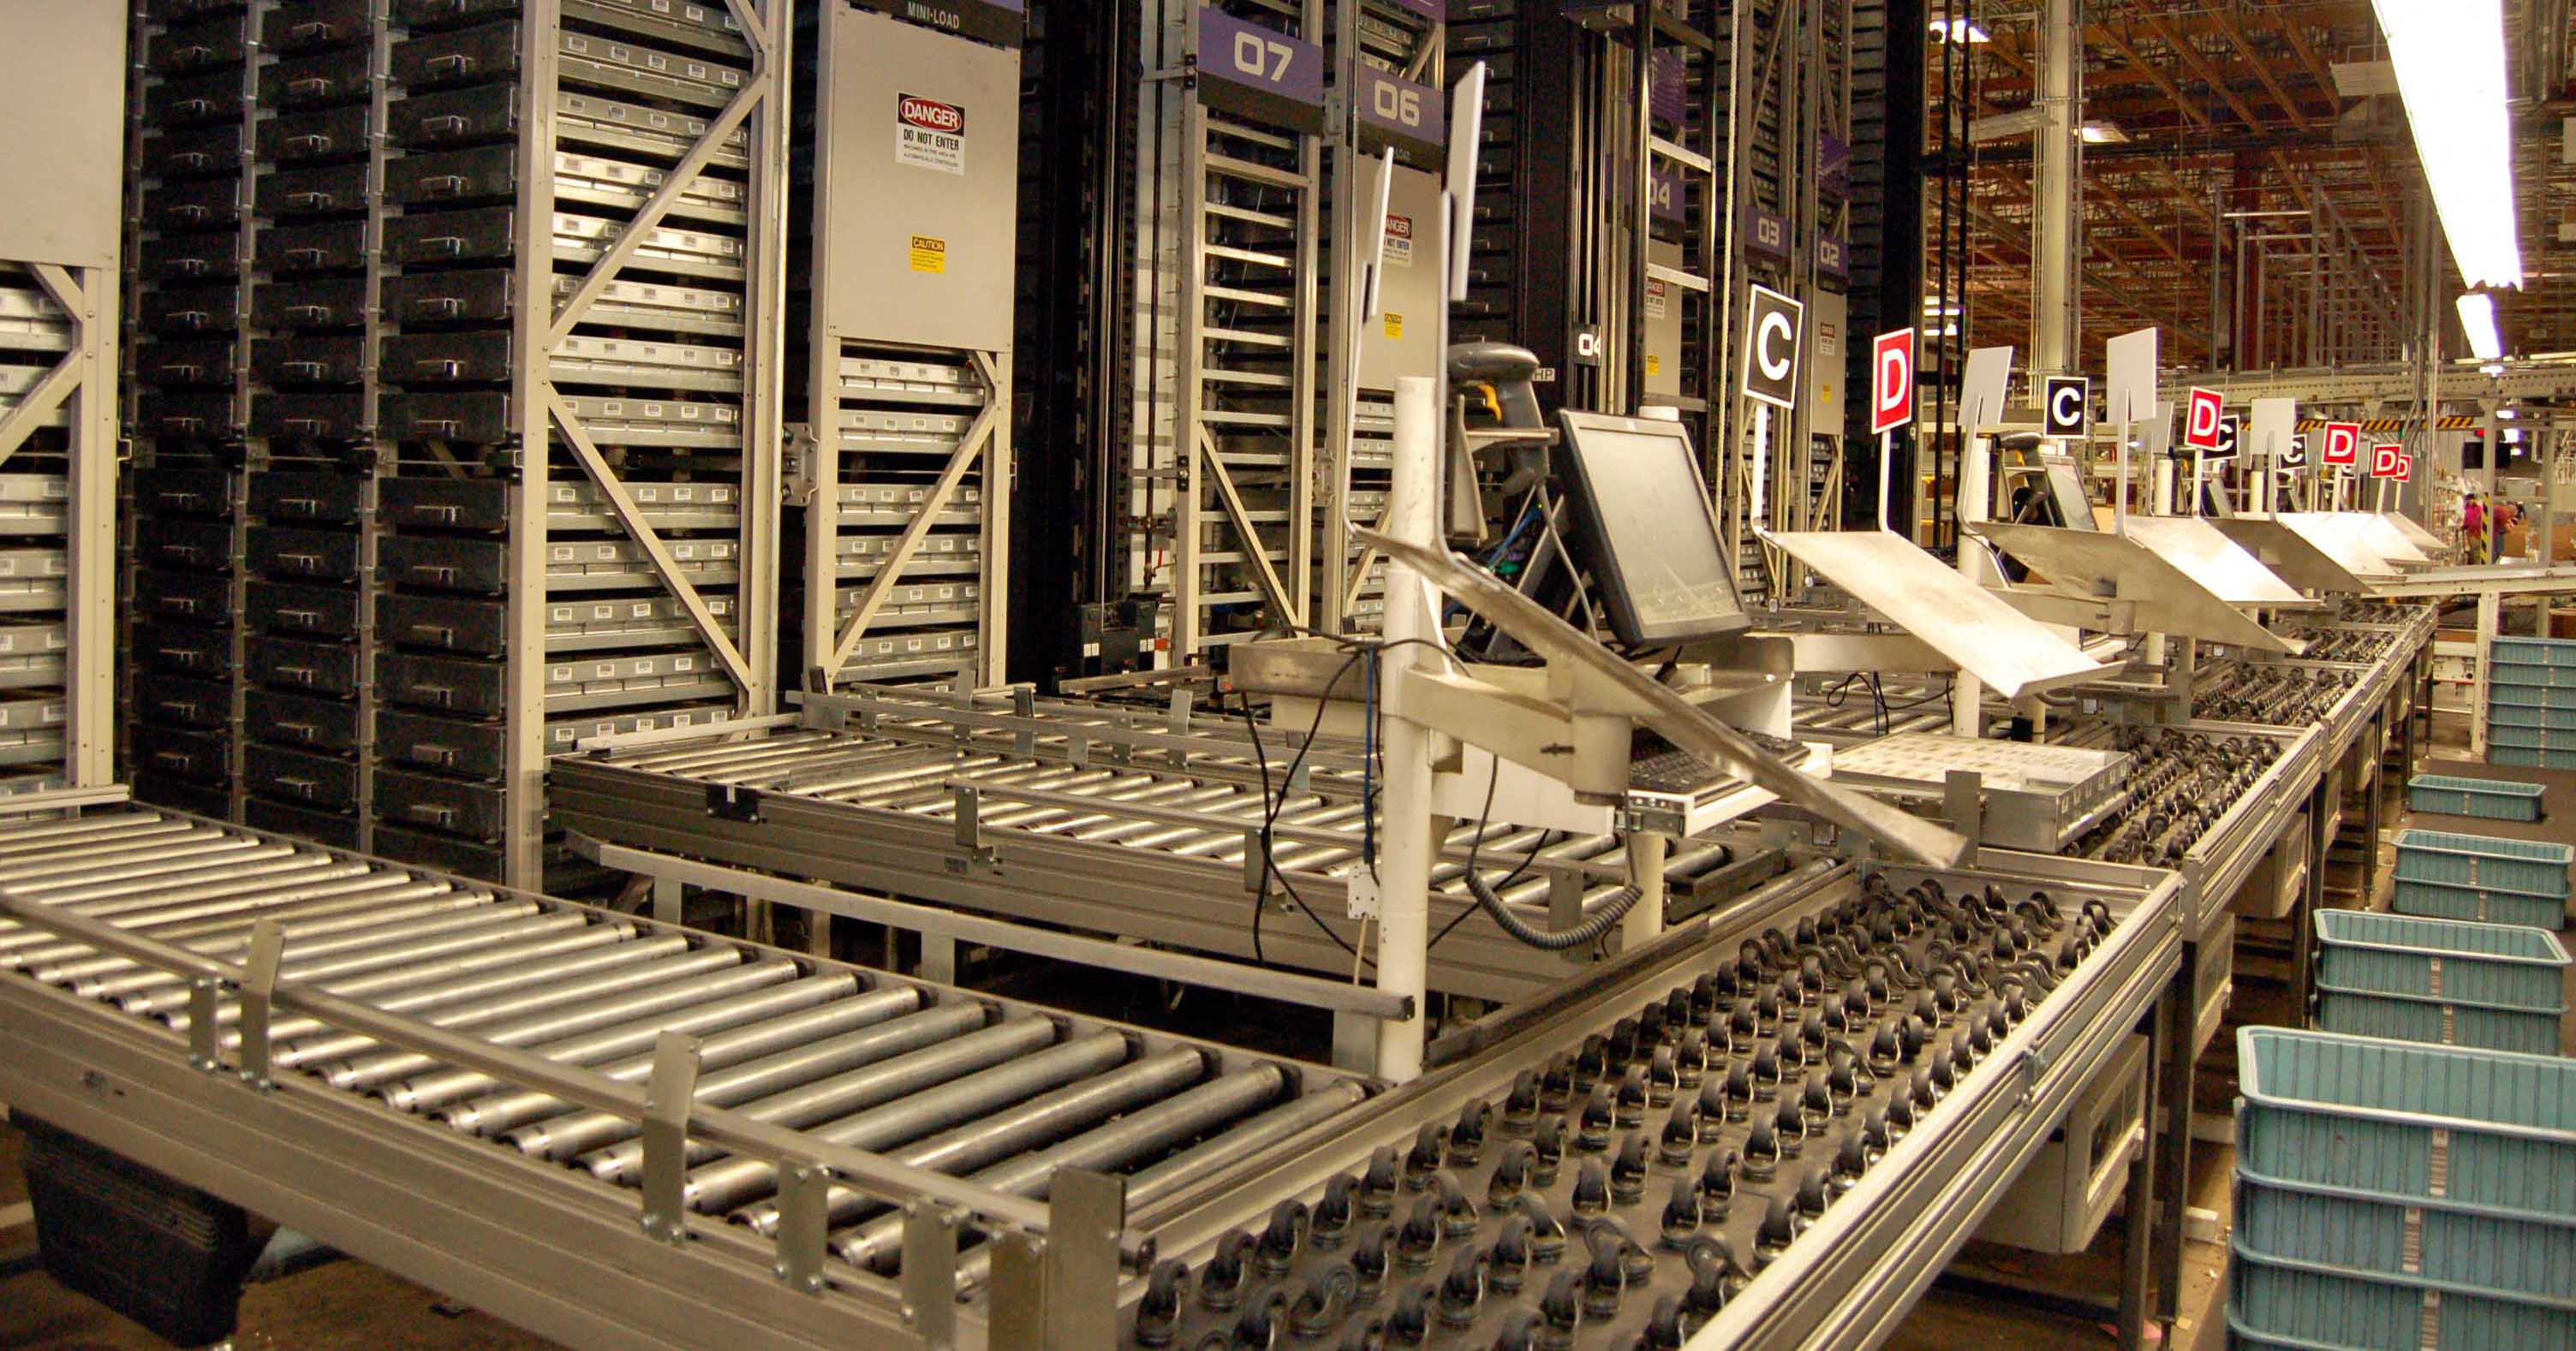
 The entry tells you more about the individual item. You may see when it was created, a physical description of it, who or what organization created it, and even brief historical background. You’ll see what repository holds it–and you can click under the name of that repository for its contact information. You may be able to order copies, visit to view the item in person, or hire a local researcher to do that for you.
 Learn More About Original Records