(This post contains affiliate links that help support our website.)
Family historians often end up with family heirlooms and documents that need archival storage.
In addition to the items you already have, you may find yourself receiving things from other relatives like family bibles, scrapbooks, and military uniforms.
The task of correctly archiving the family history can definitely get a bit overwhelming. However, with the right tools and supplies you can make a real difference in preserving your family’s treasures for future generations.
Denise May Levenick is the author of The Family Curator blog and writer for Family Tree Magazine and she joins me in episode 81 to share her top ten archival storage solutions for family historians.
Short on time? This week’s video is just 20 minutes and packed with the archival solutions you need. The video premieres on Thursday and features a live chat.
Watch the live premiere of this week’s video and participate in live chat with our Genealogy Gems YouTube channel subscriber family. (Subscribing to our channel is free. Click the red Subscribe button on the video page on our channel.)
1. Video Player (Live) – Watch the video premiere at the appointed time in the video player above. 2. On YouTube (Live) – Click the Watch on YouTube button to watch live at the appointed time at the Genealogy Gems YouTube channel. Log into YouTube with your free Google account to participate in the live chat. 3. Video Player above (Replay) – Available immediately after the live premiere and chat.
(Please note: This interview transcription has been minimally altered for ease of reading and clarity.)
Lisa: I’d love to talk about the archival supplies we need. Because obviously, to complete a task and do a good job of it, we got to have the right tools. That’s certainly true when it comes to archiving. You’ve got 10 of your top tools that I know that you’ve used as an archivist. What is number one?
1. Archival File Folders
Denise: The first thing has to be archival file folders. They are not terribly expensive. And really, what you want to do is put your item, whatever it is, in the highest quality folder or box or something to protect it right away. But since most of us have pictures and paper, a file folder really is a good place to start.
Lisa: That sounds great because often other family members are giving us things, and we may not have time to deal with it right then and there. It sounds like this would be a very safe place to put it.
Denise: It is. You can purchase them in a box of 50 or 100. If you have a lot of items or just 10 or a dozen folders, it really can scale to suit whatever the size of your archives might be.
We really do need to take that extra step and seek out acid-free, lignin-free archival file folders. The kind you buy at the office supply store are just not the quality you need to preserve your papers and your photos. You can actually cause more damage if you put things in those.
Lisa: Because there’s probably acids in those, right?
Denise: Right, because the regular office supply ones, particularly the kind that are just for regular office use, they have so much acid in them that they can cause your item to deteriorate even more.
Lisa: Okay, so number two I see here is flip-top document case. This sounds like a specialty item. What are we talking about?
2. Flip-Top Document Case
These boxes are so confusing when you’re shopping. The names of these document cases and boxes can be confusing. The one I use looks like a mini file folder box. That’s exactly what it is. Examples of the kinds of things you can store in them include old rolled up documents, military photos, and banquet photos. I have a process to flatten these, but meanwhile I needed to store them.
You can reuse this kind of a box for anything. It doesn’t have to just be file folders. But because it’s designed for file folders, it’s really perfect. It’s even got a little tag to pull it out on the shelf if you need to pull it out. There’s a place to add a label.
It’s about five inches wide. I like this size because when you get those file folders in there, it gets heavy and a lot of people store these up on shelves. They can be heavy to move down. I bought some real wide ones that are seven or eight inches. And man, those things are heavy! So, I recommend smaller ones.
Lisa: I have some items that are definitely odd sizes, or like you said they were originally rolled up and I haven’t flattened them out and decided what to do with them yet. So, this sounds great.
The third item on your list is oversized document or photo box. So, it sounds similar. We often have larger items we’re struggling with, and we don’t want to fold it up.
3. Oversized Document or Photo Box
Denise: No, in fact, you want to unfold the item, and let those folds relax.
The archival suppliers make a box that is large, larger than a shirt box. So it might hold a fully open newspaper. Or they work well for portraits or drawings or maps. They’re typically quite shallow. They won’t be necessarily a clamshell kind of opening like the boxes we just mentioned. It might be a lift off top. But you can use it for anything. And the reason it is shallow is you don’t want to put a lot of weight on the things that are on the bottom.
If you can afford it, buy large file folders that will protect your item, and then you put it in the box.
You should keep things like newspapers separate. You do not want to store newspapers with anything else other than newspapers because they’re so toxic. The newsprint is just full of acid. You want that isolated from everything else.
4. Newspaper Preservation Kit
Lisa: So that must be why number four is the newspaper preservation kit. I didn’t realize that there was one.
Denise: Yes, newsprint is a big offender.
When I visited the New England historic genealogical library in Boston, and I got a tour of their upstairs archives. It was so exciting. I felt like I was you know, in the inner sanctum. I was shown rows and rows of archival boxes. And then just stacks of items people have donated like Bibles and books and family papers. They all had to be processed and organized. The archivists there told me they will not accept donations of newspapers. Because they are so toxic, anything they touch will turn brown. And it just degrades everything around it. So ,you want to be sure to isolate your newspapers if you’re going to keep them.
What they do at the library is photocopy the newspaper onto acid free paper. Or they scan it and then print a copy on acid free paper and get rid of the newsprint.
Lisa: That sounds like a really clever way to deal with that problem. So even if grandma gives you her newspapers, and she’s also got other stuff with it, you don’t want to keep it that way. You need to separate it out.
Denise: If you really want to keep like an obituary because it’s an original paper or something, that would be a good case for encapsulating in between two sheets of archival plastic. You can encapsulate it and then you can put it right back in that Bible because it’s isolated.
Lisa: Alright, so next we have acid free tissue paper. What would you be using this for?
5. Acid Free Tissue Paper
Denise: I love this stuff! I keep a stack of it here at home.
One time my dad gave me a stereograph, you know the thing you hold up and there’s double pictures. He gave me one of those. It was my grandfather’s. It was in of all things an envelopes box. A crummy, terrible box. And it was wrapped in red tissue paper! Have you ever like gotten a drop of water on red tissue paper? It bleeds terribly!
In the box along with the stereo cards were photo cards. And, being my dad, (he’s very strict) it’s “my way or the highway.” So, I couldn’t really tell him anything.
I took the box and he said he wanted it right back. I had some acid free tissue paper, so I just took the red tissue paper out, and cushioned everything in that dumb non-archival box with the acid free tissue paper. I took some pictures of it and looked at the cards, and then I gave it back to him. It was in a lot better shape! So, if you have acid free tissue paper, you are golden when stuff like that happens.
You can also use it to stuff the sleeves of a military uniform or wedding dress. You can wrap a pair of baby shoes in it. You can use it between layers of photographs. It’s just really helpful to have on hand.
Lisa: It sounds like we definitely need a stack of it on hand at all times.
6. Acid Free Flip top Photo and Print Box
Lisa: So now we are onto number 6 and another box designed for an unique purpose.
Denise: These boxes are designed in different sizes and colors. It doesn’t matter what color they are. They’re made out of a heavier board. And actually, this little box will protect your contents against even mild changes in temperature and humidity. It’s a really good protection.
I use one that is five inches by seven inches. It’s designed to hold five by seven photos on edge. Putting them on their edge ensures that there isn’t pressure placed on them by the weight of things on top. These come in all sizes. You can get big ones that are more like a shoe box.
If you have a lot of photos, you can get dividers to use in the box. But this would also be fine. You could even use some acid free tissue and put a pair of baby shoes in there.
Lisa: Oh, yeah, absolutely.
Denise: The thing I like about these boxes is you can write on them, or you can add a label.
I cleaned out my parents homes after they died, if I came across a box like this, this says to me, “oh, there’s something special in there.”
Lisa: Yes. I totally agree with that! As I’m putting stuff together in my office, I’m thinking when I’m gone, I want something that signals to people “Keep this! Don’t toss this! This is important!” You’re kind of dressing it up and letting them give them a signal that this has been already taken care of so it needs to continue to be taken care of.
7. Archival Quality Albums
Well, number seven is archival albums. This one resonates with everybody. I mean, is there anybody who doesn’t have magnetic photo albums from 1970s, where we just struggled with things sticking and you can’t take it apart? I imagine an archival quality album would really help us with photos, negatives, letters and anything flat.
Denise: Right! The albums are designated archival quality. You want to look for a binder that is archival, as well as the inside pages. If you want to scrapbook, then you just want the paper and you would probably use photo corners. You could then write with an archival pen.
Something to be careful about is when you put a binder together. You might want to put it on a bookshelf, which is fine, but the dust can still get in from the top. Light and dust are the real enemy of things that you’re trying to preserve. So, buy a slipcover or keep them in your closet. That’s really the best place for these things because they’re protected from the light and the temperature that way.
Lisa: Good point. So, you’re saying that if you want them in your living room where people can pull them off the shelf and look at them, you will want to lay something over the top of the albums so that dust isn’t settling inside.
Denise: Yes. You know how the top of your books can get dusty!
Lisa: Exactly. I hadn’t thought about that with my photo albums. That’s a really good point.
Sometimes we have still have negatives. I know my husband inherited a lot of negatives from his side of the family. And, you know, we may or may not be ready to make prints out of all of them as soon as we get them, but we want to keep them What do you recommend for that?
8. Negative Preserver
You can use a box that is designed for negatives. It’s shorter.
Typically the 35mm negatives came in a little plastic sleeve, and that is good to use. A lot of times you can get archival supplies at a camera store. They use good quality, and I think they have something called a print file available.
Another option for negatives is binder sleeves. They’re a full page and they have little slots to put the negatives in, and then you put them in a binder that has sort of a clamshell closing. I have several of those and they work pretty well. They protect the edges of the negatives.
Lisa: Excellent!
9. Archival Slide and Media Boxes
Number 9 takes us into even more kinds of media with Archival Slide and Media Boxes. I know when I got all my VHS tapes digitized, I couldn’t bring myself to throw them away. So you’re saying that if we want to keep different forms and media, there are special boxes for that too?
Denise: Right. There are boxes that are acid free, like the ones I showed you that are sized for media and slides. You can get metal slide boxes that are pretty nice. I would avoid wooden ones. I have a few of those we inherited. But even metal ones I found at the thrift shops. People got rid of their old slide boxes.
The Kodak slide boxes that they came in aren’t bad. Slide carousels just take up a lot of space. Remember those carousels? But you can get them and they make boxes for all kinds of things. You don’t have to only use a box that is labeled a slide storage box. You can put it in something that fits.
Lisa: Good to know.
Denise: They also make them uniquely for the different types of films.
Lisa: Yes, I think I’ve got some home movie on every type of media ever created over the decades which is a good problem to have, but it’s a challenge.
Number 10 reminds me of when you and I first met gosh, probably a dozen years ago at least. And I remember talking to you about quilts. One of your specialties is really your knowledge of dealing with textiles. So often we’re thinking photos and paper but if we’re fortunate we might have a uniform, tablecloth, quilt or other textile. Tell us what this kit can do for us.
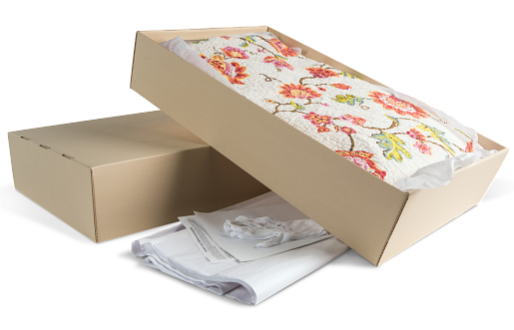
Denise: I love these! The archival boxes that I showed earlier are wonderful, but they’re heavy. Just the box itself. Imagine you have a full size bed quilt. You need a big box which is expensive and heavy.
The E flute is a kind of plastic. You’ve probably seen it used as packing material. It’s got little ridges. And it’s kind of translucent plastic stuff. That’s the best description I can think of, but it’s very lightweight. You can order one of these boxes, it comes folded or flat and you kind of assemble it. There are other types too.
Archival quilt storage solution box
I bought one for my quilts. The only trick is because the E Flute is translucent, it won’t keep the light out. I have a beautiful old velvet album quilt, and I have folded that inside a sheet and put that whole thing in the E flute box, and then stored it in a dark. I have a little archive space where I keep that kind of thing.
They make them different sizes and in kits. I really do recommend them.
Lisa: Well, that’s the next thing on my list. I have my husband’s father’s military uniform. Part of what was holding me back in storing it was getting the right kind of box. I was thinking it was going to be one of these really heavy big boxes. So, this sounds like a really nice alternative.
Denise, you’ve given us 10 fantastic archival heirloom solutions. It’s wonderful to hear that they’re available in such a wide variety. Thank you so much, my friend. It’s wonderful to see you and I really appreciate your sharing your knowledge with us.
Denise: Thank you. It’s been nice to talk with you again, Lisa. And hope to see you again sometime soon.
Native American genealogy research follows the same path that all good genealogy research does, but it also includes some unique records along the way. It’s a fascinating journey, and in Elevenses with Lisa episode 76 professional genealogist Judy Nimer Muhn (Lineage Journeys) joins Lisa Louise Cooke to pave the way. Judy will discuss:
Tribal and personal naming conventions
Tribal-specific resources
How geography impacts research
Native American genealogical records
and more…
Episode 76 Show Notes
Native American genealogy research follows the same path that all good genealogy research does, but it also includes some unique records along the way. It’s a fascinating journey, and in Elevenses with Lisa episode 76 professional genealogist Judy Nimer Muhn (Lineage Journeys) joins Lisa Louise Cooke to pave the way. Judy will discuss:
From the Article: “Native people were largely excluded from the federal census until at least 1860.”
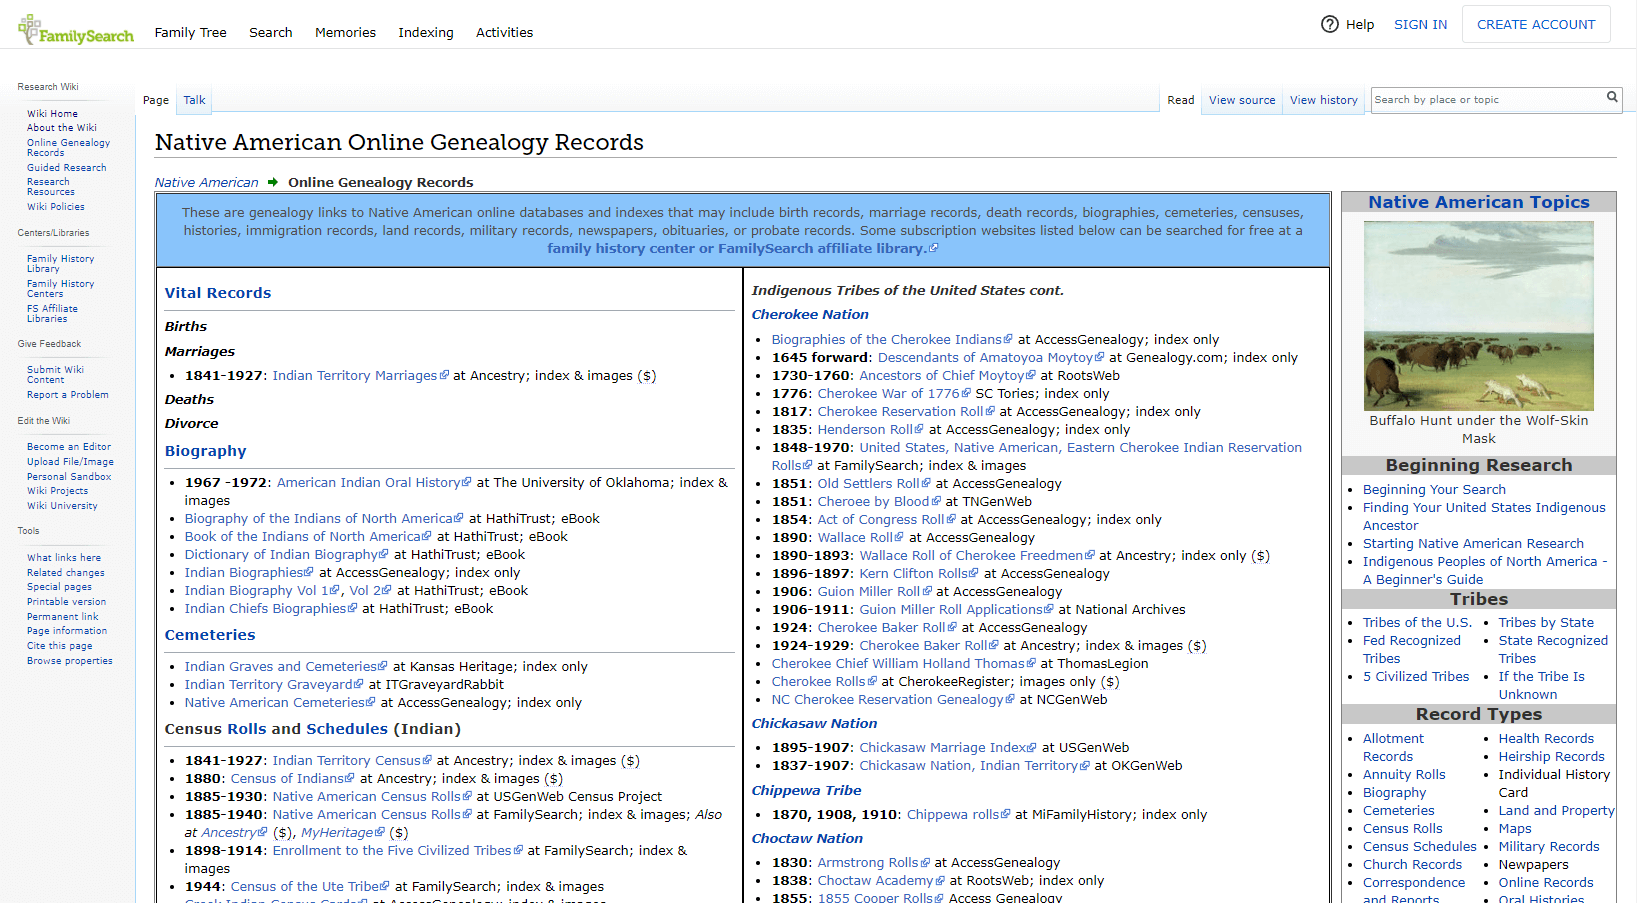
Native American Research at FamilySearch Wiki
National Archives
Article by James P. Collins called Native Americans in the Census, 1860-1890 which will help you understand what you may be able to find during that time period.
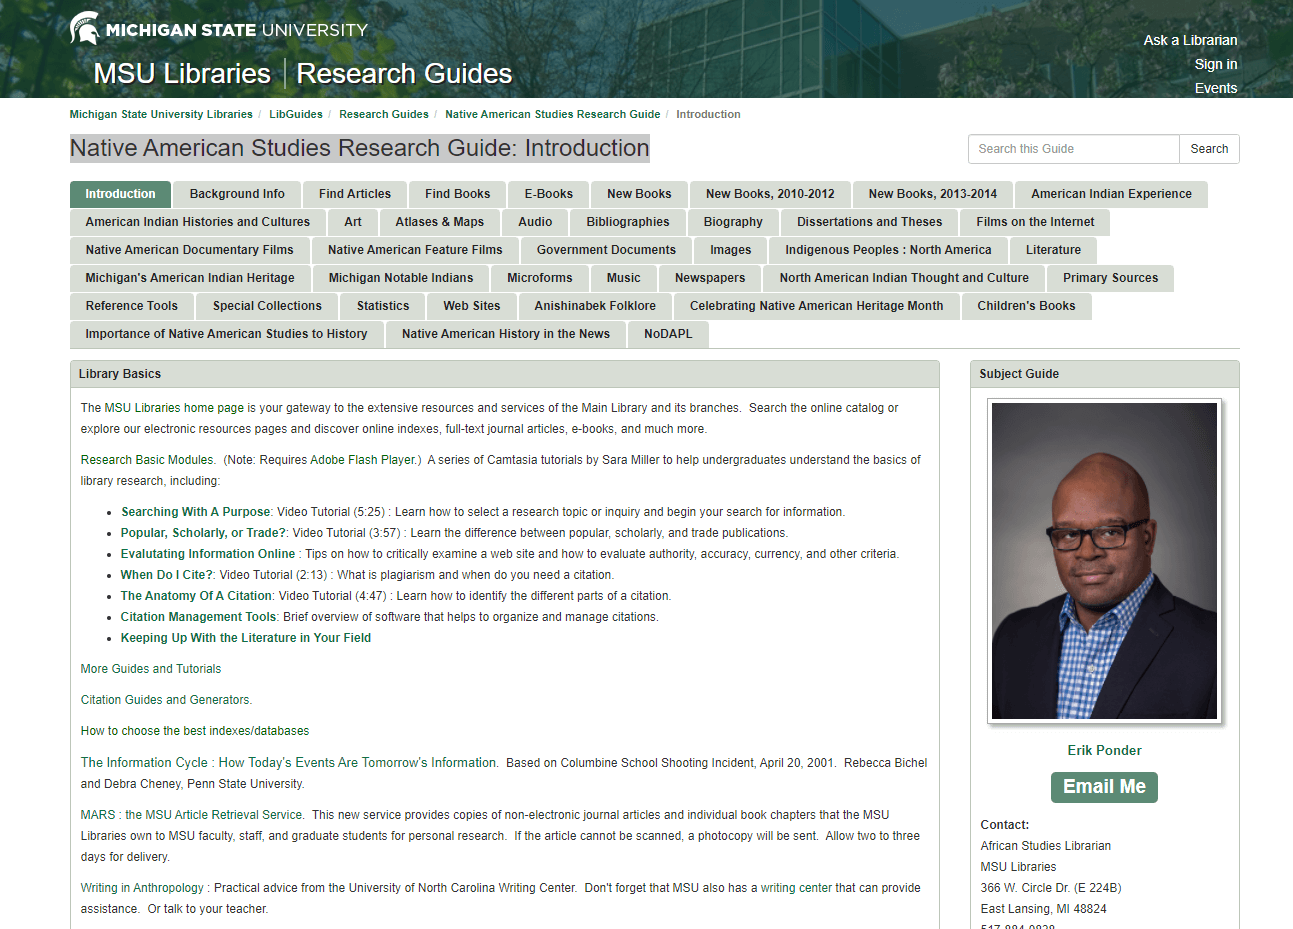
Here you’ll find many resources including newspapers, photos and reports to congress and oral histories.
Judy found materials deep within the Library of Congress website using Googling strategies from my book The Genealogist’s Google Toolbox available exclusively at the Genealogy Gems Store.
Three ways to watch: 1. Video Player (Live) – Watch live at the appointed time in the video player on the show notes page. 2. On YouTube (Live) – Click the Watch on YouTube button to watch live at the appointed time at the Genealogy Gems YouTube channel. Log into YouTube with your free Google account to participate in the live chat. 3. Video Player above (Replay) – Available immediately after the live premiere and chat.
In Elevenses with Lisa episode 74 Lisa Louise Cooke answers the question “I inherited the family genealogy – NOW WHAT?!”
You’ll learn:
how to get started dealing with genealogy research that’s been given to you
organizational strategies
incorporating the inherited genealogy into your research
what to do with inherited genealogy materials you don’t want to (or can’t) keep
Original air date: Oct. 14, 2021.
Episode 74 Show Notes
(Get your ad-free cheat sheet download in the Resourcessection at the bottom of this page.)
I Got Handed the Family Genealogy, Now What?
Inheriting genealogy is a big responsibility and can be a bit overwhelming. Even if you haven’t been fortunate enough to receive much from other researchers in your family, chances are your descendants will be faced with inheriting your research. That’s why this week’s Elevenses with Lisa episode 74 is for everyone!
As exciting as it can be to receive new genealogical information, it presents challenges such as:
figuring out if each piece of information is correct,
finding a way to process it and blend it into what you already have (or if you’re new to genealogy, what you DON’T have!)
finding a place to put it,
and making the hard decisions about what you can’t keep.
So in this video I’m going to share with you my top strategies that I’ve used myself more than a few times. So take a deep breath, grab a soothing cup of Chamomile tea, and let’s get started.
I’ve received many emails over the years from folks who have faced the challenge of inheriting genealogy research done by another family member.
Jim R wrote me to say:
“I am going through my family tree and have a question. My aunt spent a lot of time back in about 1985 and had a huge hardback book of printed up of the family tree. But I was told by a few family members that some of the information in it isn’t true. How do I go about doing my own research, and properly compare the info? I need to figure out what is right and what is wrong. This is fun, but frustrating at the same time. Thanks.”
Don’t Take Inherited Genealogy at Face Value
Accuracy (or lack thereof) can a real issue when we receive someone else’s work. We can’t just take it at face value, especially if the researcher did not cite their sources. There’s no way to know if an ancestor on their tree is truly your ancestor until you look at the genealogical source documents for yourself. If they haven’t listed which sources they used, you’ll have to go find them. The good news is that it should be a little easier to find them based on the information provided about the ancestor. Usually when you get a family tree from a relative, it will at a minimum include important dates like birth, marriage and death, and hopefully some of the places where those events occurred.
Jim inherited a large, compiled history book, but you may be fortunate enough to receive an entire lifetime’s worth of research. Well, some folks would feel fortunate, others may not! No matter how much you’ve inherited, the genealogical process remains the same: start with yourself and work backwards. It may be tempting to start focusing on new ancestors you see in the family tree you just acquired, but resist the temptation. We must always prove the relationships connecting us to each generation going back in time so we don’t end up adding someone to the tree who doesn’t belong there.
So let’s stop for a moment and go back to the beginning, when you first inherit your relative’s genealogy research. What do we do first?
Assess what you have inherited.
Jim received one big book. But if you’re like me you may have received boxes of items, many loose and unorganized.
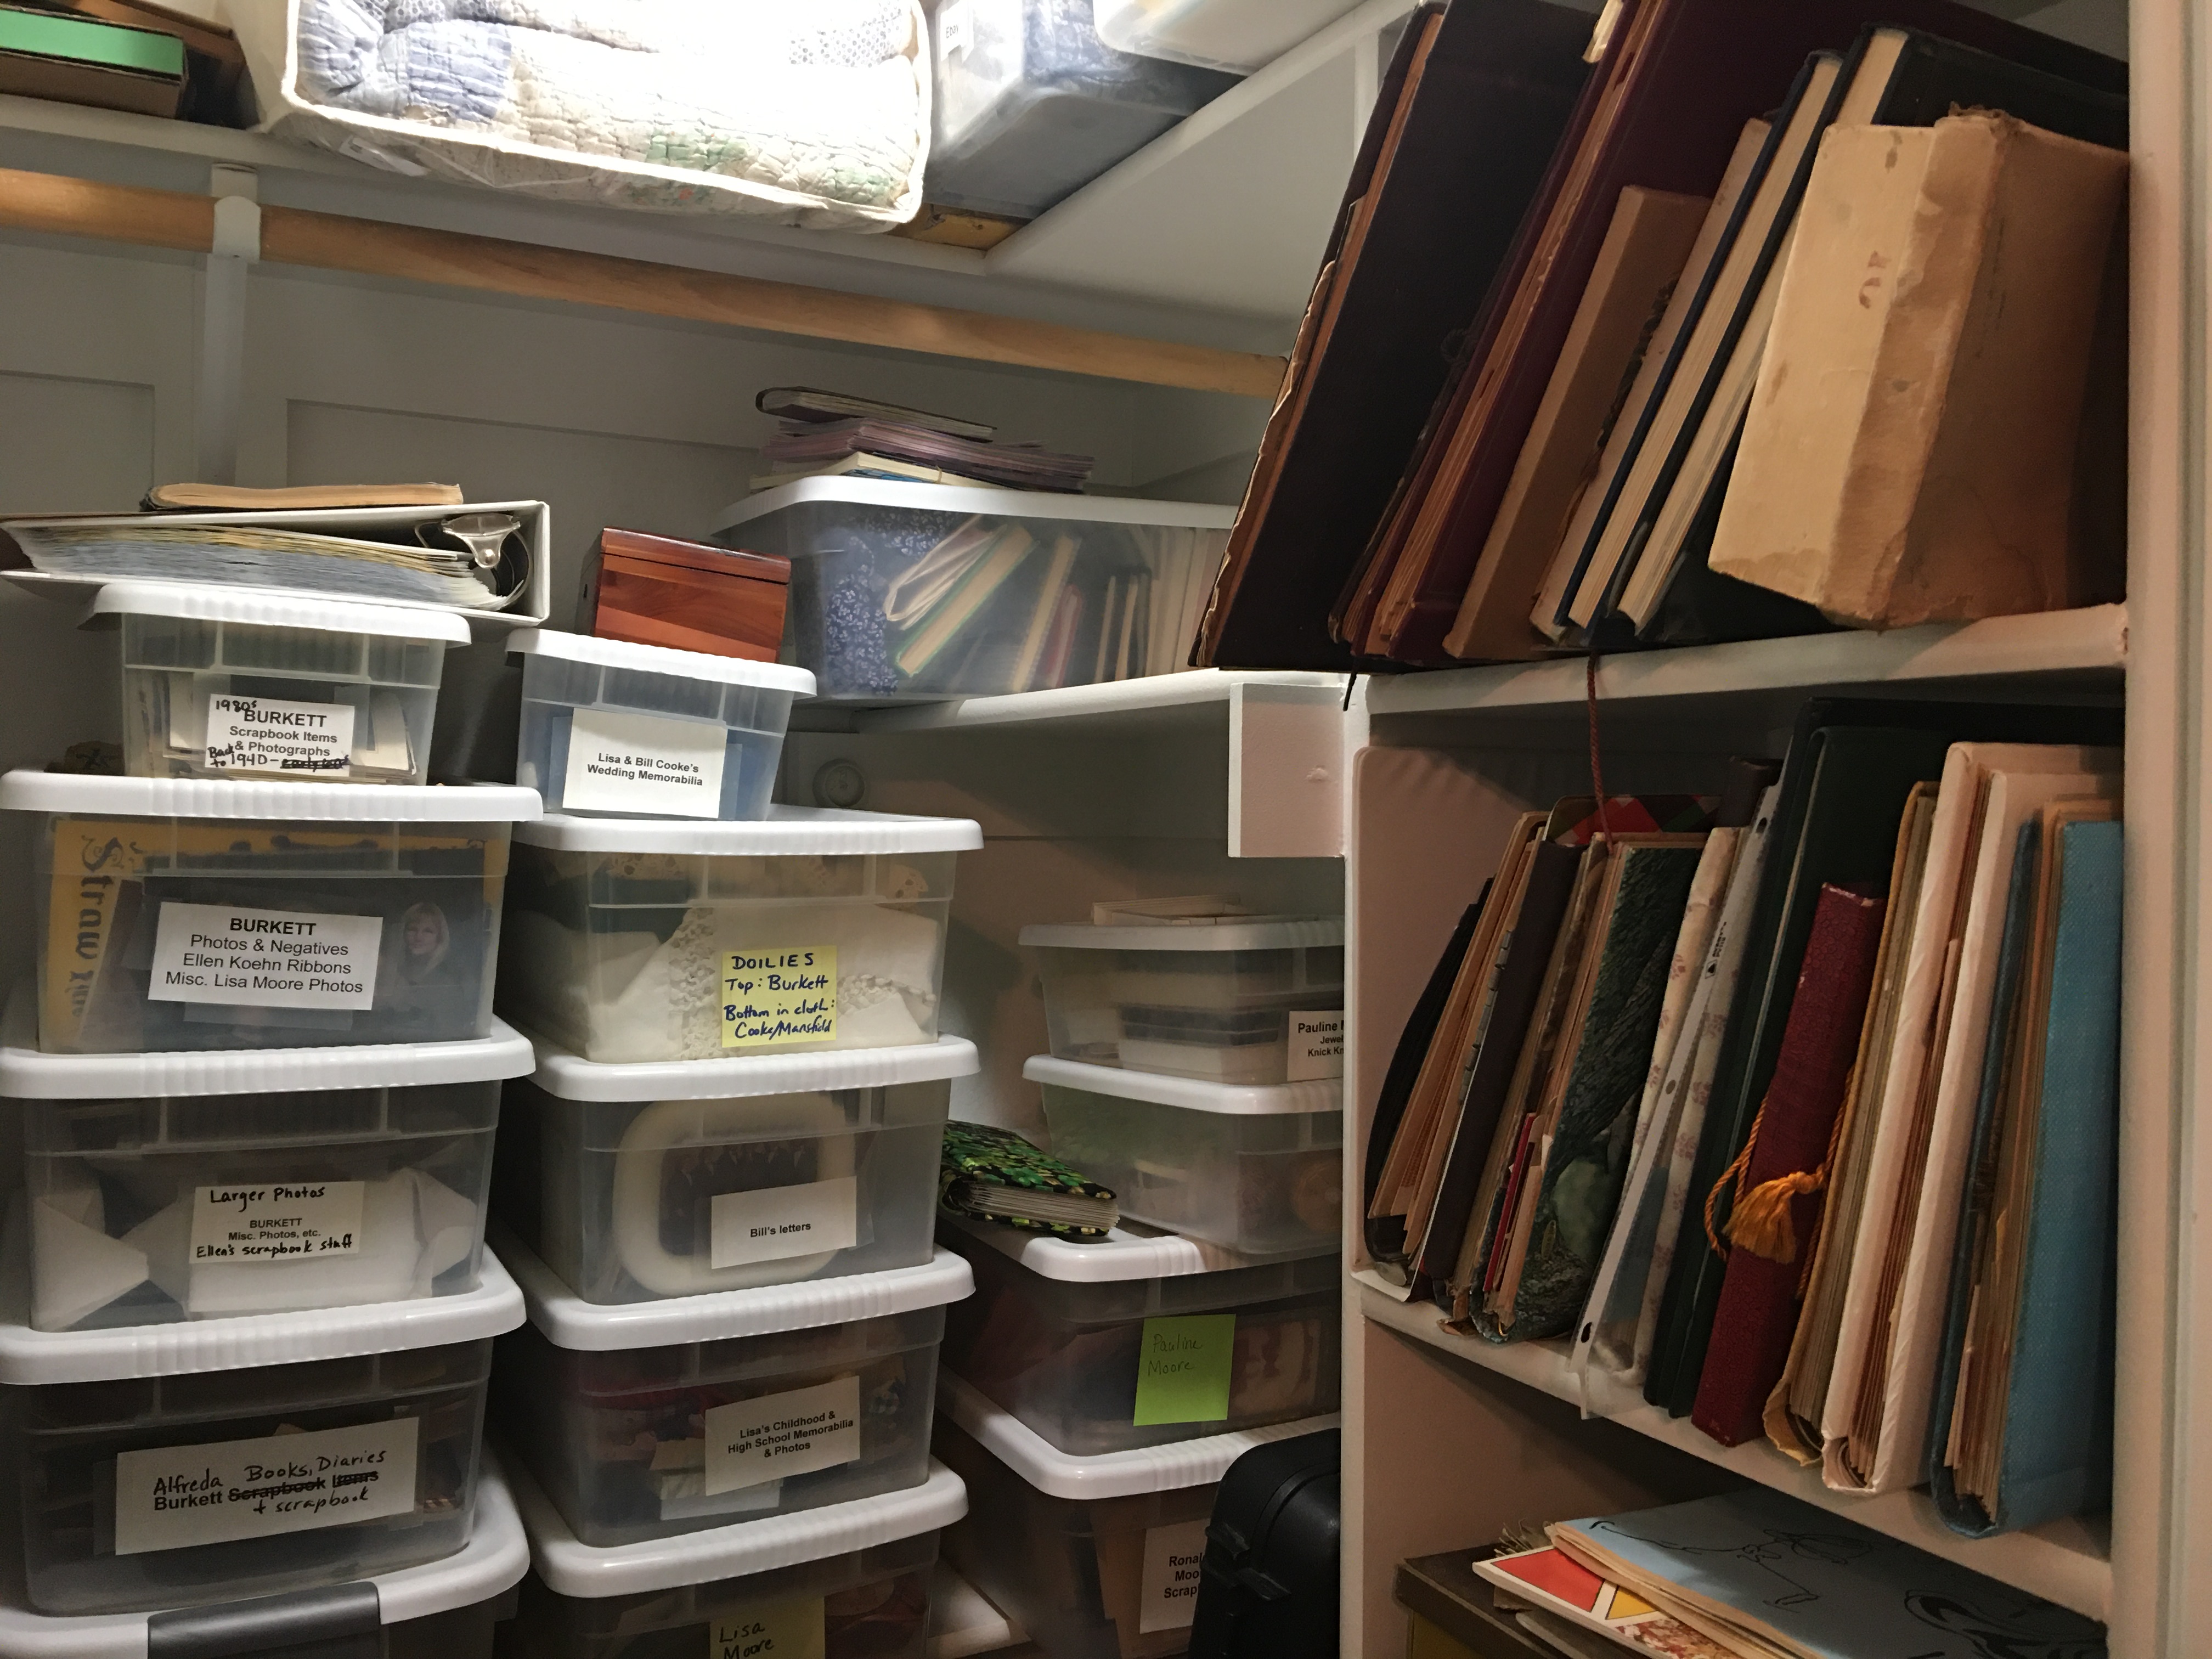
I like to divide it up by families and place each pile into a separate bin, in chronological order as much as possible. I use clear stackable bins because you can see what’s inside. I’ve used these for years and never detected an ounce of damage. Damage is more likely to come from heat, moisture and mishandling than stored undisturbed in a plain storage bin in a room temperature stable environment such as a closet.
Use 3×5 white index cards to label each bin. Use a medium black sharpie pen to write the family surname in large bold letters, and place the card inside the box at one end facing out. You will be able to see it through the clear bin. You can also simply tape it on the outside of the bin.
You’ll also need one location where all the bins can be stored until you’re ready to work on them. A spare closet or even under a bed can work. The important thing is they are all together undisturbed and easily accessible. Once items are sorted and stored, you can then pull out one bin at a time to work on.
If your inherited genealogy appears to be well organized, such as in scrapbooks, keep it in context. Don’t take it apart and divide it up. There’s something to be learned from the order in which things were added to the book.
my spare closet with bins of inherited genealogy awaiting processing.
Take inventory and prepare to track your progress.
It’s important to recognize that it isn’t likely that all of the materials and information will be digestible in one sitting. And it helps tremendously when you set up a process that makes it easy to pick up the project and put it down easily while keeping track of where you left off.
You can track your progress in a variety of ways:
a project log spreadsheet,
Word document
Evernote or One Note
A spiral notebook
Take a moment up front to put your tracking mechanism in place and be as consistent as possible in using it.
I use Excel spreadsheets for my tracking. I find it very helpful to create a separate tab for each item within the collection (book, scrapbook, computer disk, address book, etc.) This helps provide me with a complete inventory at a glance. On each tab I add columns applicable to the type of item and information it contains.
Get a genealogy software program.
If you’re new to genealogy, or you’ve only had your family tree online, now is the time to get a genealogy software program. It will not only help you stay organized, but it will also give you a mechanism for consistently adding source citations. Your genealogy software database while also serve as the “brain” of all your efforts. The database gives you one place to focus your efforts and systematically add information. Also, it puts all of it in your control on your own computer, not solely in the hands of a genealogy website that could be gone tomorrow.
There are a handful of genealogy software database programs on the market. Family Tree Maker, Legacy and RootsMagic are all good and reliable. MyHeritage offers Family Tree Builder for free.
No matter which one you choose, download and install it on your computer. Then make sure that you have an automatic cloud backup service installed and running on that computer. I have used Backblaze for years. You can get a free 15 day trial here which will give you an opportunity to see how easy it is to get up and running. (Disclosure: this is an affiliate link.)
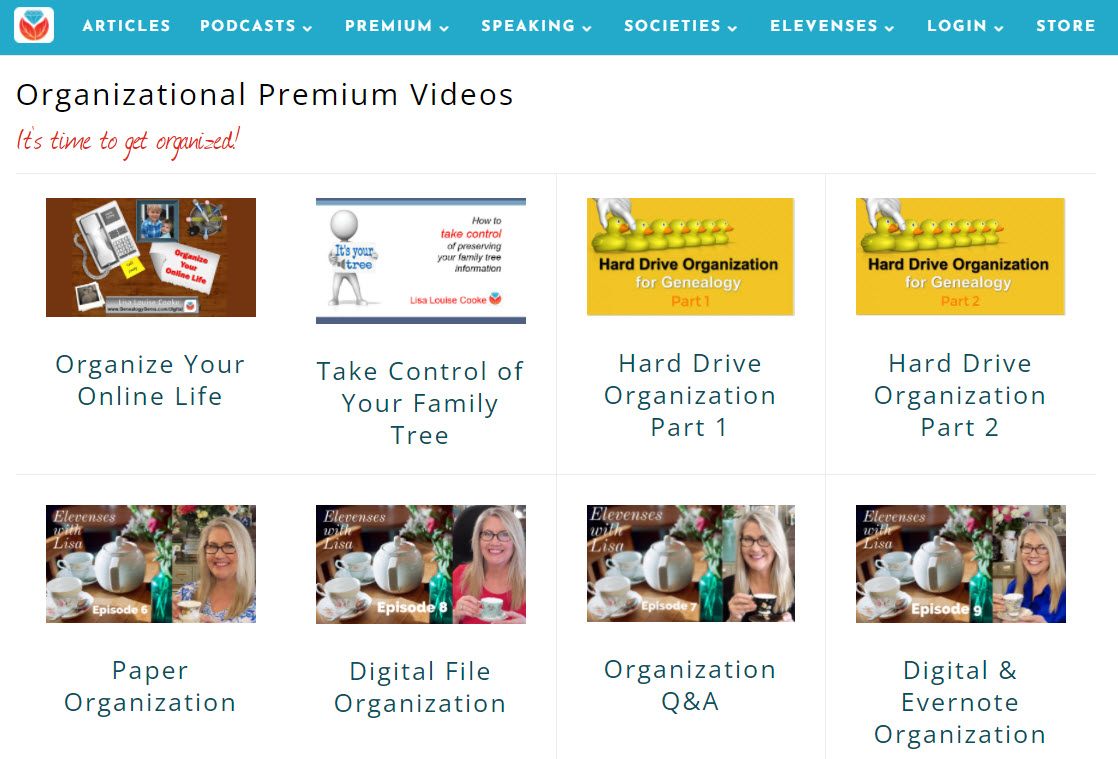
Learn more with my Premium Member classes on organizing genealogy.
Start processing the inherited genealogical information.
Whether you are new to genealogy or a longer time researcher, start by entering the information you inherited starting with yourself or your parents and then add family members going back in time generation by generation. As I said previously, I know it can be tempting to jump to older generations to work on, but you must methodically prove each generational connection in order to have an accurate family tree.
In Jim’s case, he inherited a compiled history book from his aunt, so he will want to start by turning to the page that contains himself or his closest ancestor (probably his parents.) On his tracking spreadsheet he could include columns for ancestor’s name, page number and notes, and enter that information as he works on each person’s record. By doing so, he will always know where he left off.
A compiled history is just one source, and in fact, it is not even a primary source. This means that even if sources have been cited in the book, it’s important to locate and review those sources to confirm that you agree that the conclusion is accurate. After all, this is your tree and research now.
Never enter a new ancestor without cited sources. If the book or paperwork names someone, and even provides some specific information about them, your job is to go find the records to prove it. Once you are satisfied you are ready to enter the person and their information into your database, and of course, cite your sources.
A few decades ago, back when I was doing genealogy strictly as a hobby and not professionally, I found an amazing compiled family history on my Wolf family line. It contained thousands of people, was meticulously compiled and full of details, and did not include a single source!
Since the book wasn’t an heirloom or one of a kind, I found it very helpful and simple to make a small pencil tick mark next to each person as I worked on them. I set about painstakingly finding sources for every piece of information that was new or conflicting with what I had. As you can imagine, that’s a very big job. Since time is always at a premium I didn’t research everything, particularly information that was not critical to the identification of the ancestor, or perhaps was about a collateral individual. However, I did not enter anything into my database that was not researched and proven. This means you’ll need a way to keep track of what has not yet been researched. I used a red pencil to place a tick mark next to items yet to be researched about an ancestor. You could also opt to add a column to your spreadsheet to track it and then return to it later.
Did I add everyone listed in the book in my database? Absolutely not! I focused specifically on direct ancestors and included their children. Once I made my way as far back as I could go in the book, I selectively filled in additional people from collateral lines that were of particular interest or closely associated with areas that I wanted to research further. Rest assured there is no right or wrong way to do this. Do what is most important to you in the most accurate and methodical way you can.
Cite your sources every step of the way.
Talk to any experienced genealogist and you’ll probably hear some regrets about not citing their sources when they first began doing genealogy. Source citations are like an insurance policy. It’s not very satisfying to invest in it now when everything is fine, but down the road when trouble arises you’ll be glad you did.
So what kind of trouble are we talking about? No family tree is immune from occasional problems such as:
discovering an inconsistency in your family tree
uncovering a new source that directly contradicts one of your conclusions
being contacted by another researcher who is challenging something you have posted or published about your family tree.
The only way to address these situations is to review the sources you used. And that’s where your source citation comes in mighty handy! They help answer the questions and also prevent timewasting duplication of effort.
If the only source for a particular event is the book, go out and find the original record to verify it is correct, and cite both in your database.
Learn more about citing your sources by watching my free video Source Citations for Genealogy (episode 60 of Elevenses with Lisa).
Elevenses with Lisa episode 60
What to do when you can’t keep all the genealogy you inherited.
As painful as it is to say, it isn’t always possible to keep all of the genealogical items that come your way. The reality is that shelf and closet space have limits, and our collection can grow unmanageable when added to the research of previous generations.
Start by seeing if you can reduce it. Strive to digitize all items that you want to save that are not originals, heirlooms or not readily available somewhere else.
Need help digitizing? I use Larsen Digital. Click our link and use the discount coupon codes found on the webpage.
Once digitized and recorded in your database, you can toss them. Recently I went through boxes of photographs I inherited from my paternal grandmother. Many were from the late 1970s and early 1980s when double prints were all the rage. By simply tossing duplicates and low quality photos (such as half of grandma’s hand over the camera lens) I was able to reduce the collection by almost a third!
Donation is also an excellent option. Digitize and take photos of the items and then they can be donated to a library, archive, genealogical society or other organization with an interest in them. Sometimes the shared interest is not as much in the particular families as the locations from which they hailed. One woman told me at a recent seminar that when she asked her local archive about her materials, they were ecstatic. They immediately spotted old buildings in the photos that no longer exist but held an important place in the town’s history. You never know what may be meaningful to others.
The Genealogy Center at the Allen County Public Library in Fort Wayne is an excellent resource for both free digitization and donation. Watch Elevenses with Lisa episode 31 to learn more.
Learn more about donating your genealogy in episode 31.
I recently heard from a Hal Horrocks, a long-time member of the Orange County California Genealogical Society. In 2017 they started a program called Rescue the Research. They strive to preserve the research done by their past members. It’s a great example of making hard-won genealogy research more accessible to others while reducing the burden on closet space.
Donation isn’t for everybody. However, sadly it is sometimes the only option when you don’t have descendants or relatives interested in retaining your research. Don’t despair. Donating your research is bound to elicit a genealogy happy dance from some future genealogist who comes across your research!
You can learn more about protecting, preserving and donating your genealogy research by watching my video class Save Your Research from Destruction (Elevenses with Lisa episode 10, available exclusively as part of Premium Membership.)
Your ancestors and your descendants will thank you.
It’s been famously said that “you can’t take it with you” when you leave this earth.
“You can’t take it with you”
By following these strategies and addressing that reality now, there’s one very important thing you will be leaving behind: the legacy of family history. One that avoids burdening the next generation while providing a lasting connection between all of the generations of your family tree.
Resources
Get My Free Genealogy Gems Newsletter – click here.
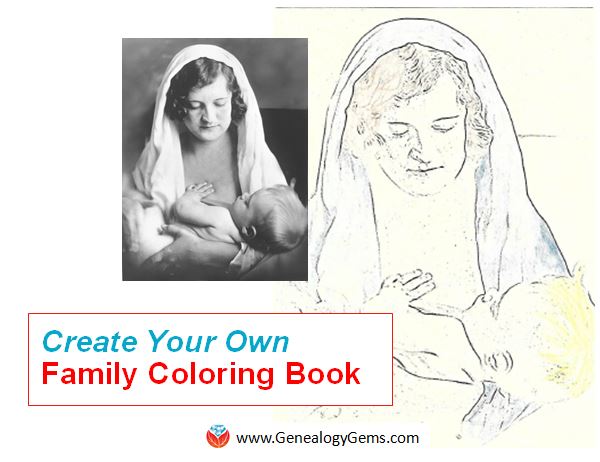
Coloring books are all the rage for adults and kids. Let this project and these free online tools inspire you to create a coloring book to celebrate your heritage.
Last Christmas, my mom Cheryl McClellan created a coloring book for our extended family out of family artwork. She requested copies of line drawings from every willing relative, especially her grandchildren (ages 3-20). Then she added her own childhood artwork, some of mine, and some of her mother’s, so four generations are represented.
The flowers on the left, originally painted by my grandma, wasn’t as easily colored because of all the dark areas. My mom’s childhood drawing and my son’s, on the right, both made very “colorable” images.
Then she simply photocopied each page to make it into a coloring page. She experimented with the black-and-white settings until she got the best quality reproductions for coloring.
The grandchildren’s artwork came out the best because they created images meant to be colored (with lots of lines and spaces and no shading). The older artwork reproduced with varying degrees of success. But all were fun to include. She chose not to bind the completed book, so the pages would be easier to color, but instead put each person’s collection of coloring pages in large envelopes.
More tools and ideas: Create a coloring book
To create your own family coloring book, gather family photos (or artwork) from your family archive that would be interesting to color. Consider pictures of relatives, homes, heirlooms, or other objects of significance to your current family life or your family history. The best images will have plenty of contrast in them (lights and darks).
Choose your favorite free online photo editing tool, if you have one. Examples include Pixlr.com and Snapstouch.com. I chose Snapstouch because it’s super easy. Here are the instructions on Snapstouch:
1. From the home page, select which final visual effect you prefer: I chose Sketch. (Depending on the photo and the desired effect, you might also choose Drawing or Outline.)
2. Choose your image file from your computer.
3. Select additional options, as shown here. (In Sketch mode, you can choose a darker pencil sketch and faces to be refined).
4. Click UPLOAD. Wait for the file to upload to the site.
5. After the upload is complete, you’ll see the option to click SKETCH. Click and wait for a moment.
6. If the final image is not to your liking, play with the options (you don’t need to re-upload the photo to do this). OR switch to a different visual effect and experiment.
7. Click DOWNLOAD when you’ve got the image you want.
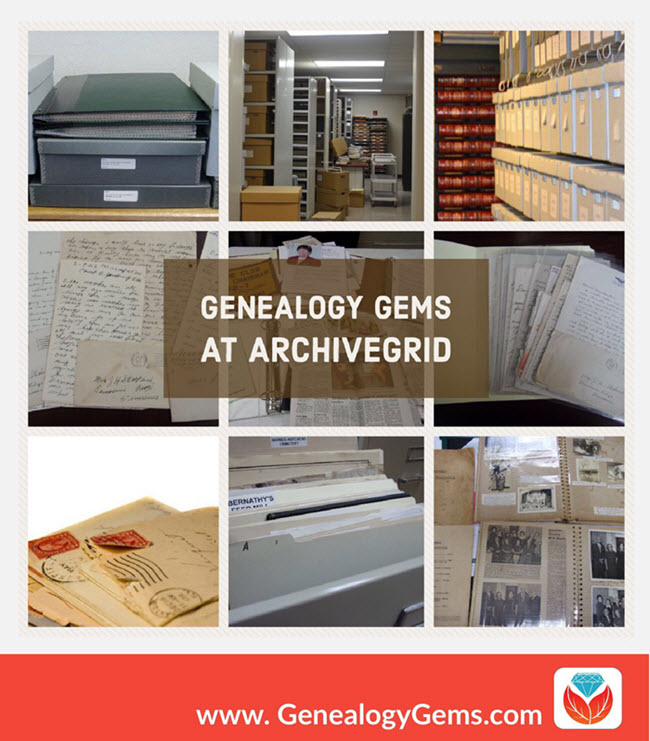
Original manuscript records may reveal genealogical gems about your ancestors. Find these old records in archives around the country using this little-known, free online tool: ArchiveGrid.
Manuscript records such as old diaries, letters, vital record collections, military documents, church registers, store ledgers, school and even business records can be genealogical gems. But finding original manuscript collections in archives and libraries can be difficult. Which archive has it? What’s the collection called? How can you access it?
ArchiveGrid can help
A little-known free website can help you locate old documents and manuscript items available in over 1,500 different archival collections. It’s called ArchiveGrid, and it currently includes close to 5 million archival item entries!
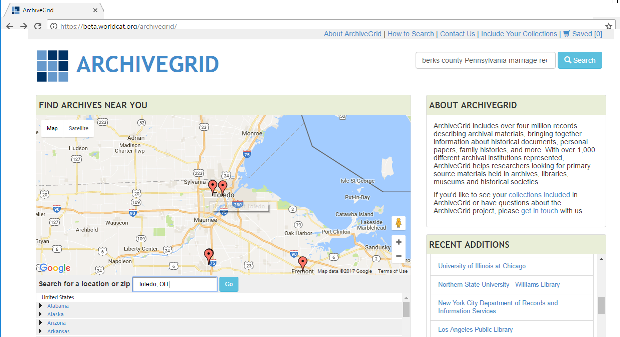
ArchiveGrid is a companion website to WorldCat, the free online catalog of millions of library items from thousands of libraries. The difference is that ArchiveGrid focuses not on published items but (generally-speaking) on unpublished ones.
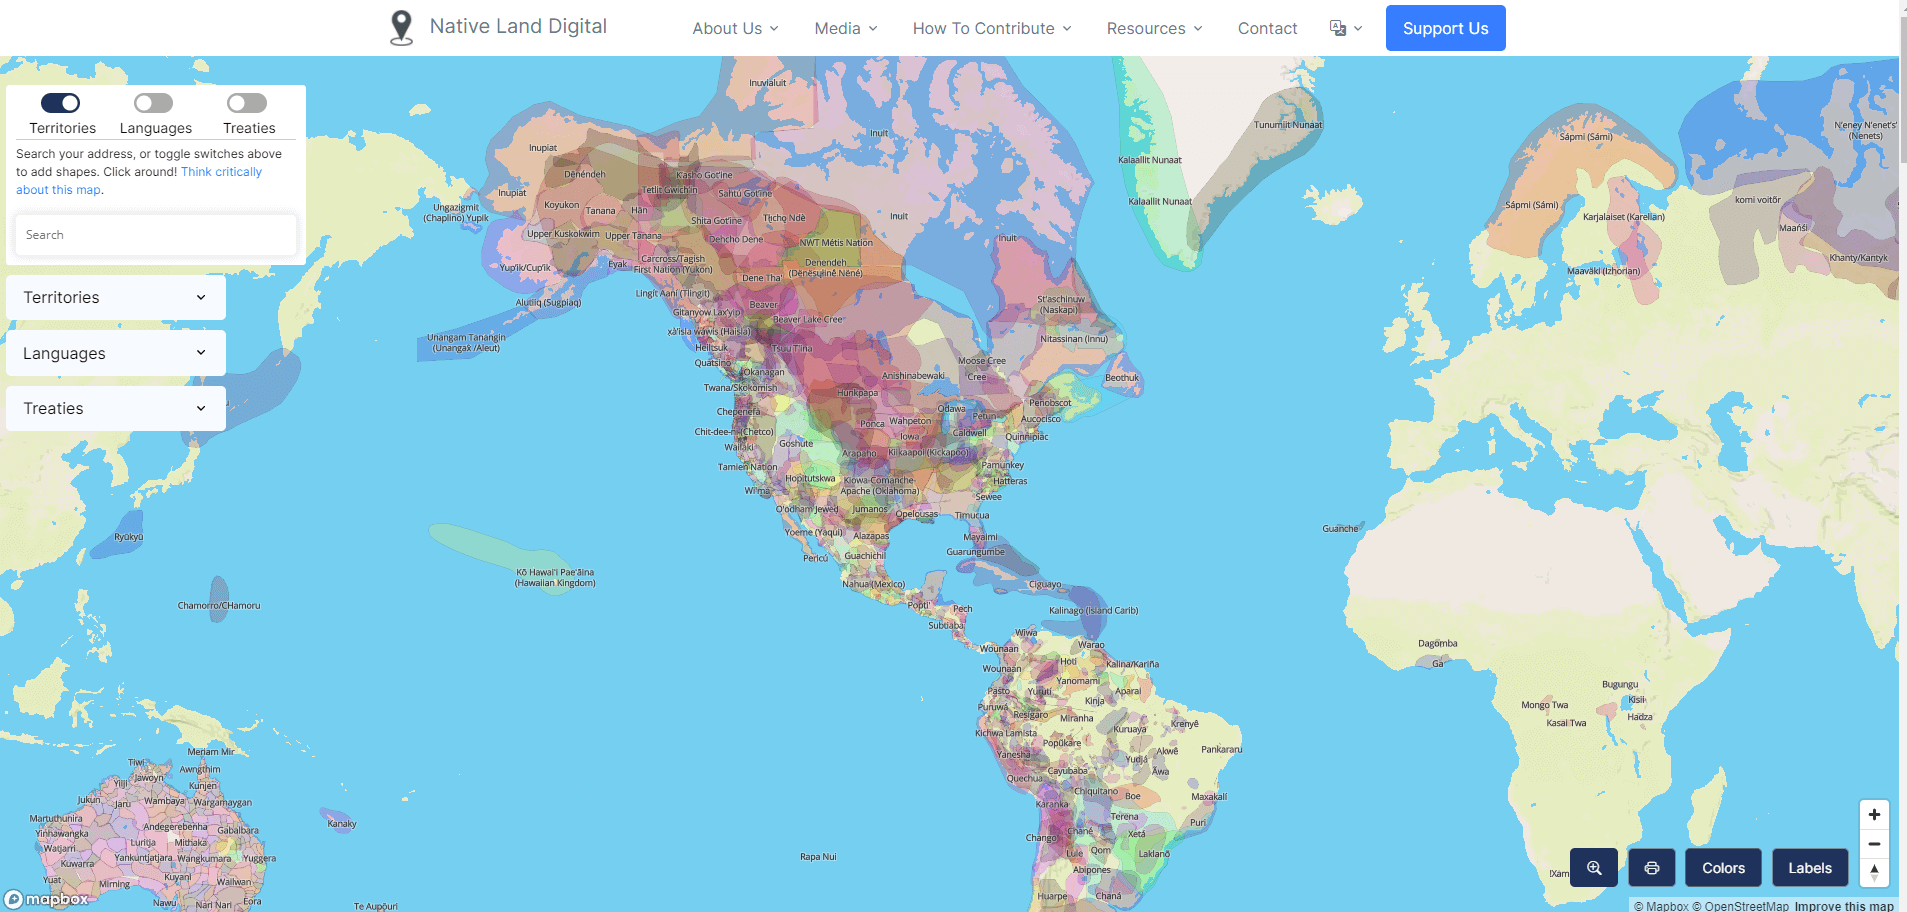
Use the map view, shown above on the left side, to identify archival collections that are near your ancestors’ home. These archives may hold materials related to your ancestors’ communities. Hover over the red markers to see the names of institutions. Click on them to find contact information and search their collections.
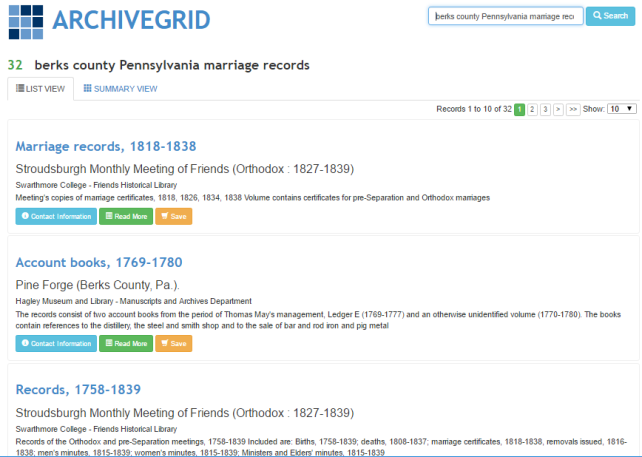
Search for specific manuscript items in ArchiveGrid
1. In the search box in the upper right part of the ArchiveGrid home page, enter search terms related to the manuscript items you hope to find, such as berks county pennsylvania marriage records. Then click Search. You’ll see a list of search results, such as these:
2. Browse search results. If you need to narrow or broaden your results, you can scroll to the bottom of the search results page and click the options you want.
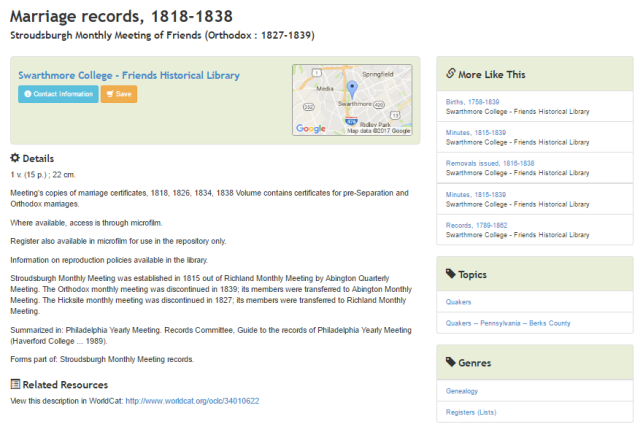
3. Click on items of interest to read more about them. Here’s what a typical ArchiveGrid catalog entry looks like:
The entry tells you more about the individual item. You may see when it was created, a physical description of it, who or what organization created it, and even brief historical background. You’ll see what repository holds it–and you can click under the name of that repository for its contact information. You may be able to order copies, visit to view the item in person, or hire a local researcher to do that for you.
As you can see, a sidebar to the right of this catalog entry says More Like This, with categories like people, places, groups, or topics. These links point to additional catalog items that are related in some way to the one you’re looking at—it’s something like browsing the stacks by topic at a library. (You can also sort all your search results this way from the main list of search results by clicking on Summary View.)
Now that the Family History Library is discontinuing its microfilm lending program, you may find yourself increasingly searching for original manuscript items that aren’t available online. And now that you know how to use ArchiveGrid, you may find yourself wanting to seek out these genealogical gems even more!

 Coloring books are all the rage for adults and kids. Let this project and these free online tools inspire you to create a coloring book to celebrate your heritage.
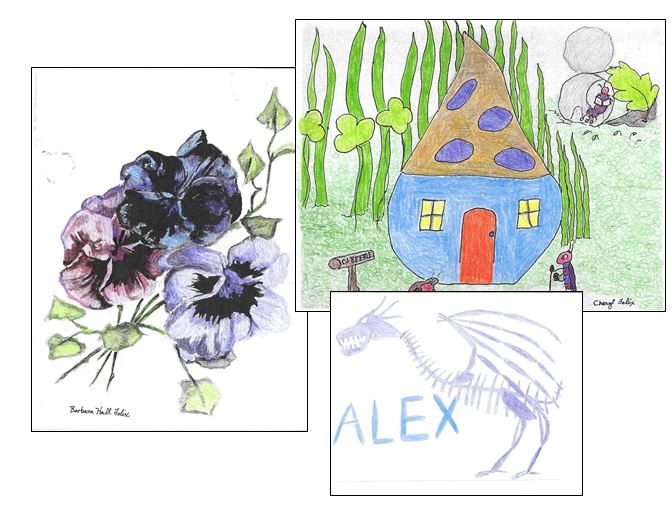
 The entry tells you more about the individual item. You may see when it was created, a physical description of it, who or what organization created it, and even brief historical background. You’ll see what repository holds it–and you can click under the name of that repository for its contact information. You may be able to order copies, visit to view the item in person, or hire a local researcher to do that for you.
 Learn More About Original Records