Google Books Just Got WAY Better! New Features Tutorial
Show Notes: I’m excited to share with you my favorite new tool at Google Books. This is a game changer for utilizing the information you find on the digitized pages. Plus I’ll show you other new features recently added to Google Books.
Why use Google Books for genealogy? Well, Google Books features over 10 million free digitized books, most of which were published prior to 1927. That makes Google Books a gold mine for genealogy research. And when you visit Google Books, think “published on paper” NOT just books! In addition to books, the collection includes newspapers, magazines, journals, almanacs, city directories, catalogs, court papers and so much more!
Watch the Video
Why use Google Books for genealogy?
Google Books features over 10 million free digitized books, most of which were published prior to 1927. That makes Google Books a gold mine for genealogy research. And when you visit Google Books, think “published on paper” NOT just books! In addition to books, the collection includes newspapers, magazines, journals, almanacs, city directories, catalogs, court papers and so much more!
SHOW NOTES
Access Google Books at https://books.google.com
Downloadable ad-free Show Notes handout for Premium Members.
Filter to Free books only
- Conduct a search.
- On the results page look for the filter menu. If you don’t see it, click the Tools
- Click the down arrow for Any View
- Click Full View
- Now your results list only include free fully digitized materials.
If you haven’t been over to Google books for a while, this is going to look a little bit different. A while back they launched a new user interface. They’ve now made some improvements. The main difference is we’re going to see this menu along the bottom of the screen.
My favorite new feature: convert image to text
Before we even look at the new menu, I promised you my favorite item that they have added to Google Books.
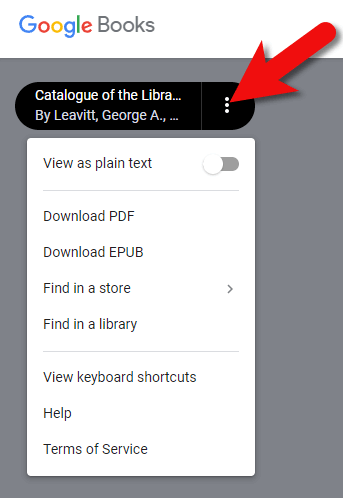
In the upper left corner, click the three vertical dots icon. This reveals a menu that gives you access to a lot of items that typically are kind of ‘behind’ the book. If you were to close this book, you would see the catalog entry for it.
New menu at Google Books
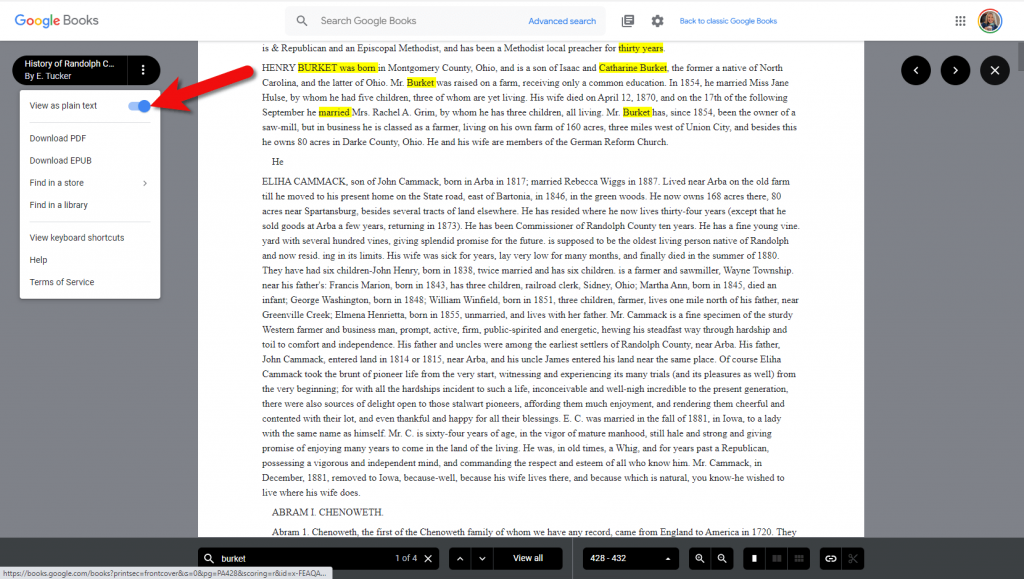
My favorite new feature here is View as Plain Text. Click the toggle button to convert the entire book to plain text. This makes the digitized images of the pages usable in many other projects and programs. Google applied optical character recognition to the books to be able to read the words on the images to make the books keyword searchable. In the past, we had to use the clipper tool to capture a bit of the image and convert it to text. The box was really small and inconvenient. This new feature provides the ability to instantly use as much of the text as you want.
Convert digitized books to text in Google Books
Because this book is fully digitized, it’s already been cleared for copyright. These books are in the public domain. They are available to use for free, copyright free. You are free to copy the text and include it in your projects, in your genealogy database, in a family history book, and so on.
Download a book
Back over at the three-dot menu in Google Books, you can also:
- download the book as a PDF or EPUB for free,
- find the book in a store, if you need a hard copy
- find the book in a library at WorldCat.
Keyboard Shortcuts Hot Keys
Another new feature is keyboard shortcuts.
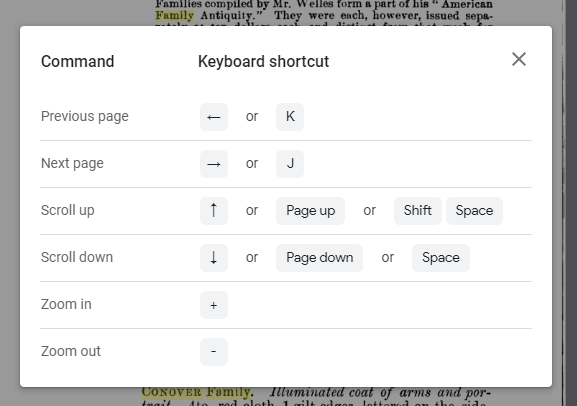
Google Books shortcuts / hot keys
Find Book Catalog Entry
I mentioned that the catalog entry for this book is sort of ‘behind’ the book. To access that, click the X in the upper right corner of the screen. This removes the view of the book. We haven’t lost access to the book. You can still access it by clicking the blue Read free of charge button.
The nice thing about the book catalog entry page is that it contains all the details about the book such as where you can purchase it, finding copies at the library, and additional editions.
Source Citation Tool at Google Books
Also on the catalog entry page is the Source Citation tool. Click create citation to reveal the options. Click the desired style, and then copy the citation and paste it in your family tree database, or other places where you are referencing this book. So, there’s no reason not to cite your source for any book found at Google Books. Source citation is very important, because down the road you might discover something more about your family and realize that you need to access that book again. Without the source citation you may not remember where you got the original information. The source citation is your breadcrumb trail back to the previous research that you’ve done. Also, if anybody ever has a question about what you have put in your family tree, you can point them to the sources that you used.
New Google Books Menu
The final new feature at Google Books that I wanted to draw your attention to is the main menu for this item. It used to be at the top of the screen, but now you’ll find it at the bottom. At the top of the screen, we now have a search box that allows you to search the entire Google Books collection. But oftentimes, when you’re looking at a book, you’re going to want to be able to search for particular names, places, dates, events, topics. You will find the search field for that in the new menu at the bottom of the screen. Type in names or other words and press enter. You’ll be given all of the pages in the book that mention those words. Also, in this menu are:
- zoom buttons,
- chapters menu (if available for the book you are viewing)
- page views (single, side by side or thumbnails.)
Clip and download an image from a book
Also in the new menu is the clipper tool. The materials in Google Books contain maps, drawings, photos and many other types of imagery that you may want a copy of. Or perhaps you just want an image of a section of text. The clipper tool allows you to capture it and save it to your computer as an image file.
- Click the scissors icon, and your mouse cursor will turn into a clipper.
- Draw a box around the desired area
- In the pop-up box click to copy the link to the clipped image.
- Open a new web browser tab and paste the link. (You can also paste the link into notes in your family tree, and other programs and documents.)
- Press enter and the image will appear in the browser tab.
- Right-click on the image.
- Select Save Image As to save it to your computer’s hard drive.
There you have it, some of the exciting new features over at Google Books. There’s never been a better time to search for information about your family history in Google Books.
Resources
- Downloadable ad-free Show Notes handout for Premium Members.
- Learn more about using Google Books: Google Books – Getting Started (Premium video class) and Google Books – 10 Surprising Finds (free.)