by Lisa Cooke | Oct 27, 2014 | 01 What's New, Inspiration, Listeners & Readers
Recently I heard from Emily, a mom of younger children who is feeling inspired to take her love for family history in a more professional direction. Have you considered becoming a professional genealogist yourself? You’ll want to check out an interview I told her about (see below). Anyone can take their life’s experiences and channel them into their career path!
“Dear Lisa,
I was at the Midwestern Roots conference today and I just wanted to say ‘thanks’ for something you said at your opening session this morning. You were talking about when your daughters gave you the iPod and how you were at a point in your life when you were trying to figure out what to do, and I think you even used the expression ‘just a mom.’
I really related to what you said. I am a mom to two younger kids, I love my family history research, and I’m trying to find a new professional direction in life. So, you’ve given me some hope that maybe I can use my love of genealogy to (somehow) help and teach other people.
Probably not the typical type of ‘thank you’ note you usually receive, but I just wanted you to know.”
Hi Emily,
You are very welcome and how sweet of you to take the time to write. Believe me when I say that “just a mom” was a reference to the fact moms often get that sort of response from the culture these days. (I know that other moms know what I mean.) Being a mom is the highest calling possible, and remains my first priority. And the great news is that technology makes it possible more than ever to pursue additional dreams!
I think you might enjoy a special interview I gave recently to the Genealogy Professional Podcast. It was for folks just like you. You’ll also find additional interviews at the bottom of my About page on my website.
Wishing you great success as you pursue your dreams!!
Lisa
by Lisa Cooke | Aug 27, 2015 | 01 What's New, Digital Archives, Evernote, images, Mobile, Organization, Photographs, Technology
Snagit and Skitch can help you highlight screenshots and other digital images you capture for genealogy. Here’s how!

 Recently Diane from Alberta, CA sent in this question:
“I am trying to find how to highlight a portion of a document such as a birth certificate. The document has three people listed for the county and prior to adding it to my tree on Ancestry, I would like to highlight my ancestor so he will stand out. Can you offer any suggestions. I tried Evernote without success, also my family tree program. What am I missing?”
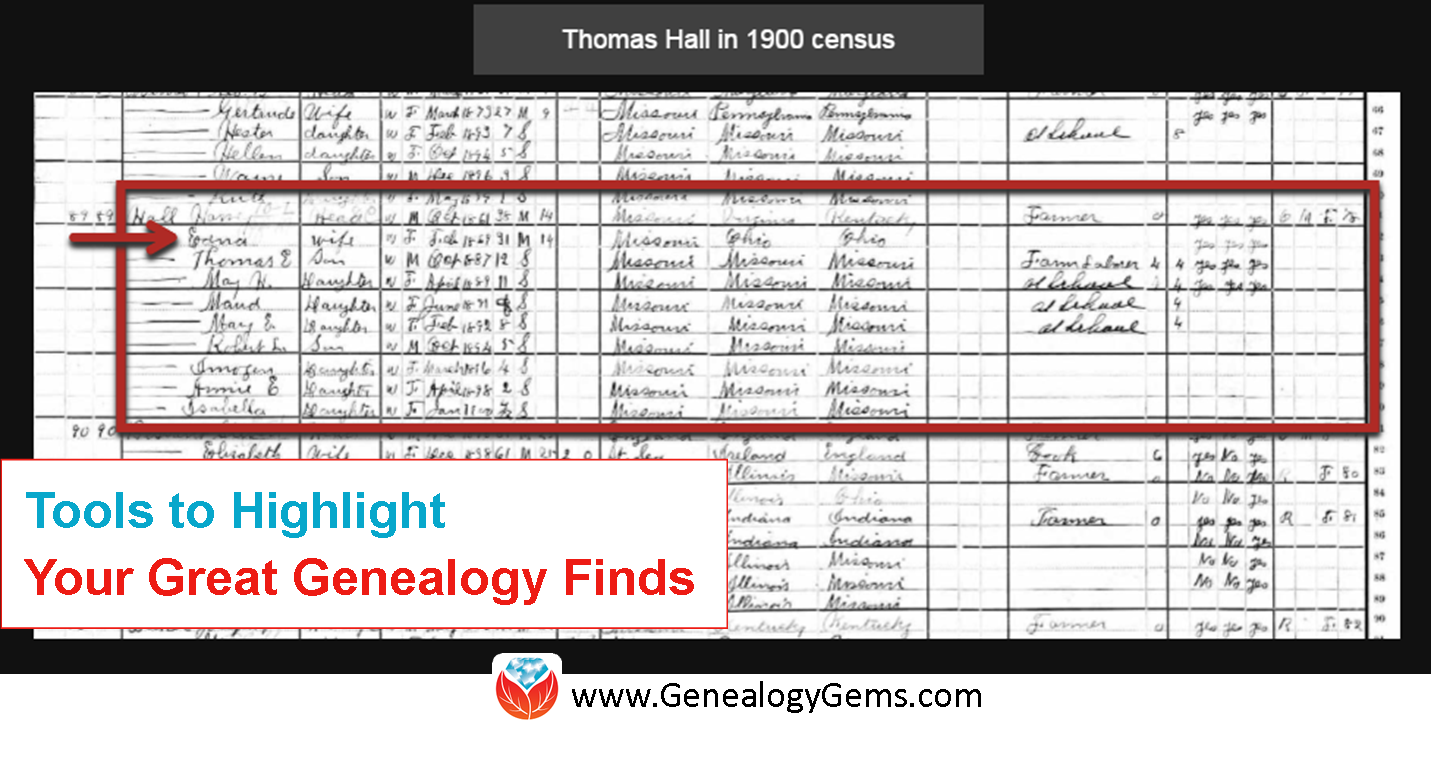
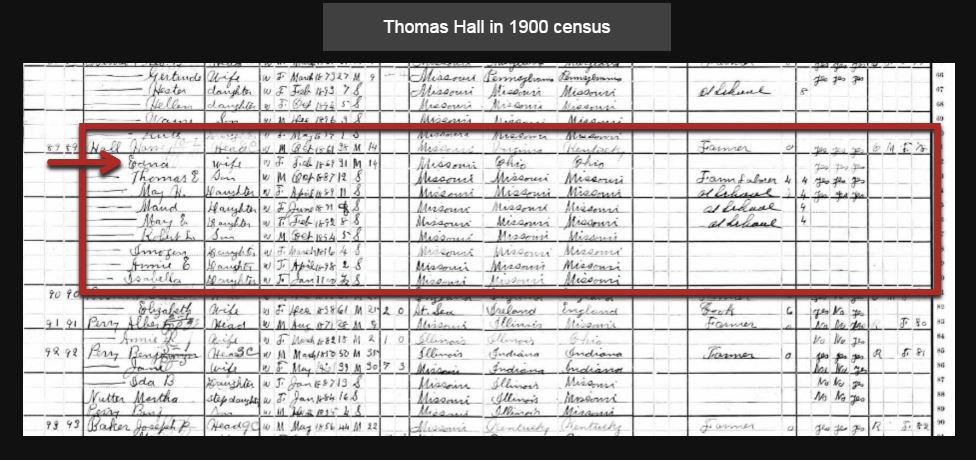
I suggested Diane use Snagit 2019, compatible with Windows and Mac software to highlight her documents. In fact, I use it constantly for a variety of genealogical projects. The full-blown software has loads of cool features!
You can also download the free Snagit Chrome extension here. After you install Snagit, you’ll see it show up on your browser page. Here’s what it looks like on Google Chrome (the blue “s” button):
 When you see something on your screen you want to capture, just click on the blue “S” icon. You’ll be asked at the outset to give Snagit access to various cloud storage options so it can store the image for you. Once you allow it access, then you’ll be able to name your file and add your own shapes, arrows and text. Use these to call attention to part of a record; annotate what you learned from it or even mark your ancestor’s face in a group photo.
As far as doing something similar in Evernote: Evernote only allows you to highlight typed text, not portions of an image. However, you can download Skitch and drag and drop the document from Evernote into Skitch. Then you can highlight an image to your hearts content. When you’re done you can Save to Evernote in the menu (SKITCH > SAVE TO EVERNOTE).
 Thanks to Diane for a great question! I hope you’ll all share this post: Snagit is free and makes it so easy to take notes on your digital images, for your own use or to share with others!
Resources
How to Add Text to a Web Clipping in Evernote
Should Evernote Be My Digital Archive?
Annotating and Transcribing Documents in Evernote (What Evernote Can and Can’t Do for Family History)
by Lisa Cooke | Aug 18, 2015 | 01 What's New, images, Listeners & Readers, Organization, Records & databases, Research Skills, RootsMagic, Trees
 When you post your family tree online at multiple websites, it’s easy to lose track of changes you make at each one. Maintaining a master family tree on your own computer can help solve that problem.
Recently Gems podcast listener Louis wrote in with a question many of us face. He recently purchased RootsMagic 7 software to keep track of his family tree, but he’s still finding it difficult to corral all his data in one place. Here’s the problem, he says:
“I have my family tree splattered everywhere: FamilySearch, MyHeritage, and Ancestry. I’m afraid of losing control of my tree and would like some advice on keeping things straight. Each of the sites I go on seem to offer different information, so I started posting tree information on different sites. Can you offer any suggestions that I can use to centralize my data across different sites?”
I can fully appreciate Louis’ situation. Here’s a quick summary of how I keep my family tree organized all in one place.
Websites come and go, as we know, so I look at my RootsMagic database on my computer as my MASTER database and tree. This kind of approach lets you post your family tree online but not lose control of it!
When I post GEDCOM files of my family tree on other websites (what’s a GEDCOM?), I do so to try and connect with cousins and gain research leads. With that in mind, I upload only the portion of the tree for which I want to generate those connections and leads. In other words, I don’t put my entire GEDCOM on each site (MyHeritage, Ancestry, etc.) because I don’t want to get bogged down with requests and alerts for far flung branches that I’m not focused on researching right now. To do this I make a copy of my database, edit it to fit my research, and then upload it.
As I find documents and data on these websites, I may “attach” them to the tree on that site, but I always download a copy and retain that on my computer and make note of it in RootsMagic. That way I retain control of my tree and my sources.
 And of course the final step is to back up my computer so everything is safe and secure. I do that with Backblaze (the official backup of The Genealogy Gems Podcast) and you can click here to learn more about their service for my listeners.
In the end, it is my family tree and history. I want to keep ownership of it on my own computer, even when I share parts of it online.
Resources
 Best Genealogy Software: Which You Should Choose and Why
RootsMagic Update for FamilySearch Compatibility
Free RootsMagic Guides
Family Tree Builder for Mac
Thank you for sharing this post with others who may have the same question! Email it, share it on Facebook, pin it, Tweet it–just use our handy social media icons on this page.
(Full Disclosure: Some of the websites mentioned and links provided in our articles are for sponsors of The Genealogy Gems Podcast. They are sponsors because we think they are terrific and use the products ourselves. We include affiliate links for your convenience and appreciate when you use them because they help keep The Genealogy Gems Podcast available for free. Thank you!)
by Lisa Cooke | Aug 13, 2015 | 01 What's New, Beginner, Blogs, images, Writing Family History
 More and more people are blogging about their family history. Here’s why!
When it comes right down to it, many of us want to write up our family stories, but we don’t really want to write or publish a 300-page book. Blogging your family history in short snippets is a perfect alternative! Why?
1. Its shorter, flexible format is much less intimidating for many people. You don’t have to lay out a book or fill hundreds of pages. You can write a little bit at a time, as your time and mood permit.
2. A blog is like your own family history message board. Every word you write is searchable by Google–which means others researching the same family lines can find and connect with you.
3. A family history blog can help bust your toughest brick wall. I’ve heard and shared countless stories here at Genealogy Gems from readers and listeners of how just “putting it out there” on a blog led to someone contacting them with a treasure trove of new information about their family tree.
4. Writing a narrative about your research will help you identify gaps in your research. Sometimes errors or bad assumptions you made will jump out at you.
5. Your kids and grandkids are (or will be) online. They will more likely want to read quick and easy stories on the go on their smart phones and tablets. Putting your research out there on a blog provides them with an easy way to digest the family heritage and subscribe to it, since blogs can be delivered to their email inbox or to a blog reader.
6. Because there are no excuses. You can start a blog for free. There are no rules, so you can decide how often and how much you write at once.
7. If you leave the blog online, it will still be there even when you’re not actively blogging. You will continue to share–and you may continue to attract relatives to it.
Resource:
Start a family history blog with this free series from our Family History Made Easy podcast (an online radio show)
Part 1: What to Consider when Starting a Genealogy Blog. The “Footnote Maven,” author of two popular blogs, talks about the process of starting a genealogy blog. She gives great tips for thinking up your own approach, finding a unique niche, commenting on other people’s blogs and more.
Part 2: Insights from Popular Genealogy Bloggers. We hear from two additional popular genealogy bloggers, Denise Levenick (author of The Family Curator and alter ego of “Miss Penny Dreadful” on the Shades of the Departed blog) and Schelly Tallalay Dardashti (author of the Tracing the Tribe blog).
Part 3: Step by Step on Blogger.com. How to create your own free family history blog on Blogger.com. Learn tricks for designing a simple, useful blog and how NOT to overdo it!
Final tips: Wrap-up and inspiration. In this concluding episode, learn how to add a few more gadgets and details to your blog; pre-plan your blog posts, publish your first article, and how to help your readers subscribe. You’ll also get great tips on how to create genealogy content that others looking for the same ancestors can find easily online.
 SHARE! Invite someone you know to start a family history blog by sending them this post. They’ll thank you for it later!
by Lisa Cooke | Aug 10, 2015 | 01 What's New, Evernote, images, Source Citation
Here’s a simple solution for making additions to an existing web clipping in Evernote.
![By CBS Television (eBay item photo front press release) [Public domain], via Wikimedia Commons](https://lisalouisecooke.com/wp-content/uploads/2015/08/evernote-source-citation.jpg)
Photo: [Public domain], via Wikimedia Commons
Carolyn wrote me recently when she ran into this problem of how to add text to a web clipping in Evernote: “I clipped a wedding document from FamilySearch to Evernote Notebook [and] added URL to dropdown menu. But where can I add the citation that is given on FS document page?
I tried copy/paste but…back at Evernote, nowhere to paste citation. I like to document everything I use in my family records, so this is important to me…I enjoy using Evernote and following your tutorials that came with my (Genealogy Gems Premium website) membership. I have been using Evernote for just two weeks.”
Carolyn, I’m thrilled to hear that source citation is important to you, because it is the backbone of solid genealogical research! Here’s a simple solution.
How to Add Text to a Web Clipping in Evernote:
1. In Evernote, click once on the web clipping in the existing note
2. Press the right arrow key on your keyboard (you will see that now there is a big flashing cursor to the right of the clipped image)
3. Press the Enter key on your keyboard (just like a Return on a typewriter, your cursor has now moved one line below your clipping.)
4. Type or paste copied source citation as desired.
5. Use the formatting options at the top of the note to change the font size, type, and color, etc.
6. Click the INFO icon to see and add more data as desired (such as the original URL of the webpage where you clipped the item.)


Click here to learn more about using Evernote for genealogy.
Did you find How to Add Text to a Web Clipping in Evernote helpful? It’s easy to share it by clicking any of the social media icons at on this post. And we feel all happy inside here at Genealogy Gems when you do – thanks for being a Gem!

 - Ethel_Merman_NYWTS.jpg. Licensed under Public Domain via Wikimedia Commons - https://commons.wikimedia.org/wiki/File:Ethel_Merman_NYWTS-restored.jpg#/media/File:Ethel_Merman_NYWTS-restored.jpg)
