5 Steps to Finding Marriage Records
Show Notes: Marriage records are essential to building your family tree. Here are the 5 steps you need to in order to find an ancestor’s marriage record.
Watch the Video
5 Steps to Finding Marriage Records for Genealogy
Downloadable ad-free Show Notes Marriage Records Worksheet for Premium Members.
A really good Spring cleaning task is to look through your family tree, starting with yourself and working backwards, and just checking to see if you have all the vital records for everyone. Vital records include birth, marriage and death records. Civil marriage records are typically some of the oldest vital records, and offer valuable information.
Step 1: Determine the time and place.
Time and place are critical to marriage record searches. Records like census records can help you get within 10 years of a marriage, and can also help you narrow in on the location of the wedding. Thankfully, all U.S. Federal Census records are free and online at FamilySearch.
Marriage records are typically filed at the county level. However, they can sometimes be found at the town level, particularly in New England.
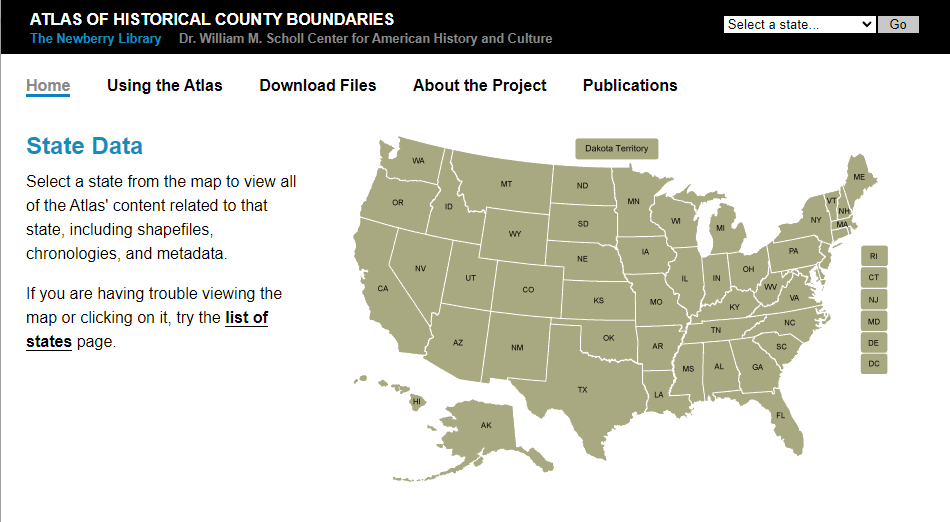
It’s very important to identify the correct county at the time of the estimated marriage. You can do that using the Newberry Library’s Atlas of Historical County Boundaries. Click on the state and then select the time frame.
Step 2: Use a genealogy guidance website
Genealogy “guidance” websites pull together information from a variety of sources to aid you in your research in a particular area. Here are two of my favorites:
The FamilySearch Wiki
Click on North America > United States > State. Scroll down the state page and click on the county. Use Alt + F to quickly search for the word marriage.
The wiki will likely also provide you with links and clues as to where to find the records. Remember, it’s not always a comprehensive list, but it’s a great place to start.
Learn more about the Wiki with these videos:
- How to Navigate the FamilySearch Wiki (and find what you need!)
- Dive Deeper into the FamilySearch Wiki (Genealogy Gems Premium Membership required)

If civil marriage records had not yet started when your ancestors married, look for church marriage records. Learn more with my video: How to Use Church Records for Genealogy (Premium)
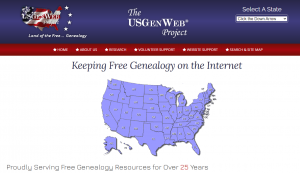
US GenWeb
- All-volunteer website
- Organized by state and then county.
- Great place to tap into the collective brain trust of genealogists interested in the same area.
- Provides information such as when records started, how to access them, or if they are no longer available.
- Provides links to online records.
Step 3: Genealogy Records Websites
If those leads don’t pan out, next turn to major genealogy websites. Start with the free FamilySearch, then if you have subscriptions to sites like Ancestry or MyHeritage, use those. (Note: These are affiliate links and we are compensated if you make a purhcase.) Only a fraction of these website’s record collections are included in their hints and suggestions. This means that the card catalog is essential if you want to scour all the records.
Learn more about searching Ancestry’s card catalog: Ancestry Top Tips and Hot Keys (Premium)

Video & Show Notes (Premium)
Step 4: Contact the jurisdiction that originally created the records
If you don’t get the record that way, you’ll need to do it the old-fashioned way: contact the county or town clerk.
Early vital records are often moved to the state level. That contact information can likely be found on the FamilySearch Wiki page you found, or you can Google:
County name, state “marriage records”
Check the following repositories:
- State Library
- State Archive
- State Historical Society
- County Historical Society
- Other: _________________________________________
Step 5: Google Search
If all else fails, turn to Google to see if there are any other repositories or online resources outside of the largest genealogy websites and archives. Use search operators to focus your search.
Example: Randolph County Indiana “marriage records” 1880..1900
The quotation marks ensure that the exact phrase (Marriage records) is included on each web page result you get.
Two numbers separated by two periods is called a Numrange search. This instructs Google to also ensure that each web page result includes a number (in our case, a year) that falls within that range. It’s a great way to target marriage records from a particular time frame.
Learn more about marriage record research with these two instructional videos:
- Marriage Records Case Study with J. Mark Lowe
- Marriage Records and Gretna Green with J. Mark Lowe
Resources
Downloadable ad-free Show Notes Marriage Records Worksheet for Premium Members.
History Hub Tutorial
Show Notes: Are you trying to work on a genealogy brick wall, and you think the records you need might be at the National Archives? In this video, I’m going to show you a new way that you can get answers and hopefully get the records quickly.
The National Archives is a great place to do that, but as I’ve mentioned before in this video, their website can be a bit daunting. However, I’ve got some good news. They have updated the website, and tucked away in that update is a special area where you can ask questions and get answers from many different sources including the staff at the National Archives.
It’s called History Hub. This updated platform is a place where the staff will actually answer your questions. You’ll also get responses from other archivists, librarians, museum curators, genealogists, and history enthusiasts. We all have areas of expertise and a wide array of experience, and the new History Hub makes it easier to help each other.
History Hub Show Notes
Downloadable ad-free Show Notes handout for Premium Members.
History Hub Free Account
Before you can ask a question or help answer a question, you’ll need to register for a free History Hub account. To do so, click the Create your History Hub account now link on the home page. Type in the account name you want, enter your email address and a password and click the box to agree to the terms of service.
If you are a returning History Hub user, you will need to reset your password and re-accept the community Terms of Use when you first log in.
Be aware that accounts that have not been used for over 1 year are automatically deactivated. So, you can email them at historyhub@nara.gov and they will reactivate your account.
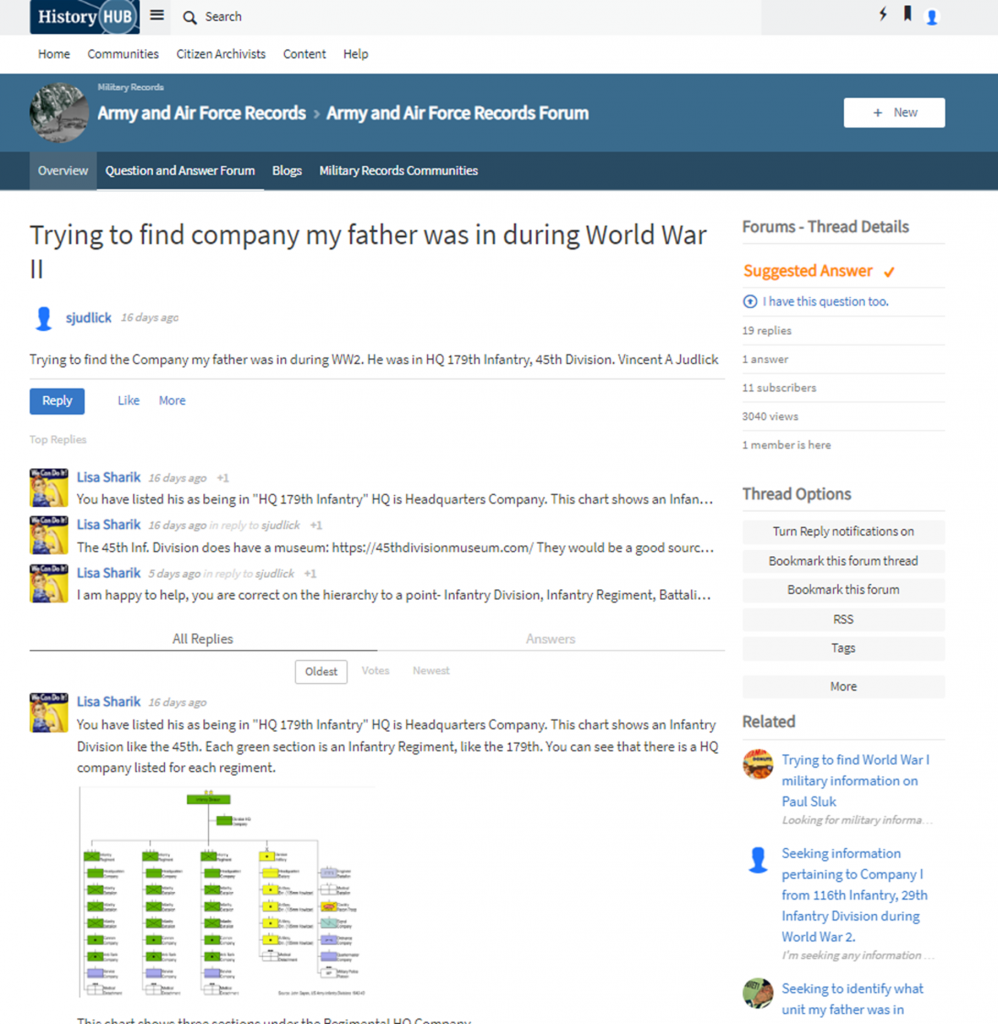
Searching History Hub
Searching for answers at the History Hub is pretty simple and easy to do. You can enter your question in the “Ask” field on the History Hub homepage, or within a specific community. And we’ll talk about communities in just a second.
Let’s first ask a question. There’s a very good chance that someone else has already asked a very similar question to the one you have and there may already be a lot of contributions that will have the information you need.
Go to History.gov and type your question or some keywords into the Ask box. Don’t click the Ask button just yet. Give it a second to show you any potential answers that are already on History Hub. They will appear as a list below the Ask box.
Again, those answers will build up over time, so if when you ask your question you don’t see a similar answer, that’s OK. Go ahead and click the Ask button now and you’ll be taken to a page called Ask a Question in Researchers Help where you can write up your question. Include any relevant information you already know, such as names, dates, and places, and also mention specifically where you’ve already looked. That’s going to help them help you.
You can also add Tags to your question so that if someone searches for a tag, your request will also pop up. And be sure to check the box at the bottom so that you’ll be notified when someone replies to your post.
There are a couple of things to understand and keep in mind. First, all questions are public. So don’t post your phone number or other personal information about you or other living people.
Second, all questions are reviewed and moderated to make sure they comply with History Hub’s Terms and Conditions which again you can read when you sign up for your account. They only moderate and answer questions on weekdays during regular business hours, so patience is a virtue here.
In addition to the Ask a Question box, you’ll find a search bar at the top of the page. This search field searches the entire History Hub website. It’s very similar to the Ask a Question search bar in that once you enter your search terms, you’ll want to wait and let it populate possible answers that are already on the website. It will show you Forums, blogs and communities where your terms are being discussed.
You’ll also find a link to Advanced Search in the bottom right corner of that prepopulated list. This gives you a place to filter down in several creative ways which is very handy if you’re looking for information on a pretty broad topic or one that has had a lot of activity on History Hub.
History Hub search example
They even give you an RSS feed for your specific query. So, if you use an RSS reader to follow blogs and podcasts, you could add this link to it to sort of bookmark this search and keep up to date on the activity on this topic. If you don’t use a Feed Reader currently, but that sounds interesting to you, check out a feed reader like https://feedburner.google.com/ or just google Feed Reader.
Browsing History Hub
Even if you don’t have a specific question, History Hub is worth browsing. There are a couple of ways to do that.
When looking at a community (for example, the Genealogy page), you’ll see:
- Ask a Question.
- Recent Blog Posts from this community.
- Top Questions where you can look through the most popular questions and topics. This also includes threads from related forums. Use the filters underneath the title of this section to focus even more.
- Activity Stream which features the most recent conversations.
- Explore Communities. History Hub currently hosts 19 communities, including “Researchers Help,” Military Records, Genealogy, and more. To see them all, click on Communities at the top of any page on the History Hub website.
At History Hub you can not only ask questions, you can also answer them. Since all of us have expertise in our own areas of genealogy, History Hub encourages everyone to share their knowledge and experience with other users who are new to archival and genealogical research. So, you can help out a fellow genealogist by clicking Reply at the bottom of their post and sharing what you know about the topic.
Notifications, Updates, and Subscriptions
As I mentioned before, this site is building up content over time. So, you’re probably going to want to follow topics, and History Hub offers a couple of ways to do that.
Forum Updates & Notifications
If you’re interested in following a particular topic, such as Census Records, or Army and Air Force Records, you can get updates by email and on the platform for all new questions and answers in that specific forum. To do that, click on any community’s Question and Answer Forum tab, then click the Turn Forum notifications on link in the sidebar of that Forum’s homepage.
Subscribe to Community Updates
You can also receive daily or weekly email updates within a specific community, including new blog posts and questions. To do that on any Community Overview page, click “Email digest options” in the right column sidebar.
Getting Help with History Hub
History Hub Help Files: Getting Started. Again, this website is newly revamped, so they are still working out the bugs. You can report any problems or ask questions in the Technical Help and Support Forum.
Resources
Downloadable ad-free Show Notes handout for Premium Members.
Cemetery Research for Genealogy: 4 Steps for Finding Your Ancestors’ Graves
Cemetery research is a crucial family history skill. Tombstones are monuments to our ancestors lives and may have key genealogical clues engraved in the stone. Follow these four steps to finding your ancestors’ burial places and the records that complement them.
Many of my ancestors are buried just two miles from my house in Round Hill Cemetery in Marion, Virginia. I drive by the cemetery each day, as I take my daughters to school. I never pass by without glancing up at the hallowed ground which holds the remains of those who came before me. The sun perfectly illuminates their resting place each morning and a majestic tree stands at the very top of the hill–a living monument to the lives they led in the town where I now raise my own family.
It is an emotional experience to stand in the place where an ancestor’s remains have been laid to rest.
Each time I visit the grave of my grandma, I have a vision of a family standing around a casket on a bitter cold day in March. It was a just few days before the official start of spring, but it was the dead of winter to me. That ground is sacred to me, now.
Each time I visit, I am transported back in time to that day. A wound is re-opened for a moment, but the moment is fleeting because I quickly remember her life, not her death.
I remember the stories she told, the service her hands rendered to her family and, most importantly, the love that transcends time and even the icy grip of death. Death truly loses its “sting” as we stand before a monument of stone and see beyond to the life it represents. Scenes like this one have played out at each grave.
I am reminded of this quote from Fear Nothing, a Dean Koontz book, whenever I visit the cemetery:
“The trunks of six giant oaks rise like columns supporting a ceiling formed by their interlocking crowns. In the quiet space below, is laid out an aisle similar to those in any library. The gravestones are like rows of books bearing the names of those whose names have been blotted from the pages of life; who have been forgotten elsewhere but are remembered here.”
I have often gone to my ancestors’ resting places to take pictures of headstones and search for relatives I may have missed in the past. It seems like each time I visit, I notice something new.
This library of marble holds many clues that have helped me break down brick walls in my family history research. These clues have been there, etched in stone, for decades. It wasn’t until I recognized how to read the clues that I began to understand the importance of cemeteries in family history research.
These resting places have become much more to me than merely a place to go and offer a bouquet of flowers. There are answers waiting to be discovered. The key to getting the answers is knowing which questions to ask.
In my experience, the best genealogists are not the ones with the best cameras, the best software, or the best gadgets–they are the ones with the best questions.
Curiosity is the most important tool to the successful genealogist. The next time you find yourself in a library of marble, take a few moments to let your curiosity run wild. Ask yourself:
- “Who are the people surrounding my family members?
- What are their stories?
- What do the etchings on their headstones mean?”
That curiosity will lead to the most remarkable discoveries and you will see for yourself how a piece of marble truly can break down a brick wall.
Below I’ve outlined the steps for finding family cemeteries and which questions you should be asking when you get there. Get inspired by my own examples of breaking down brick walls, and implement these methods I used for your own success!
Cemetery research step #1: Identify the cemetery
The first step in cemetery research is to identify the name of the cemetery where an ancestor was buried.
The best places to start looking are death certificates, funeral home records and obituaries. Each one of these records should contain the name of the cemetery where a family member was buried.
We sometimes fail to look beyond the names and dates on death certificates. If we get in the habit of taking the time to absorb all of the information on these important documents, we will find genealogical treasure.
Sometimes, the death certificate will not give us the name of the cemetery.
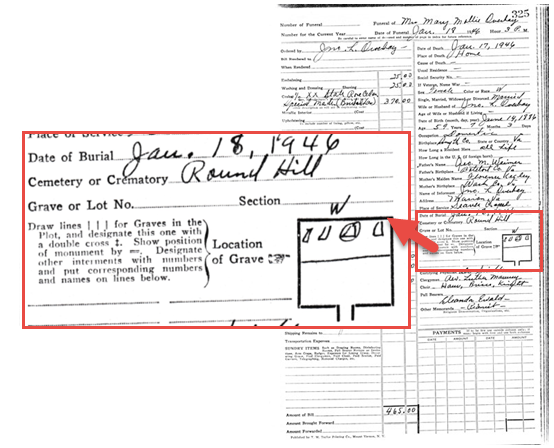
This was the case with my great-grandmother, Mollie Weimer Overbay. I was frustrated to see that the death certificate only indicated that she was buried, as opposed to cremated or removed to another location. While the certificate did not provide me with the name of a cemetery, it did offer the name of the funeral director: W.B. Seaver.
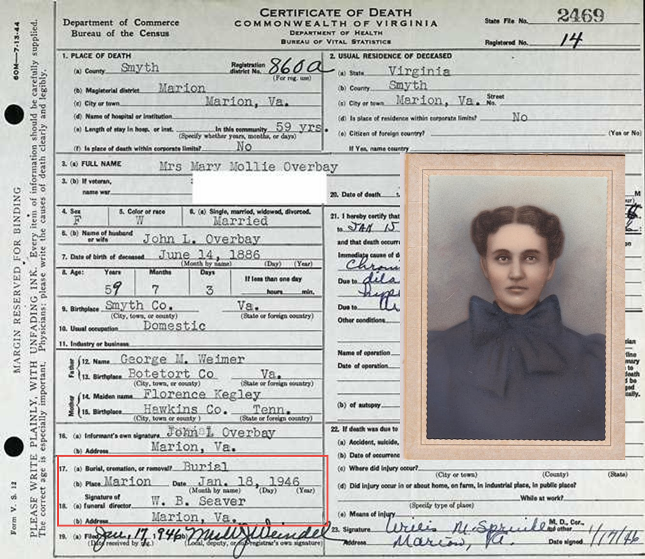
Luckily, I was able to follow this lead to the local funeral home. Within their records, I discovered that she was buried in Round Hill Cemetery, along with many of my other ancestors.
Cemetery research step #2: Locate the cemetery
Once you have located the name of the cemetery, several resources can guide you to its location.
Three helpful websites are listed below. Which you choose may depend on personal preference or familiarity but also on which site seems to have more records for the locales of most interest to you.
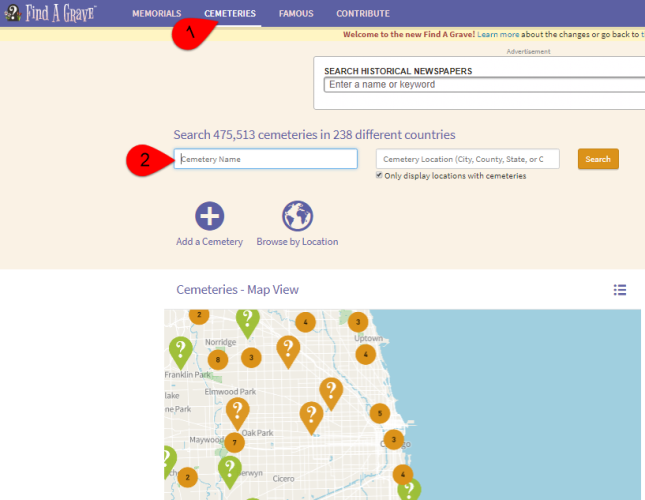
1. One of my favorite online resources is Find A Grave.
This website allows you to search for cemeteries all over the world.
At the home page, click on the Cemeteries tab (#1, below).
Then enter the name or location of the cemetery (#2). In the screenshot below, you can see part of the Google Maps interface that shows you the exact location of the cemetery, should you want to visit in person:
Find A Grave also has pictures of many of the headstones located within cemeteries.
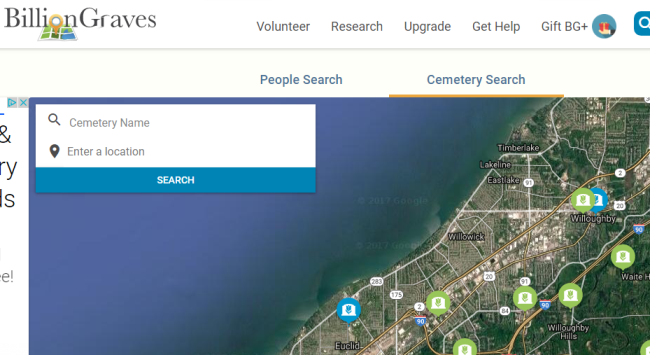
2.  Billion Graves allows users to collect photos of headstones by using an iPhone/Android camera app.
The app, available on Google Play and the App Store (for iPhone and iPad), tags the photos with the GPS location and, essentially, maps the cemetery as headstones are added.
Search for cemetery locations using the Billion Graves app or on the website by selecting the “Cemetery Search” option and then entering the name of the cemetery or a known address (to see it on Google Maps):
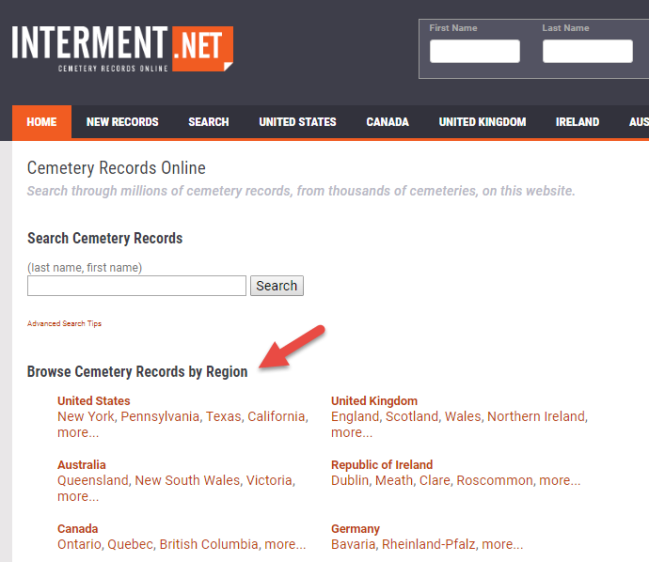
3. Interment.net can also be helpful.
From the home page, scroll down just a little until you see “Browse Cemetery Records by Region.” This can be especially helpful if you’re looking for all records within a specific county or other region. However, it’s not quite as useful if you’re trying to locate all cemeteries within a certain radius of a location, regardless of local boundaries.
In addition to these resources, it is essential to contact the local library, genealogical society, and/or historical society where your ancestors are buried. These organizations are well-known for maintaining detailed listings of local cemeteries within their collections.
For instance, within Smyth County (where I live) there is a four-volume set of books that contains the work of two local historians, Mack and Kenny Sturgill. They spent several years mapping local cemeteries and collecting the names on all of the headstones.
Although these books were completed in the 1990s, the information is still valuable to genealogists. Detailed driving directions were given to help future researchers locate cemeteries that would otherwise be difficult to locate. Many of them are on private property and even in the middle of cow pastures or wooded areas.
Furthermore, some of the headstones that were legible in the 1990s have now become difficult to decipher due to weathering or have altogether disappeared. It is likely that the counties in which you are conducting cemetery research offer similar resources.
Cemetery research step #3: Prepare for a visit
Once you have found the cemetery you want to visit, you will want to take the following items along with you to make the most of your visit:
- a camera
- pair of gloves
- grass clippers
- notebook and pen
- long pants
- sturdy shoes
You may also want to use a damp cloth to bring out the carvings on headstones. A side note: if you are like me and have an aversion to snakes, you will either choose to go on cemetery expeditions during the winter, or you will invest in a pair of snake chaps.
Get more help! The Family Tree Cemetery Field Guide (above) contains detailed step-by-steps for using FindAGrave and BillionsGraves, plus guides for understanding tombstone epitaphs and symbol meanings.
Disclosure: Genealogy Gems is a participant in the Amazon Services LLC Associates Program, an affiliate advertising program designed to provide a means for sites to earn advertising fees by advertising and linking to Amazon.com. Thank you for supporting our free podcast by using our link.
Cemetery research step #4: Visit and search for clues
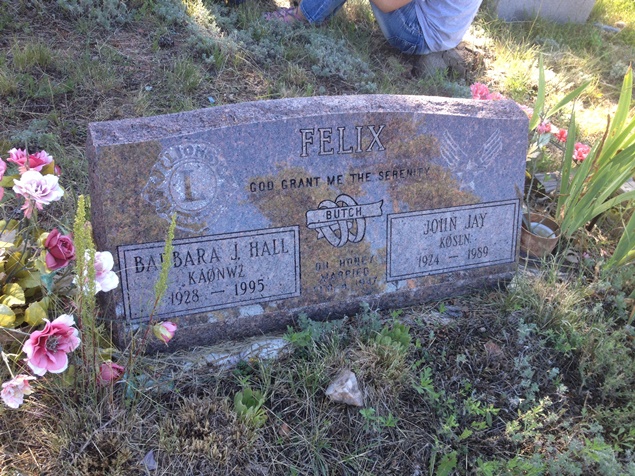
This headstone shows something unusual: the couple’s ham radio call signs (the codes engraved just below their names).
The headstones found in cemeteries can reveal much about your family. You will find more than birth and death dates. If you look closely, you will discover symbols related to military service and religious beliefs, maiden names of the women in your family, and you may even find family members that you never knew about. Many times, you will find children buried in the family plot. Look around to see who is buried near your ancestors. It is likely that you will find connections to other family members when you are visiting the cemetery. These connections may lead you to break down long-standing brick walls within your family history.
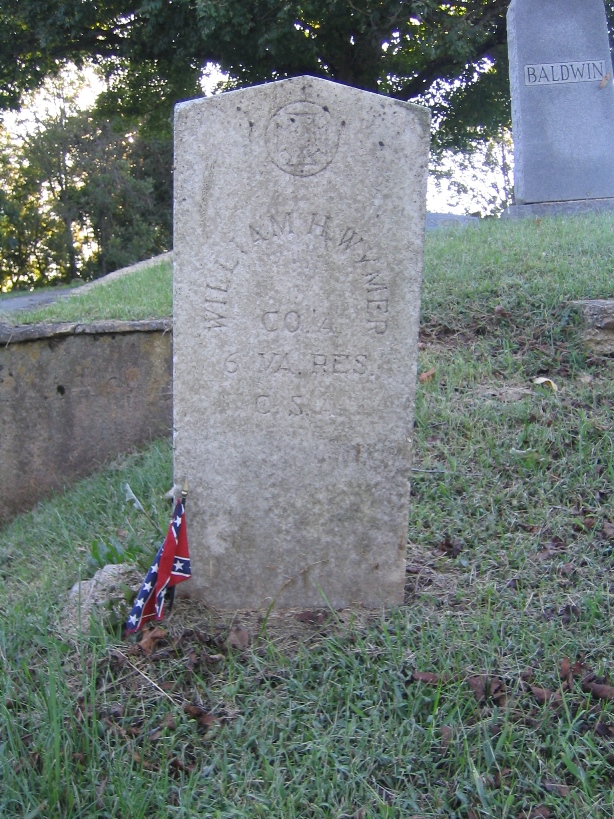
In my own experience, there have been several instances in which cemetery research has helped shed light on a family mystery. I had grown up hearing that there were members of our family who had fought in the Civil War. Who were these men? What experiences did they have during the war? Where had they fought?
The answers to these questions came as the result of a visit to the cemetery. I had gone to Round Hill Cemetery to photograph the headstones of my Weimer ancestors. As I worked my way down the row, I encountered an unfamiliar name—William Henry Wymer. At the top of his headstone, there was a Southern Cross of Honor—a symbol used to denote a soldier who fought during the Civil War. Below his name was the following inscription: “Co. A, 6 VA RES, C.S.A:”
When I went home that afternoon, I began to search for more details. With some census research, I learned that he was the uncle of my great-grandmother, Mollie Weimer Overbay. Upon confirming his relationship to our family, I began searching for a pension application for his wife, Rhoda:
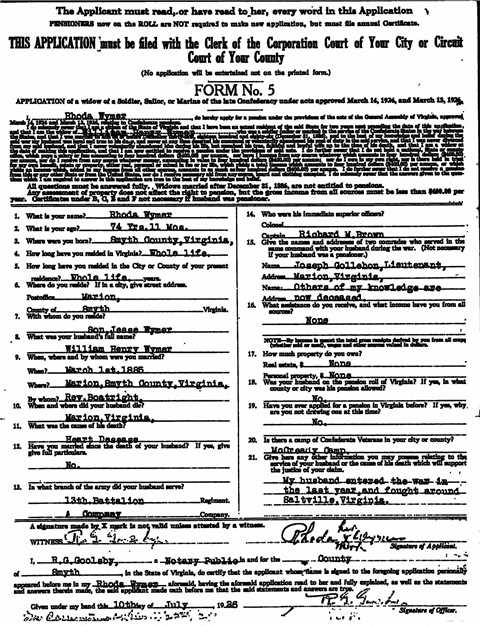
The application had been submitted in 1926 and told the story of William’s life. Among other things, I learned the answers to my questions about his service during the Civil War. His wife indicated that he enlisted during the last year of the war and was present during a well-known battle in our county—the Battle of Saltville. I am sure that my great-grandmother had grown up listening to tales of this battle and William’s experience during the war. The details of the story had been lost but were now re-discovered thanks to a trip to the cemetery.
Subtle clues like this one await you as you search out your own ancestors. The next time you make a trip to one of these libraries of marble, take a few moments to look closely at the clues that surround you. They may not be obvious, but they are there, waiting for your curiosity to uncover them. So, bring your cameras, your gloves, and your grass clippers to the cemetery on your next visit—but don’t forget to bring your questions and your ability to perceive the minute details, as you stand beneath the towering trees, among the rows of marble, waiting to offer up their long-held secrets.
More cemetery research tips
- Cemetery records: An alternative to death records

- How to find cemeteries in Google Earth
- How to read a faded tombstone without damaging the stone
Disclosure: This article contains affiliate links and Genealogy Gems will be compensated if you make a purchase after clicking on these links (at no additional cost to you). Thank you for supporting Genealogy Gems.