Not all people of color were enslaved prior to the emancipation. In fact, many were freed long before that. Researching free people of color can be quite complex. Tracing my own family line (who were free people of color) continues to be a real learning process for me. However, don’t let the challenges deter you from exploring this rich part of your heritage. In this “Getting Started” post, we discuss the manumission process, “negro registers,” and more for tracing your free people of color.
Who are Free People of Color?
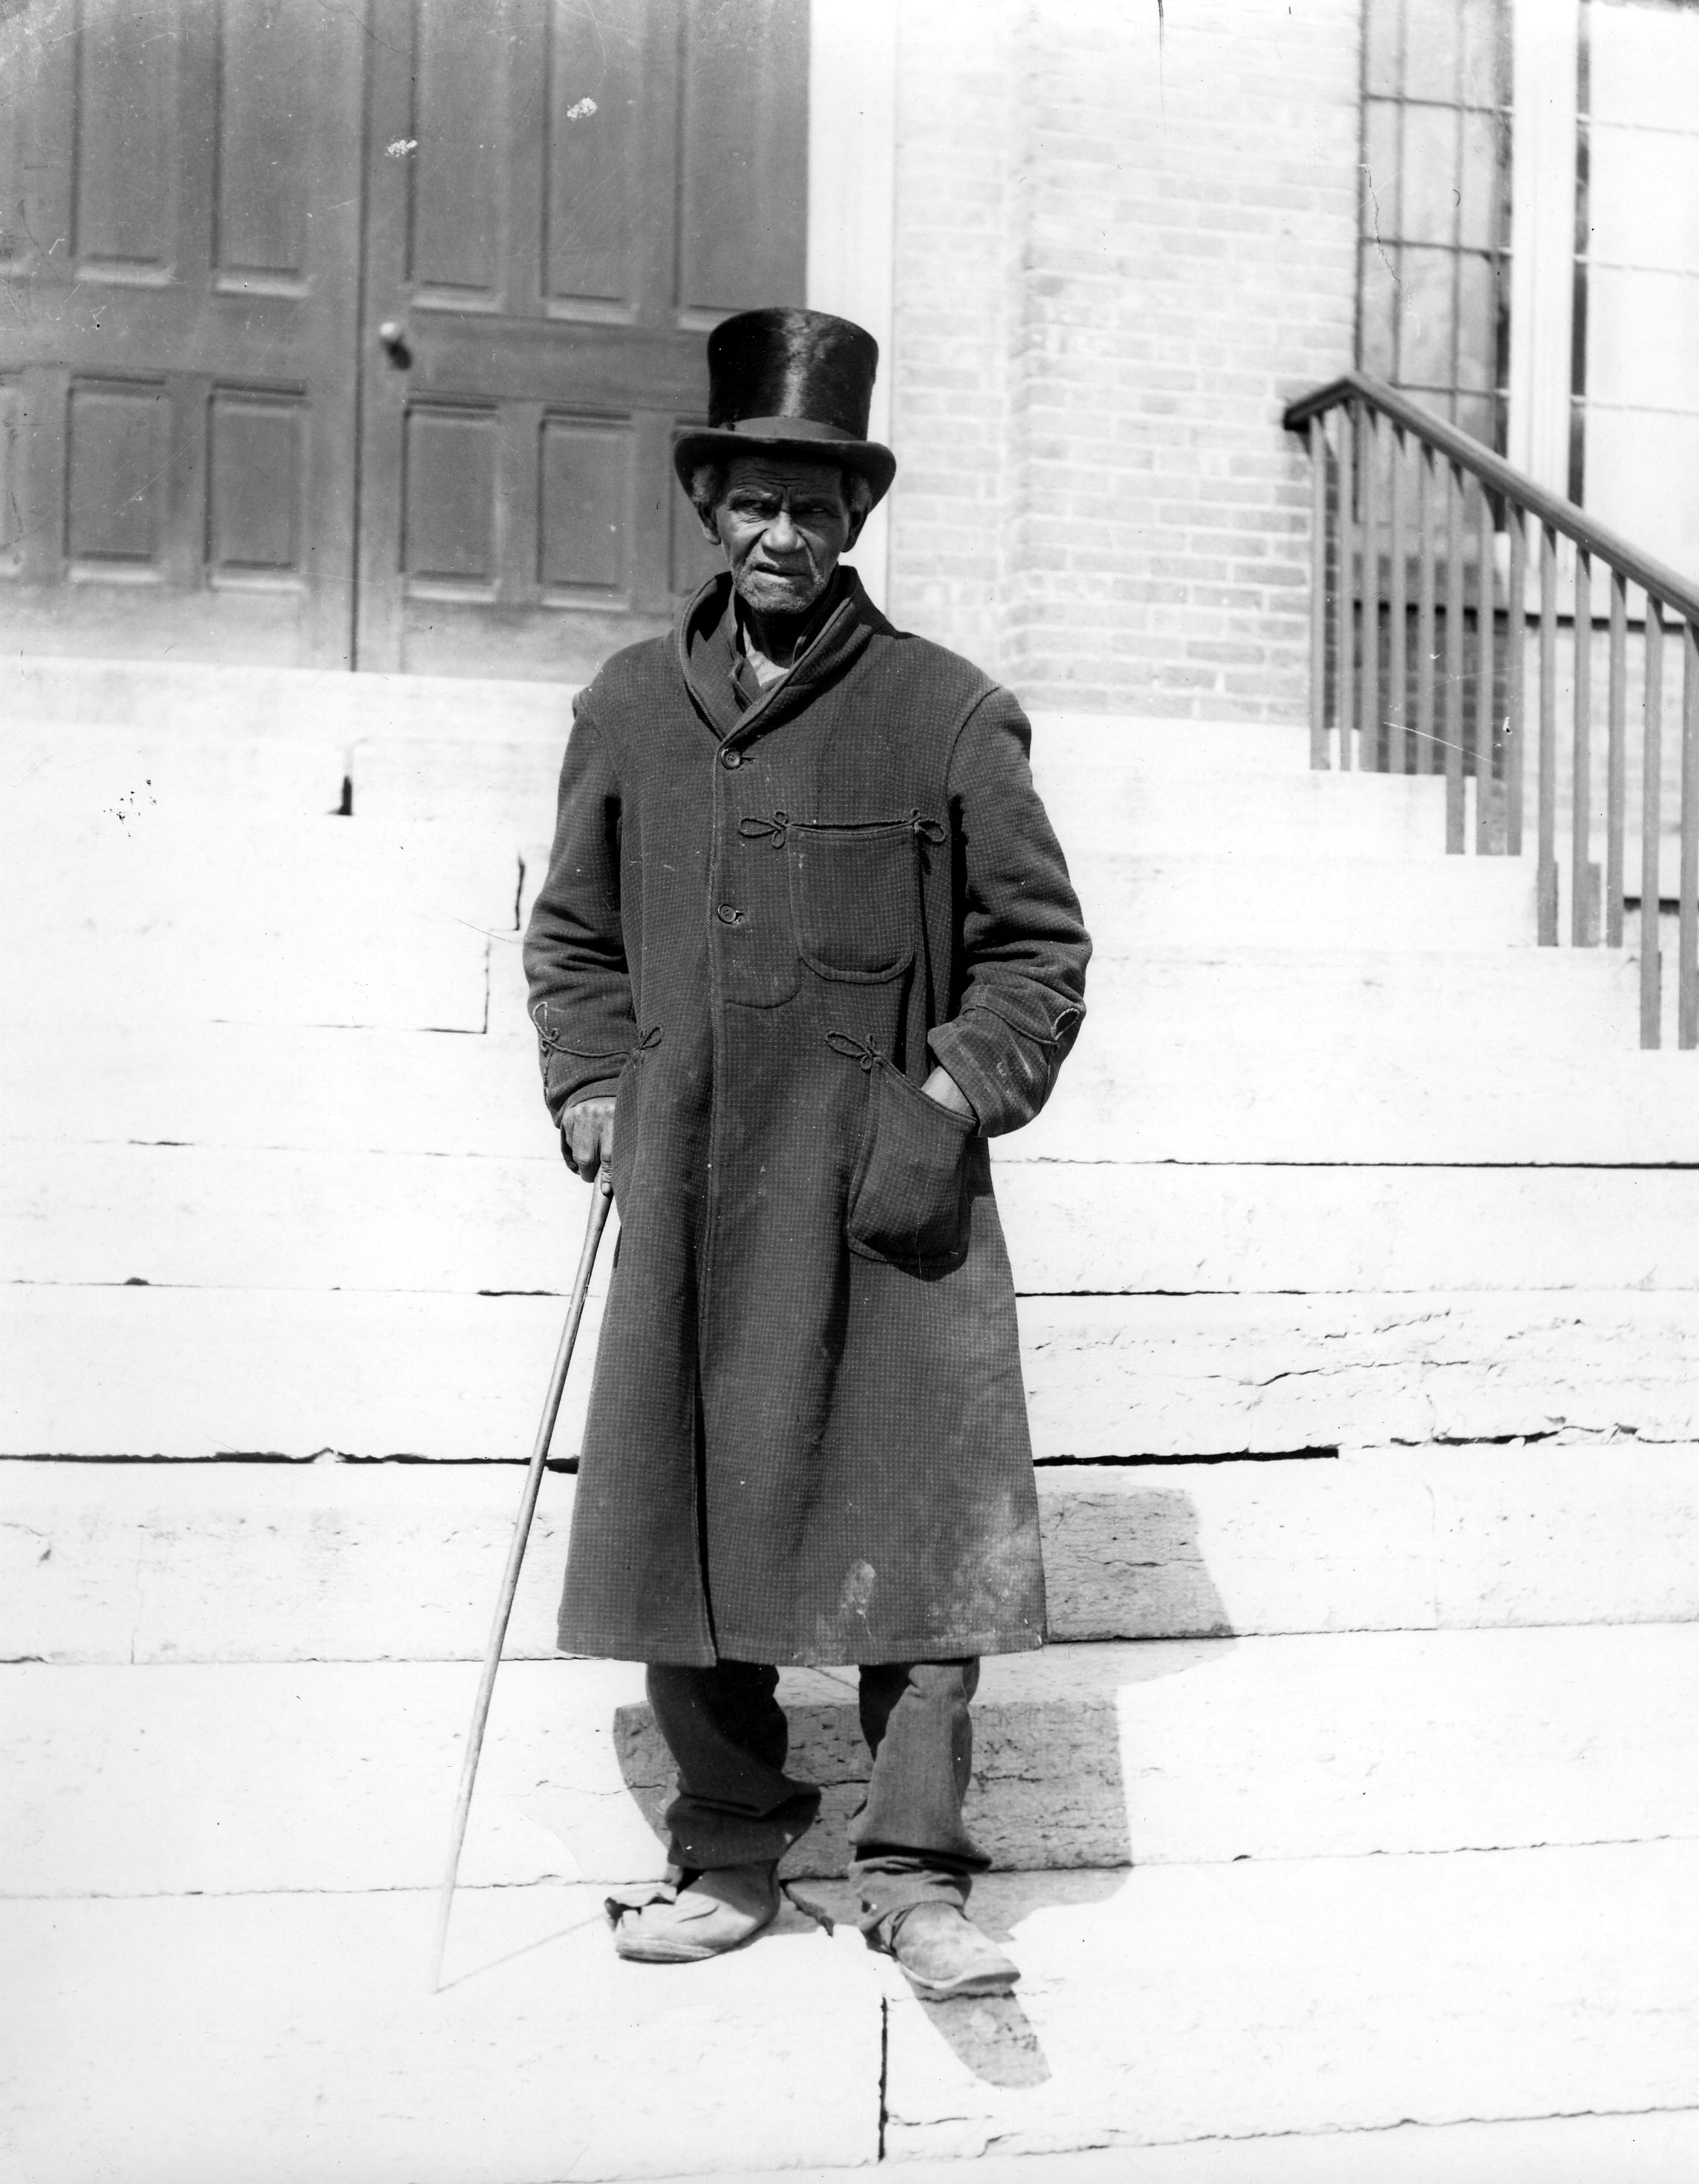
[Note: Throughout our post, we will be using terminology that was used at the time the records were created.] A ‘free negro’ or ‘free black’ was a fairly recent status in the U.S. which differentiated between an African-American person who was free and those who were enslaved prior to emancipation. If a person was referred to as a ‘free negro’ or ‘free black’, that meant the person was not living in slavery. It is a fascinating and little know fact that, as Ancestry Wiki states, “one in ten African-Americans was already free when the first shots were fired on Fort Sumter.”
Step 1 for Tracing Free People of Color: Censuses
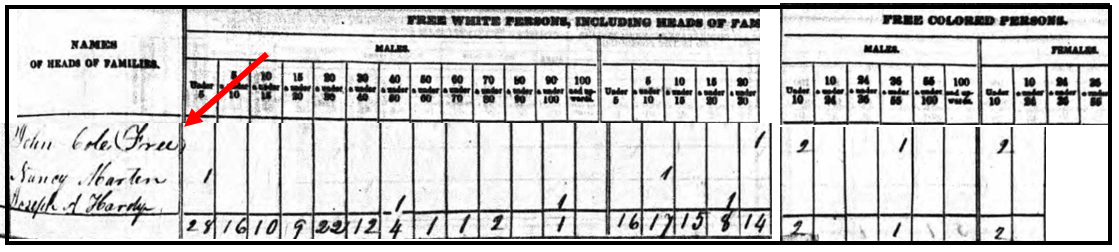
Sometimes, the story of your ancestors being free people of color was passed on through oral traditions. In my own family, our “line of color” was not talked about. Instead, my first clue was when I found my ancestor in the 1840 population census listed as free. I also found that one woman (presumably his wife) was marked in the column for “free white persons,” but John and the children were marked as “free colored persons” in this census. This was the first step to identifying my ancestor as a free person of color.
Let’s see another example. The 1850 and 1860 U.S. Federal Censuses included two population schedules. One enumerated free inhabitants, and the additional schedule, referred to as a Slave Schedule, was for making an enumeration of those persons who were enslaved. [We will discuss this further, below.]
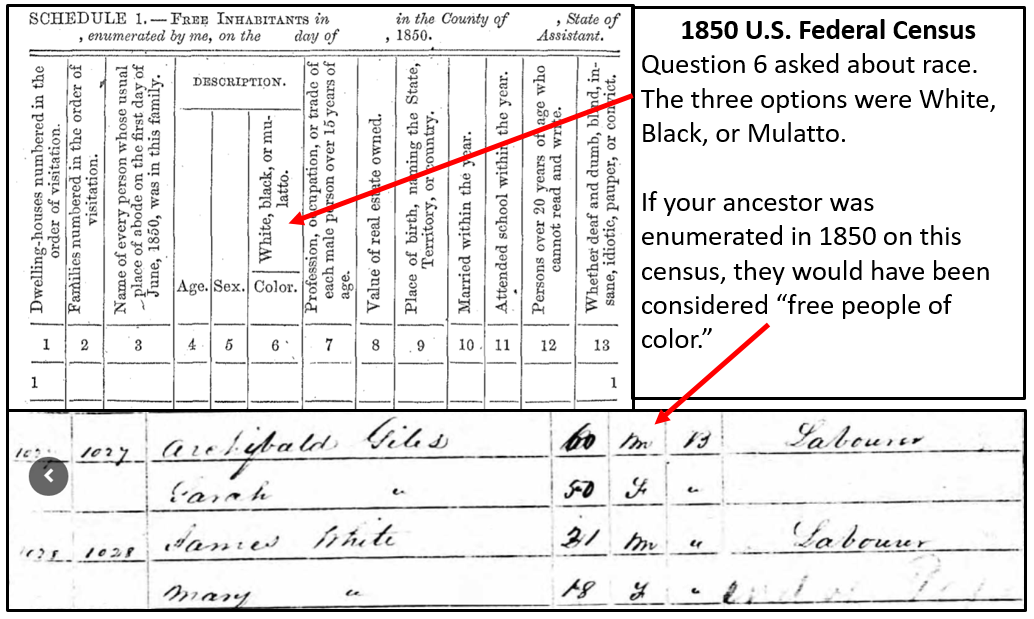
If your ancestor appears on the 1850 U.S. Federal Census for free inhabitants, they are considered free, even if their race was listed as “Black.” An example of a Black man enumerated on the 1850 census is shown in the image below. Archibald Giles is recorded as “Black,” but appears on this census for “free inhabitants.” Therefore, he would be considered a free person of color.
If your targeted ancestor does not appear on either the 1850 or 1860 population schedule for free inhabitants, they might have been enumerated on the slave schedules of 1850 or 1860.
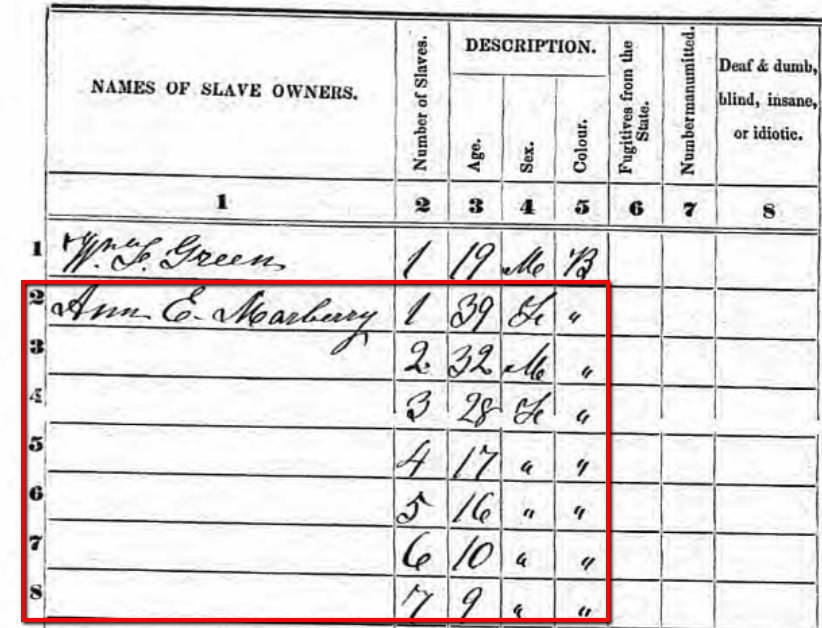
1850 Slave Schedule for Henry County, Tennessee. Snapshot via Ancestry.com.
In this example to the left, you will see a portion of the Henry County, Tennessee Slave Schedule for 1850. Notice, only the heads of household or the “owners” were listed by name. Slaves were not named, but rather listed by age and sex under the names of their “owners.”
Step 2: The Manumission Process
Once you have identified that you have free people of color in your family tree, the next step is to determine how they became free. Many free people of color came from families that had been free for generations. This could have been due to a manumission of an ancestor or a relationship between an indentured white woman and a black slave. I make mention of this relationship between races because it is helpful to remember that the status (whether free or enslaved) of the child was based on the status of their mother. If the mother was free, then the child was free. If she was a slave, then the child was enslaved. [1]
Manumission was a formal way in which slaves were set free. There are many reasons why a slave owner may have released or freed his slaves. In some cases, slave owners would free their mistresses and children born to her. In one case, I found the following comment made by the slave owner, “I give my slaves their freedom, to which my conscience tells me they are justly entitled. It has a long time been a matter of the deepest regret to me…” And thirdly, it was possible for a slave to obtain their manumission through the act of “self-purchase.”
If the mother was free, then the child was free. If she was a slave, then the child was enslaved. [1]
Private manumission through probate. A private manumission decree could be made in a last will and testament. You can find these manumissions in wills, estate papers, or in probate packets. Many of these county level probate records have been microfilmed or digitized and are easily accessible online.
Sometimes, a manumission in a will would be contested. When this happened, a long paper trail of court documents may have been created. A thorough search of all of these proceedings may offer a wealth of genealogical data and clues.
Usually, manumission papers included the name of the slave owner, the name of the slave, and the reason for manumission. In the case of the slaves of John Randolph of Roanoke [Virginia,] his slaves were not named individually in his will written on 4 May 1819. Instead he stated, “I give my slaves their freedom, to which my conscience tells me they are justly entitled. It has a long time been a matter of the deepest regret to me, that the circumstances under which I inherited them, and the obstacles thrown in the way by the laws of the land, have prevented my manumitting them in my lifetime, which is my full intention to do, in case I can accomplish it.”[2]
John freed over five hundred slaves, and though each of them was not listed by name in his will, a codicil at the end of the will did name two of his slaves when he asked that Essex and his wife Hetty “be made quite comfortable.”[3]
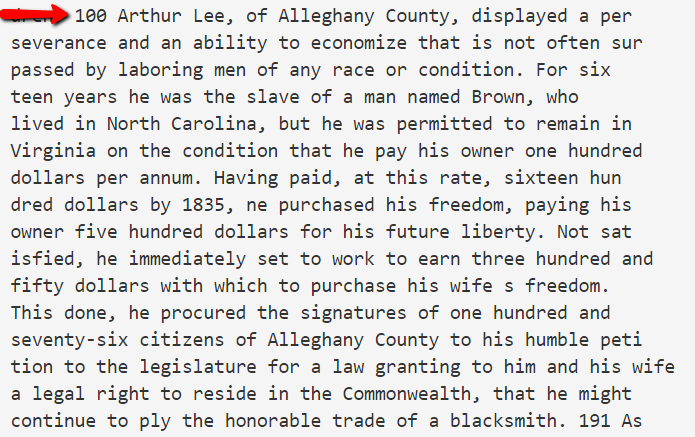
Record of Arthur Lee purchasing his freedom.
Manumission through self purchase. Self-purchase may seem impossible; however, many slaves were not required to work on Sundays for their masters.[4] On this day, men and women could hire themselves out to do work for others. With frugality, they could save their earnings to buy their freedom or the freedom of their loved ones, though this was very, very difficult.
As you can see in this example of Arthur Lee, he was able to pay for his freedom and the freedom of his wife, though it took many years. This type of record could be found in a published book, a record listed in notarial books of the county, civil minutes books, or other courthouse holdings. It is important to speak with a knowledgeable person in your targeted area about where you should look. A knowledgeable person may be those working with the local historical or genealogical society, or a head of the local history department of the public library.
Step 3: “Negro Registers”
If you do not find the manumission in a last will and testament, perhaps due to a courthouse fire or other loss, you may have luck searching the county records where your free people of color later settled. Free people of color were often required to register, using their freedom papers, when they relocated to a new area. These types of records are called ‘negro registers’ or ‘records of free negros.’
Newly freed people carried with them their freedom papers which were given to them when they were manumitted. Once they relocated, they would register with the county clerk. They would need to show the county clerk these freedom papers and a record was made in the register. The record may include the name of members of the family, ages, and most recent place of residence.
The book titled Registers of Blacks in the Miami Valley: A Name Abstract, 1804-1857 by Stephen Haller and Robert Smith, Jr. provides the following information about registers of freed people:
“From 1804 to 1857, black people in Ohio had to register their freedom papers with the clerk of courts of common pleas in the county where they desired residency or employment. State law required this registration, and clerks of court were to keep register books containing a transcript of each freedom certificate or other written proof of freedom (see Laws of Ohio 1804, page 63-66; 1833, page 22; 1857, page 186). Few of these registers have survived to the 20th century.”[2]
Though this author says that only a few of the registers have survived, I found some microfilmed registers listing the names of free people of color who had settled in Miami County, Ohio at the local historical society archives. Again, it is important to ask those people who would be most knowledgeable, and in this case, it was the historical society.
In conclusion, we understand that tracing both our enslaved and manumitted ancestors is often a difficult task. We also know there is much more to learn and share for the best techniques to researching these lines. We encourage you to review some of the additional sources below. Please let us know what other resources have been most helpful to you in researching your free people of color in the comments section below. We want to hear from you!
When you’re working on our genealogy, you’ve got data and records coming from all directions: websites, interviews, archives, downloadable documents, and more. Some of it you’re actively working on, some of it you need to save for later, and the rest has already been analyzed and is ready for archiving. This variety of data requires a variety of storage locations.
Watch episode 71
In this week’s special episode of Elevenses with Lisa (episode 71) I’m going to share with you my genealogy data workflow. We’ll talk about how it all fits together to ensure an uncluttered desk and the ability to instantly put my hands on what I need when I need it. If that sounds like something that you need help with, please join me this week.
Three ways to watch: 1. Video Player (Live) – Watch live at the appointed time in the video player above. 2. On YouTube (Live) – Click the Watch on YouTube button to watch live at the appointed time at the Genealogy Gems YouTube channel. Log into YouTube with your free Google account to participate in the live chat. 3. Video Player above (Replay) – Available immediately after the live premiere and chat.
Episode 71 Show Notes
Barbara left a comment saying she found our recent videos that we called How Alice the Genealogist Avoids the Rabbit Hole helpful (episode 68 and episode 69), but she did had a question about Evernote. She asks, “Once you have processed (the genealogy record) and extracted the information you need, do you remove them from Evernote and place them in your digital genealogy filing system? I get a bit confused in thinking about what the other purposes of Evernote might be. Wouldn’t I just save my documents, newspaper clippings, etc. to my digital files on the hard drive and also to my Google Drive folders? Is there any need to also have them in Evernote?”
This is a great question, and I think the best way to answer it is to talk about my entire genealogy workflow in which programs like Evernote play a part.
It really helps to have a consistent way to capture and find what you’re actively working on. My workflow works great for me, but its just one way. Follow along with me and see if this might be a flow that will work for you.
The Genealogy Data Flow
Let’s start off with an overview of my workflow. And there are really 5 major workstations, if you will, that your data flows through. Some of these we’ve discussed previously here and also in several Premium Member videos:
Active Genealogy Work
This is the stuff we are working on currently. I several different tools to capture and work on these items: Evernote, genealogy website subscriptions, “pending” folders on my computer, pending tabs in my 3 ring notebooks and physical pending box on my desk. We discussed this in Elevenses with Lisaepisode 7.
Conclusions added to Master Genealogy Database (Software on your computer)
Archival Digital Storage (your computer.) See episode 8 (Digital Archiving) You can certainly keep archival items in Evernote as well.
Archival Paper Storage (your binders.) See episode 6(Paper Archiving)
Cloud backup. I use Backblaze at https://www.backblaze.com/lisa (affiliate link – thank you for your support of our free content)
Incoming Genealogy Sources
Not everything I find while researching is ready to be archived the moment I find it. Some items are actively being found and worked with such as:
Items I’m exploring for the potential application to my current research project
Items pending analysis
Unproven items
Items playing a role in a bigger research question that I want all together for now.
Bright Shiny Objects (BSOs) – stuff I found along the way that doesn’t relate to my current research goals
Not everything is captured on my computer. Many items (photos, audio and video records, typed notes) are captured on my phone and my iPad. So, I need an easy way to funnel everything back to one active workspace. A cloud-based notetaking service allows me to do this because it’s available as software on my computer and an app on my mobile devices. All synchronize through my account on the cloud. I use Evernote (affiliate link – thank you for your support of our free content) so I’ll refer to that, but there are others out there like OneNote, and Google Keep. (Learn more about how to user Evernote in episode 70.)
Evernote allows me to:
Capture and hold items
search and retrieve more effectively than on my computer thanks to OCR (subscription)
work my genealogy research plan
easily collaborate with another researcher by sharing a single link
Store and share media such as audio and video recordings
OK, so does everything go straight into Evernote? The answer is no. So let’s take a look at what happens to a digital item when I get it. I’m going to call it data, but it could be a downloaded genealogy record, a web clipping from a website, a photo of a gravesite I took with my phone, or anything else that includes information I want to use.
Working Your Genealogy Research Plan
When we work our genealogy research plan, we will inevitably locate documents. Typically, these are digital, but sometimes we find a physical document and make a digital copy of it.
Before a digital item is deemed relevant and ready to archive, we have a lot of work to do. We need to evaluate and analyze the document to determine its value and its possible application to our family history. If deemed reliable and applicable, we then need to extract the data and enter it into our family tree software. We may also decide to add some or all of the information to other places such as our online tree if we have one.
Many times, all of this work can’t happen in one sitting. We may need to be able to review and work with the item several times before we’re finished with it. I call this “processing” the document.
Even after its processed, we may still need the item nearby for reference as we work our research plan in the hopes of reaching our goal. At this stage, I consider this item to be “Active.” The opposite of that would be items I consider to be “Archived.” An archived item has been fully utilized and is no longer playing an active role in my research plan. That’s not to say I may not need to reference it again in the future, which is why it must be archived where I can retrieve it. The point is that the item is not relevant to my current active research. For example, perhaps it pertains to my mother’s side of the family and right now I’m working on my father’s side of the family.
My active digital items are typically added to Evernote, which I consider to be my Active workspace. It is not my archival space. However, this is not to say that you can’t store everything in Evernote forever if that’s what you want to do. You certainly could. I’ve given this a lot of thought and there are a few reasons why I don’t store everything in Evernote.
The main reason I don’t store everything in Evernote is that I’m a firm believer in retaining control of my data. If we store everything on a website or in a cloud service (which Evernote is), they (or their hosting provider) could pull the plug tomorrow and it would all be gone. I certainly don’t think that would happen overnight, although there are real cases of that happening. But I don’t want to take the risk, and I don’t want to have to scramble in a panic to move a mountain of data because I’ve been given a 30 day notice that a service is ending or has been sold to another company. (And let’s not even think about the possibility that the email notification of that happening went to my Spam folder!)
In order to retain control of my family history data, my long-term data storage needs to be within my control: my computer, external hard drives (both backed up with Backblaze) and paper print outs. That being said, when it comes to my active research project, I’m willing to trade the risk for the speed and convenience of using an online tool or service such as Evernote. My active research is a small fraction of my total research, most of which has been archived on my computer.
So, when I first find an item, I have a decision to make: where am I going to put it? Will I save it to my computer or to Evernote? It depends on what it is.
Items I save to Evernote:
Items needing OCR to be most useful. Examples: Newspaper articles, web clippings
Items created with my phone or tablet. Examples: Photos of gravesites and documents, interview audio recordings, videos of research trips
Items needing analysis before confirmed as pertaining to my family. Examples: Record downloaded from a genealogy website. I want these in Evernote because everything is together in one place. Tags and the search feature allow me to instantly retrieve any combination of records I need at any given time for cross reference. And if I need to share any or all of the items with another researcher it’s easy to do with just one share link. A cloud notetaking service make working your research plan much easier. (Premium Members watch my video class Collaborative Genealogy with Evernote.
Example:Items pertains to my family but not part of my current research project.
Downloaded genealogy records I don’t have time to process right now.
All items are tagged with relevant information to make them quick and easy to find in addition to keyword searching.
Items I save to my computer hard drive:
Items to I want to keep that have been processed.
Digital scans of visual items. Examples: Family Photos, old postcards
Large files created on my computer (audio, video).
I have a solid system for organizing my folders and file on my computer so it’s quick and easy to find them. If you’re a Premium Member you can watch my step-by-step classes on how to set that up for yourself on my website GenealogyGems.com.
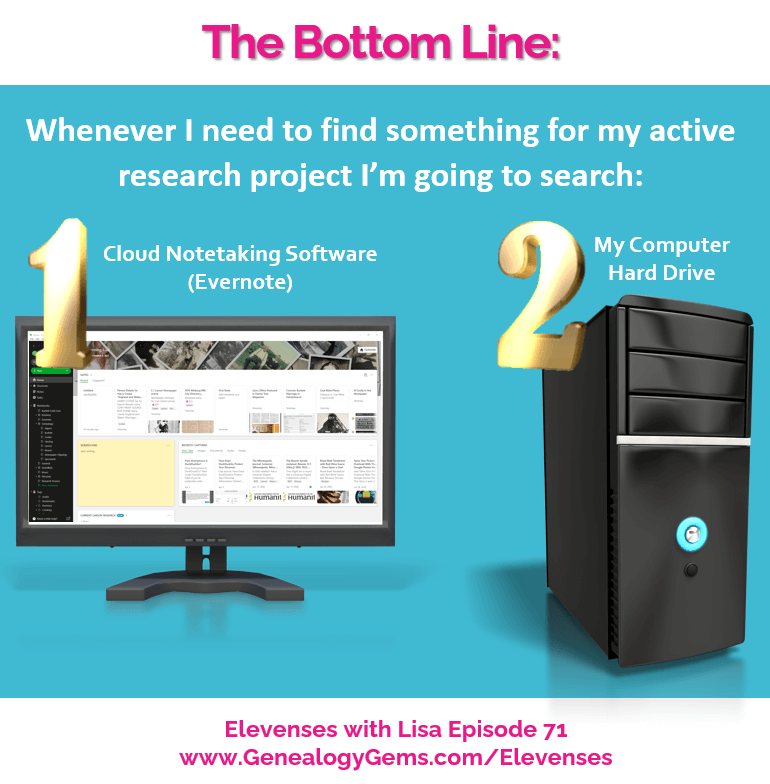
The bottom line is that whenever I need to find something for my active research project I’m going to search my notetaking service first, and then my computer hard drive.
Archiving Processed Items
Once I reach my research goal and I’m done actively using those sources, I’m ready to archive them. I could just leave everything in Evernote, but I want to make sure that all genealogical documents that I referenced as a source in my master database, are archived on my computer for long-term storage that I control, and that is being automatically backed up.
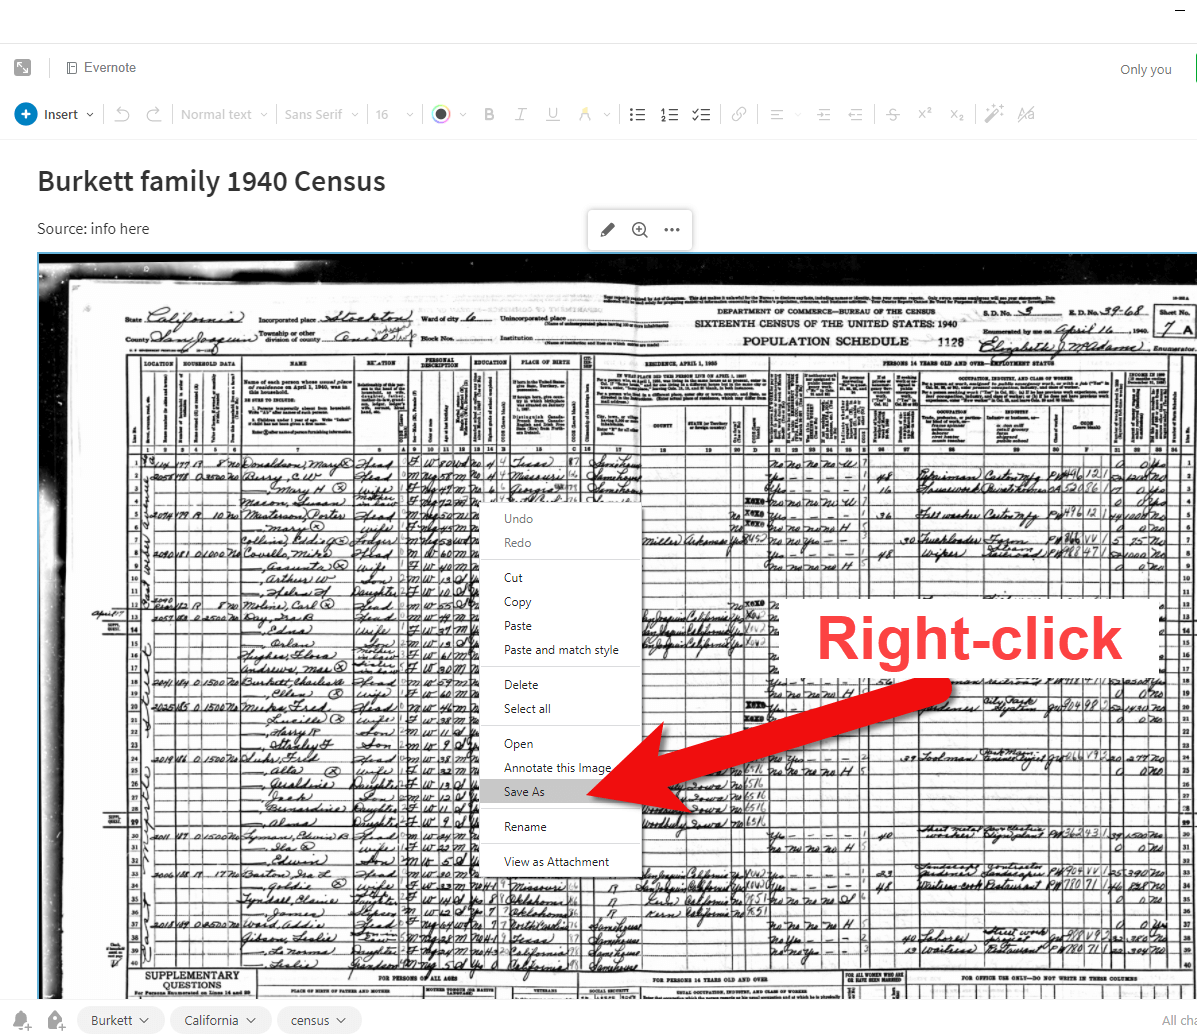
An important thing to understand about Evernote is that you can’t just download everything with one click in its original file format. However, you can save individual digitized items in your note, such as genealogical records, to your hard drive. Since there is no lifetime storage limit, I leave the note intact in Evernote, and I save the image to my computer hard drive. Save the image by right-clicking on it (in Windows, & I think it is Command click on a Mac) select Save As and save it to the appropriate archival folder. I do this at the end of the research project. Now you may feel like your “research project” never ends! But I’m referring to a genealogy research plan.
How to save a document image to your hard drive from Evernote.
You can learn how to create one in Evernote by watching my Premium video class Using Evernote to Create a Research Plan. (Premium membership required.) Of course, after I’ve answered my research question I quickly develop the next one and build a plan around it. So, you’re right, it never actually ends – thank goodness!
How Do I Find It Later?
My software database is the brain of my genealogy operations. I may have family tree information on various genealogy websites, on my computer, in Evernote and maybe even on my own family history website. But my database is the final word on what I have found and believe to be accurate. As I draw conclusions and add data to my family tree in my database, I cite my source. Therefore, everything I need to know about my tree is in one location I control on my own computer. If someone asks me a question about someone in my family tree, I can quickly look up the information and also see where I got it (the source).
“Your genealogy database software is the brain of the organization.” Lisa Louise Cooke
When I want to refer back to one of those sources I would look in one of three places:
My computer archival digital files (especially if it’s not part of my active research plan). This is easy to do because I know my folder system well, and it guides me. I’ve never lost anything yet!
Evernote (particularly if the source is part of my current research plan.)
The surname binder (if my citation tells me or I suspect it would be an archived piece of paper.)
Because I stick to my system, I usually instinctively know where to look. And because of they way each is set up, I can find things FAST!
Final Thoughts
Of course there are always exceptions to any rule, and there may be an item or situation that doesn’t fall perfectly neatly into a category or activity. Use your own best judgement on how to handle those. OCR search capability and great systems for digital and paper items will make it possible to find what you need when you need it. And most importantly, you’ll retain control over your family history legacy.
Be sure to share your Evernote credentials in a secure place and share them with a trusted relative so that the account can be passed on in the future. Learn more about protecting your legacy by watching my video class Saving Your Research from Destruction. (Premium membership required.)
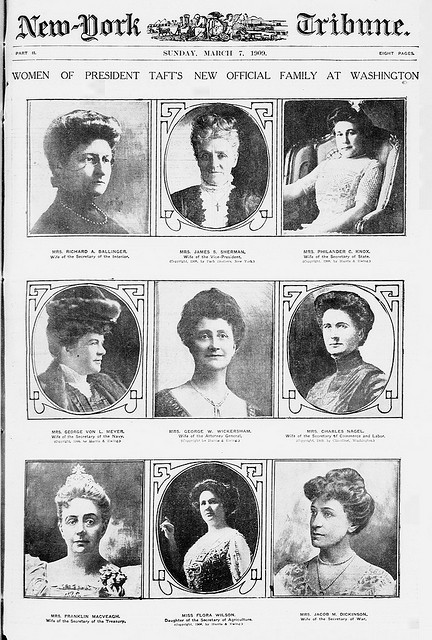
Women of President Taft’s New Official Family at Washington, New York Tribune, March 7, 1909. Cover, illustrated supplement. Library of Congress image, posted at Flickr. Click to visit webpage.
The Library of Congress has a Flickr album that’s front page news–literally! It’s a New York Tribune archive with newspaper covers dating back more than a century.
“This set of cover pages from the New York Tribune illustrated supplements begins with the year 1909,” explains the album. “The pages are derived from the Chronicling America newspaper resource at the Library of Congress. To read the small text letters, just click the persistent URL to reach a zoomable version of the page.”
“Daily newspapers began to feature pictorial sections in the late 1800s when they competed for readers by offering more investigative exposés, illustrations, and cartoons. In the 1890s, William Randolph Hearst and Joseph Pulitzer tapped into new photoengraving techniques to publish halftone photographs, and other newspapers soon adopted the practice. The heavily illustrated supplement sections became the most widely read sections of the papers and provided a great opportunity to attract new customers. The daily life, art, entertainment, politics, and world events displayed in their pages captured the imagination of a curious public.”
Available at http://genealogygems.com
We don’t often find our ancestors splashed across front-page news. But we can read over their shoulders, as it were, to see what was going on in their world and what others around them thought about these events. Newspaper articles and ads reveal fashions and fads, prices on everyday items, attitudes about social issues and more. Read all about using old newspapers for family history in How to Find Your Family History in Newspapersby Lisa Louise Cooke.
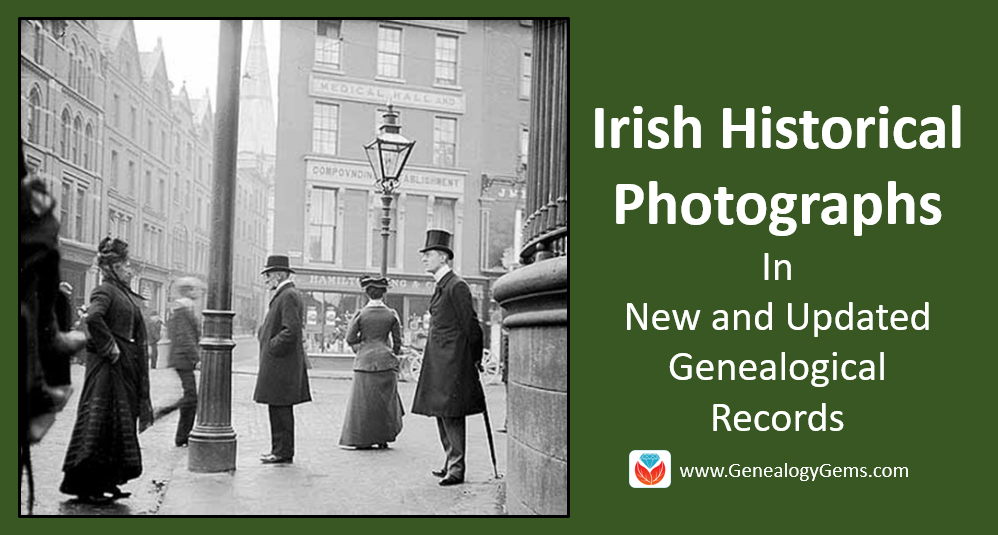
We are bringing you Irish historical photographs from Dublin this month in celebration of Irish heritage. Search these amazing photos of your ancestral homeland. Also this week, directories from Scotland, church records of the United Kingdom, and censuses for Canada and New York State.
Ireland – Dublin – Irish Historical Photographs
The Dublin [Ireland] City Council has launched an online archive of over 43,000 Irish historical photographs and documents to their website. These amazing photographs can be searched by archive, date, or location for free. They show images of events like the Eucharistic Congress and the North Strand Bombing. There are also images of football games, bus strikes, and old Dublin streets.
These Irish historical photographs includes pictures of old documents and objects, too, with the oldest document dated to 1757!
You’ll love these two quick-guides by Donna Moughty on Irish genealogy. Guide #1 titled Preparing for Success in Irish Records Research will help you determine a birth place, differentiate between persons with the same name, and walk you through identifying helpful US records.
Guide #2 titled Irish Civil Registration and Church Records, will guide you through locating Protestant church records, civil registrations, and more. It will also walk you step-by-step through using the new online Civil Registration records.
Scotland Post Office Directories contains over 382,000 records and allows you to explore thousands of pages of directories to learn more about the life and work of your Scottish ancestors. This Findmypast collection focuses on a particular town or district although a number of national postal directories are also included. The majority comprise a description of the place along with lists of people by occupation. For example, you will find lists of magistrates, councilors, sheriffs, police officers, and merchants.
The records are do not contain transcripts, but do include a digital image. The detail you will find on each page will depend on the type and date of the directory.
In conjunction with these post office directories, there are some that are browse-image only. They have not been indexed at this time. These 598 volumes of the Scotland Post Office Directories Image Browse are an excellent source for family history and those who need to trace their ancestors on a yearly basis.
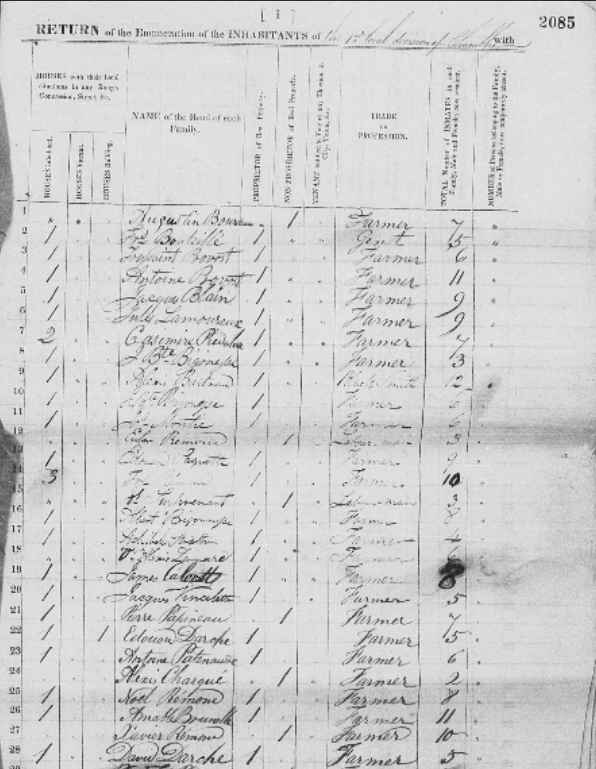
Canada – 1842 Census
The Lower Canada Census 1842 at Findmypast contains over 46,000 records. The Province of Lower Canada was a British colony on the lower Saint Lawrence River and the shores of the Gulf of Saint Lawrence between 1791 and 1841. It covered the southern portion of the modern-day Province of Quebec and the Labrador region of the Province of Newfoundland and Labrador.
Each search result will include an image of the original document and a transcript. The original returns were printed in French and English and transcripts may include occupation, language, residence, and the number of inhabitants at their dwelling. Images can provide detailed information about the local area such as number of inhabited and uninhabited buildings, the number of barley mills, tanneries, distilleries, the price of wheat since last harvest, and the price of agricultural labor per day.
United Kingdom – London – Russian Orthodox Church Records
Findmypast has added records to their collection titled Britain, Russian Orthodox Church in London. Over 13,000 records taken from volumes of birth, marriage, and death records from the Russian Orthodox Church in London in exist is this collection. The records further include correspondences, congregational records, and church documents. The majority of the volumes are written in Russian although a limited number of English-language records are available.
The Russian Orthodox Church records are available as a browse set only at this time. You will need to search the records by the document description such as Births, marriages, deaths, converts, and passports, 1888-1919 or Donations to St Petersburg Guardianship for Poor Clergymen, 1863. Then, search within the digitized volume to find your ancestor.
You will find numerous correspondences with other church leaders in London, America, Russia, and Japan, as well as documents related to religious doctrine. The facts found in each volume will depend on the type of record you are viewing. Birth, marriage, and death records will typically include the individual’s name, event date, and place, while birth and marriage records may also include the names of the individual’s parents.
United Kingdom – War Records
New records have been added to the Findmypast collection of Anglo-Boer War Records 1899-1902. This unique database of more than 470 sources may reveal the unit your ancestor served with and any medals, honors, or awards they won. The register also contains a completely revised casualty list of 59,000 casualty records.
Each record contains a transcript and may include the following information:
Name
Service number and rank,
Unit & regiment
Medals, honors or awards received
Memorials relating to death if applicable
United Kingdom – England – Births and Christenings
By Anton Laupheimer [Public domain], via Wikimedia Commons
Though this collection from FamilySearch has been available for awhile, they have recently added more records. The England Births and Christenings, 1538-1975 now totals over 68 million records. There are some important tips and known problems with this database. Before searching, be sure to read the details at the FamilySearch Wiki, here. As an example: In birth or christening records, if a surname is not listed for the child, the indexer often assigns the father’s surname to the child. This surname may not be correct. So if you are looking for a birth or christening, search by the given name of the child, adding parents’ names and as much locality information as is permitted.
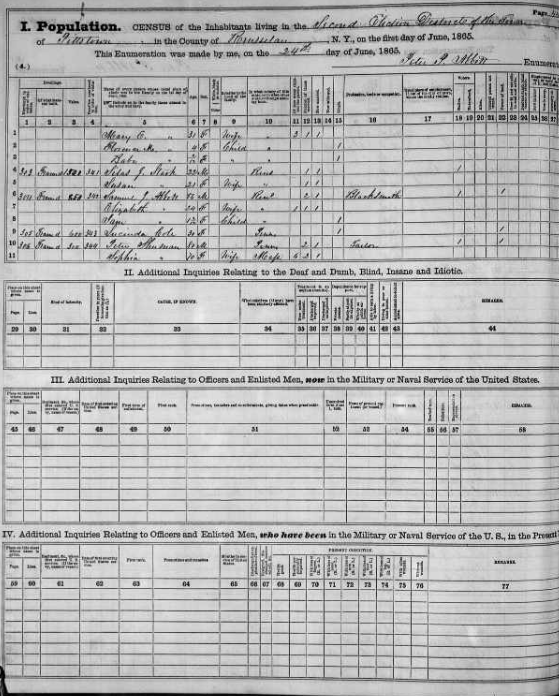
United States – New York – State Census
FamilySearch has added to the New York State Census of 1865 this week. State censuses are particularly helpful to researchers because they fill in the gap between federal censuses. Unfortunately, the following counties are missing:
Allegany
Clinton
Franklin
Genesee
Hamilton
New York
Putnam
Queens
Seneca
St Lawrence
Sullivan
Westchester
Wyoming
The population schedule includes the name, age, birthplace, and occupation of each household member as most censuses do.
However, this census also includes two military schedules with information of officers and enlisted men currently in the military and men who had served in the military. This census contains information on when and where the individual first entered the military, rank, how long they were in the service, their present health, as well as several other items.
Additionally, the census contains tables on marriages and deaths occurring during the year ending June 1, 1865. These tables contain typical marriage and death information, but can be a helpful resource for those who have been unable to find these records in traditional locations.
Lastly, a second table entitled deaths of officers and enlisted mencontains deaths of individuals which had occurred while in the military or naval service of the United States, or from wounds or disease acquired in said service since April, 1861, reported by the families to which the deceased belonged when at home. It includes the name of the deceased, age at death, if married or single, if a citizen, several items relating to military information, date of death, place of death, manner of death, survivors of the deceased, place of burial and any remarks.
 The population schedule includes the name, age, birthplace, and occupation of each household member as most censuses do.