Resources
These show notes feature everything we cover in this episode. Premium Members: download this exclusive ad-free show notes cheat sheet PDF. Not a member yet? Learn more and join the Genealogy Gems and Elevenses with Lisa family here.

Browse-only collections at Ancestry and other genealogy websites are sometimes viewed as inaccessible, but they are actually a hidden treasure. Learn how to access these browse-only collections at Ancestry and expand your family history research.

In the past we’ve written about how to access browse-only content at FamilySearch.org. Many readers said it opened a whole new world of genealogy records to them that they didn’t know they were missing.
The good news is that FamilySearch is not alone in offering browse-only content. Ancestry.com also has browse-only collections of digitized records. (Not an Ancestry.com subscriber yet? Click here to learn more. This is an affiliate link and we are compensated if you make a purchase, which supports this free blog. Thank you!)
Knowing how to search and browse records effectively is critical because you shouldn’t just rely on hints. Ancestry, for example, only provides hints from about the top 10% of their most popular databases. That means if you only spend time on reviewing hints, you’re missing a massive amount of genealogical information available in all of the other records.
Typically you’ll be using the search feature to find those other records. However not all records are searchable. That’s because after the long process of acquiring the rights to digitize and publish a genealogy record collection, it takes even longer to get them indexed for a variety of reasons. Thankfully, Ancestry doesn’t always make us wait to gain access to them until the indexing is complete.
The digital images are published without an index. This means they are not searchable by names and other keywords. Therefore, it can take some time to locate a record within one of these collections. But I think you’ll agree it’s more convenient to look through them from the comfort of your own home rather than renting microfilm or traveling to a far off location!
Here’s your checklist for better browsing.
While Ancestry.com doesn’t make it quite as easy as FamilySearch to find browse-only or partially-indexed databases, it’s still very much worth the effort.
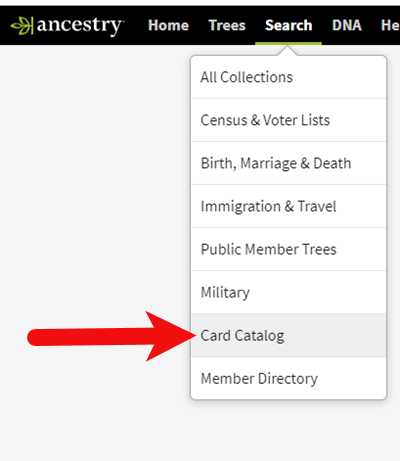
From the main menu on the Ancestry website, select Search > Card Catalog.
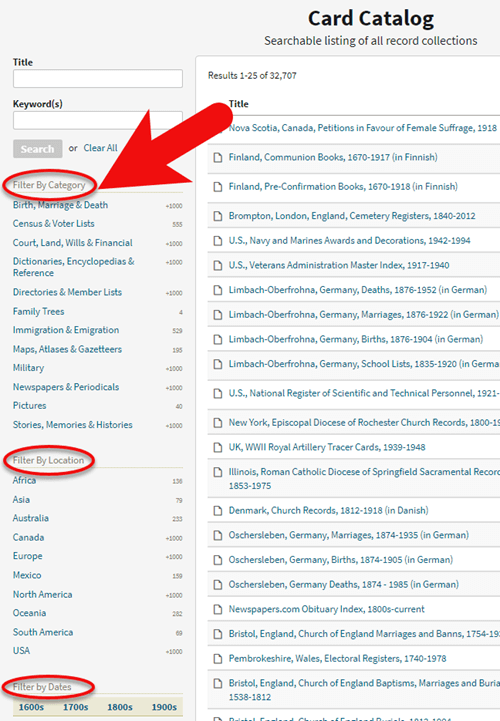
In the upper left corner you can search the catalog by title and / or keyword. However, if you know the type of record you are looking for, such as military records, the best place to start is filtering by that category. If the list is long, you can then search within that category by keywords.
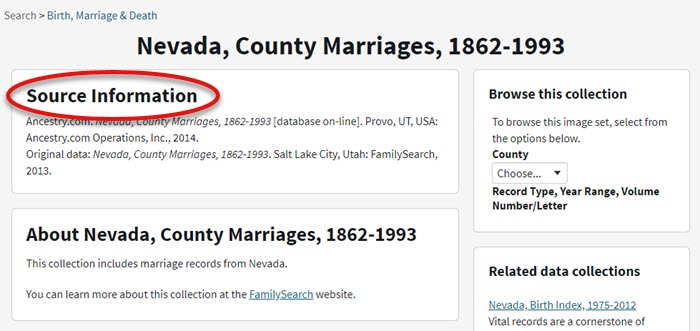
If you don’t see a search box on the left side, then you can assume that this collection has not yet been indexed and therefore isn’t searchable by keywords and other data. Instead you will see typically see the source information box at the top.
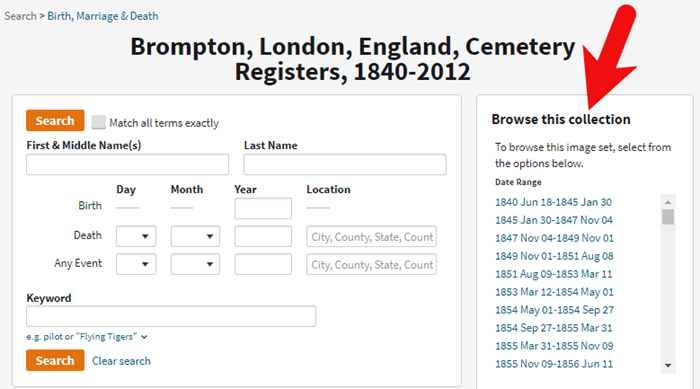
On the right side of the screen you will see a Browse this Collection box. The filtering options presented will depend on the way the collection is organized.
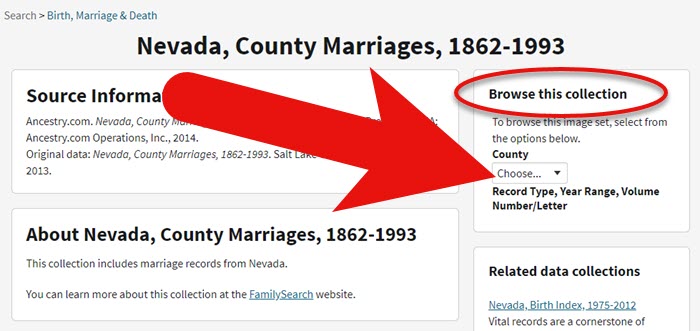
In the case of the Nevada County Marriage database, a drop down menu allows you to filter by county.
As you can see in my example, once I selected a county I can also filter down by record books. So even though you can’t search names, you can often zero in on the portion of the collection most relevant to your search.
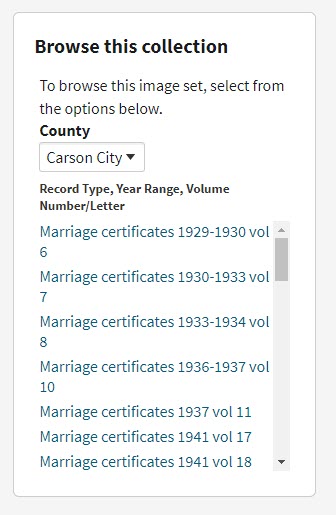
Browse this Collection box
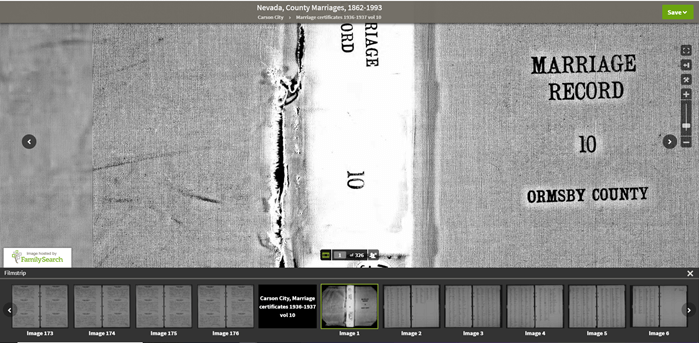
Once you have selected the available filters, you’ll find yourself in the digitized records. They are displayed in a filmstrip layout which will come in quite handy for navigation through the pages.
Navigation is crucial since we can’s search by names and keywords. Let’s take a closer look at the ways you can navigate:
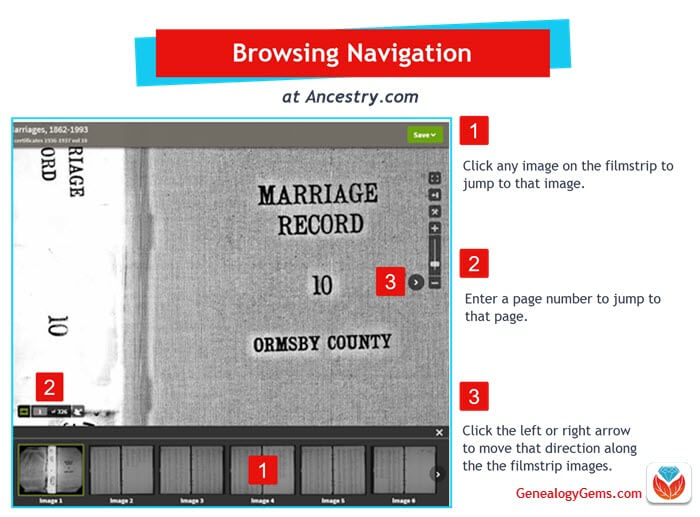
Browsing a digitized genealogy record collection at Ancestry.com
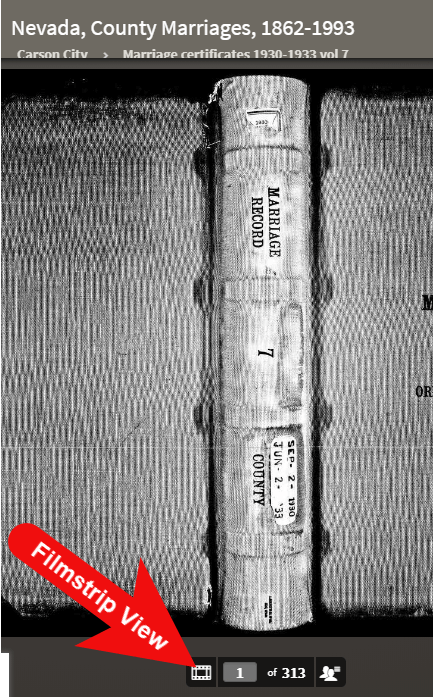
if you don’t see the filmstrip view, click the filmstrip icon:
WATCH THE BONUS VIDEO below to see the next section in action. Click on the sound button to the right of the play button to turn on the sound.
Many records that were originally bound in books like this collection include index pages. In this book the index appears at the beginning. If you look closely at the filmstrip images it’s easy to spot where the index lists are and where the records begin.
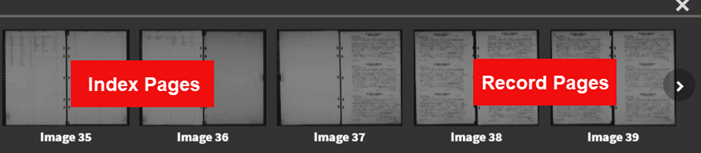
So even though Ancestry hasn’t had the chance to index the records yet, they are indexed in the book. This will make the job of browsing for the records you need even easier.
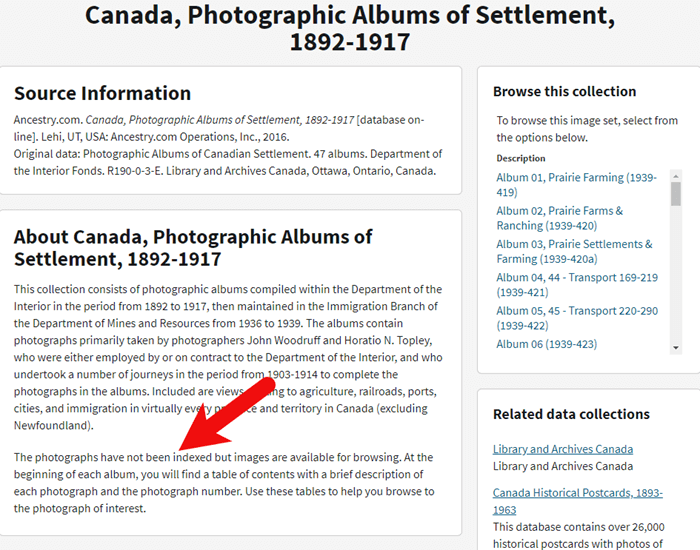
The “About” box on the card catalog entry often includes important information about whether or not the collection has an index. One example of this is the Canada, Photographic Albums of Settlement, 1892-1917 record collection. It is a browse-only series of digitized photo albums by Canada’s Department of the Interior between 1892 and 1917. The collection description includes very useful instructions such as: “At the beginning of each album, you will find a table of contents with a brief description of each photograph and the photograph number. Use these tables to help you browse to the photograph of interest.” As you can see, taking a few extra moments to read about the collection can make browsing it much easier.
Remember that Browse this Collection box on the right hand side of the card catalog entry page? (See the Browse this Collection box image 6 images above.) This handy menu is also embedded in the record viewer. If you need to switch to a different book, album or other portion of the collection, you don’t have to hit the back button and start over. Instead, at the top of the viewing page, click the volume or collection you are currently viewing (this appears as a sub-title under the main title of the collection.) A browse structure menu will appear showing you all the other options within the collection. Just click the one you want and you will be instantly switched over. Think of it as pulling a different volume of a series of books off the shelf!
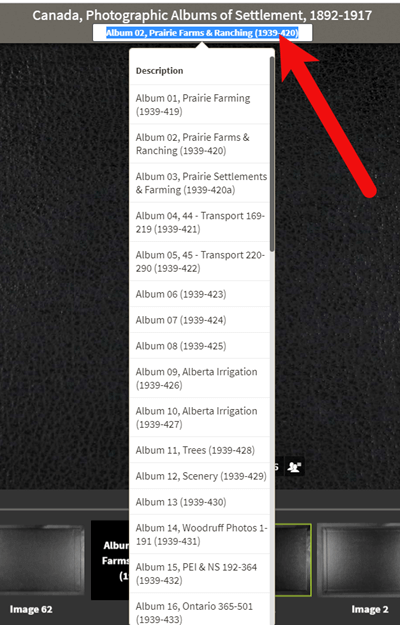
Switching volumes within the collection within the viewer.
There will be times when even though a record collection is indexed, you may still want to browse it. Browsing isn’t just for unindexed records. Many genealogy gems can be found by browsing a database that you’ve already searched. You may spot neighbors of interest, other surnames from your family tree, and more. So even when you are working with a record collection that has a search box, look for the browsing option in the right column.
The records most likely to not yet be indexed, and therefore browse-only, are the newest records added to Ancestry. If you’re looking to bust through a brick wall, here’s a great way to find the newest records that just might do it.
From the main menu on the Ancestry website, select Search > Card Catalog.
In the right hand corner you’ll find a Sort By menu. Select Date Added.
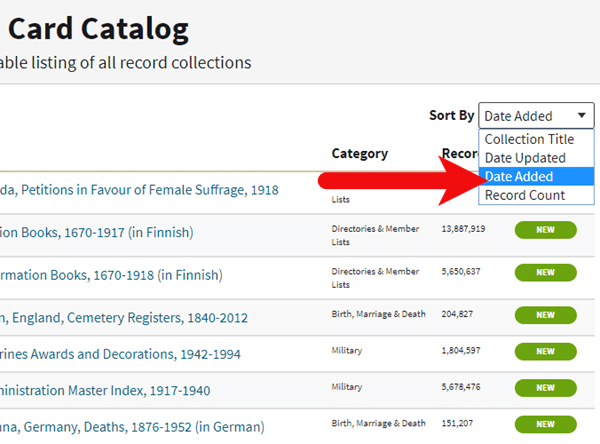
Select Date Added from the Sort by menu.
The Card Catalog will now be presented in the order in which the records were added. The newest records will appear at the top of the list.
Use the filters along the left side of the page to filter the collections by record type, location, and date. Then use the search boxes to target keywords. This will give you results that include your keyword starting with the newest collections.
Making a small investment of time in getting to know the search and browsing functions of a website can pay off big.
BONUS PDF: Click to download a handy ad-free PDF version of this article for easy reference: How to Find and Browse Unindexed Records at Ancestry
Here are three more articles and podcast episodes here at Genealogy Gems that can help you maximize your genealogy research efforts:
Please leave a comment below and share the genealogy gems that you uncover using these techniques. And of course if you have any questions, leave those as comments as well and I’ll reply.
Elevenses with Lisa is our little slice of heaven where friends get together for tea and talk about the thing that never fails to put a smile on our face: Genealogy!
The National Archives is a wonderful resource of unique genealogical records. Though the archives are closed, the website is open, and it’s a great place to search for records and prepare for future genealogy research trips.
The National Archives website and online catalog can be a bit mystifying. If you’ve ever tried to search it and wound up frustrated, you’re not alone. This is often the case because the nature of the archives and the search function of the online Catalog are not genealogically focused. Armed with an understanding of how and why it is set up the way it is, and the know-how to search, refine, and download documents, you’ll be ready to add it to your genealogy toolkit.
In this video episode and article, we’ll be answering important questions such as:
Original Air Date: Jan. 21, 2021
Important Links:
The National Archives Website: https://www.archives.gov
Search the Catalog: https://catalog.archives.gov/
To understand the types of records we can expect to find we must first understand the role and mission of the National Archives. Their role is preserving and making available only the permanent Federal Government records. Some have genealogical value.
Some traditional genealogy records can be found at the National Archives such as:
Most if these records are available in person. However, all National Archives locations have been closed since March 13, 2020 and remain so as of this writing.
Because the following genealogy records are not created at the federal level, they would not be cataloged or found at the National Archives:
To obtain these records, check with the appropriate state or county.
Before you begin your online search:
On the National Archives website they provide a great example of a research question that a genealogist might have and how it can lead to records.
QUESTION: Why did my ancestor have a significant decrease in net worth between the 1860 Census and 1870 Census?|
ASK YOURSELF: How might your ancestor have interacted with the federal government that could help explain this discrepancy?
RECORDS TO SEARCH FOR: The Bankruptcy Act of 1867 allowed many people to file for voluntary bankruptcy. The genealogists could search in the National Archives Catalog for bankruptcy AND [state where you ancestor lived during that timeframe] to see if bankruptcy records are available that could help answer the question.
There are three key types of searches you can conduct in the catalog:
Let’s start with a keyword search:
You can use the filters on the left side of the results page to narrow down your results.
Refine your search results by type if you know the type of material you want. Example of material type include photos, maps, or textual records.
It’s important to remember that just because the item appears in the result does not mean that it is available online. Many of the descriptions don’t include digital images of the records.
You can dramatically narrow down your search results to include only digital items that you can review from home. To do this, on the search results page, click on the filter Archival Descriptions with Digital Objects. This will revise your results list so that you will only see descriptions of items with images attached.
It never hurts to try searching by name, although many record descriptions will not name the people who are named in the records. You can improve these searches by using quotes around the entire name, or just the surname. This will restrict results to only items that exactly matches what appears in the quotes.
You’ll notice that there isn’t a specific search field for names in the National Archives Catalog. Here are several additional search strategies you can use when searching for the names of people:
Example: Joseph Maggio OR Guiseppe Maggio.
Again, keep in mind that most descriptions in the National Archives Catalog do not include the names of people mentioned in the record. If you know an individual participated in event, search for related keywords and look within the records. You will need to read them to see if your ancestor is mentioned.
Another way to improve your search results is to shift your focus from people to topics. This is strongly recommended by the National Archives. You are much more likely to get a greater number of results because people aren’t usually named in descriptions. Be sure to read the description carefully to see if the item will be helpful and worth requesting.
When searching topics, think about and make a list of relevant phrases and keywords. For example, when searching for Land Records, try searching for phrases such as:
Premium Members Exclusive: Downloadable National Archives Topic Search cheat sheet (PDF)
After clicking the description on the search results page you will be on the record page. If there is a digital image, it can be downloaded. Look below to see if there are additional pages. You can click to select the desired page and then click the download icon just below the image.
If you would like to download all of the images, look below the list of images to see if a compiled PDF is available. This will allow you to download and save all of the images in one convenient file.
The Record Group Explorer offers a unique way of visualizing and finding records at the National Archives website:
Records are grouped by specific government agencies. Each group is represented visually in a section. The section is light blue, signifying the total volume of textual records. If a dark blue bar appears in the section, it is an indicator that some of the records are digitized. The percentage or number (depending on the view you select in the grey Record Group Explorer Tools bar across the top) of digital images will be shown.
If the section is green, that indicates that there are records online but they are not textual records. They may be items like photographs or films.
If the section is grey, there are no records available online at all.
Click a section to learn more about that Record Group and explore the records.
The National Archives holds a surprising number of motion pictures. As you browse or search, focusing on topic will likely be more helpful than searching by name. Consider looking for your ancestors’ homes, businesses, military service, events and associated locations.
Check out Motion Picture Library Stock Shots, ca. 1953 – ca. 1959
“A series of films: 306-LSS, a group of more than 400 black and white reels of stock footage that ended up in the hands of the United States Information Agency (USIA).”
One of the advantages of tuning into the live broadcast of each Elevenses with Lisa show is participating in the Live Chat and asking your questions.
From Sue M.: Do they hold WPA and CCC records?
From Lisa: Yes to both!
From Steve S.: Can you use the * and ? as search operators in the NARA catalog? Also thanks for de-mystifying this site! you have made it much more understandable.
From Lisa: After the show Steve did some searching and found this handy page providing additional search tips and operators supported by the website. Thanks Steve!
From Michael R.: Are the Naturalization records in the National Archives different from those in local courthouses?
From Lisa: I haven’t looked lately, but about 15 years ago I filed a Freedom of Information Act (FOIA) request and received my great grandfather’s federal naturalization paperwork. It included a photograph that was not included at the county court level.
From Lynnette B.: I had my parent’s old home movies put on DVD’s several years ago. What is the next step in making them more available? Adobe spark video? YouTube? I want to identify each person on them?
From Lisa: An easy way to get started is by making Adobe Spark Videos (see episode 16) which is free and easy. Use the Titles feature to add text explaining who is who. Uploading them to your free YouTube account channel is a super easy way to share them.
Click to learn more about Genealogy Gems Premium Membership.
Now when you discover an ancestor’s record on Fold3.com, you can save it to your online tree at Ancestry.com.
According to Fold3.com’s press release: “Whenever you see a green ‘Save to Ancestry’ button above a document or on a Fold3 memorial page, you can link that document or page directly to someone’s profile on Ancestry.”
“You’ll be asked to log into your Ancestry.com account, and then you’ll see a drop-down list of your trees. Locate the tree you wish to save the document to, begin typing the name of the person to whom the record should be attached, choose the correct name from the list that appears, and then press save.”
Watch a tutorial video to learn more and see how it’s done.
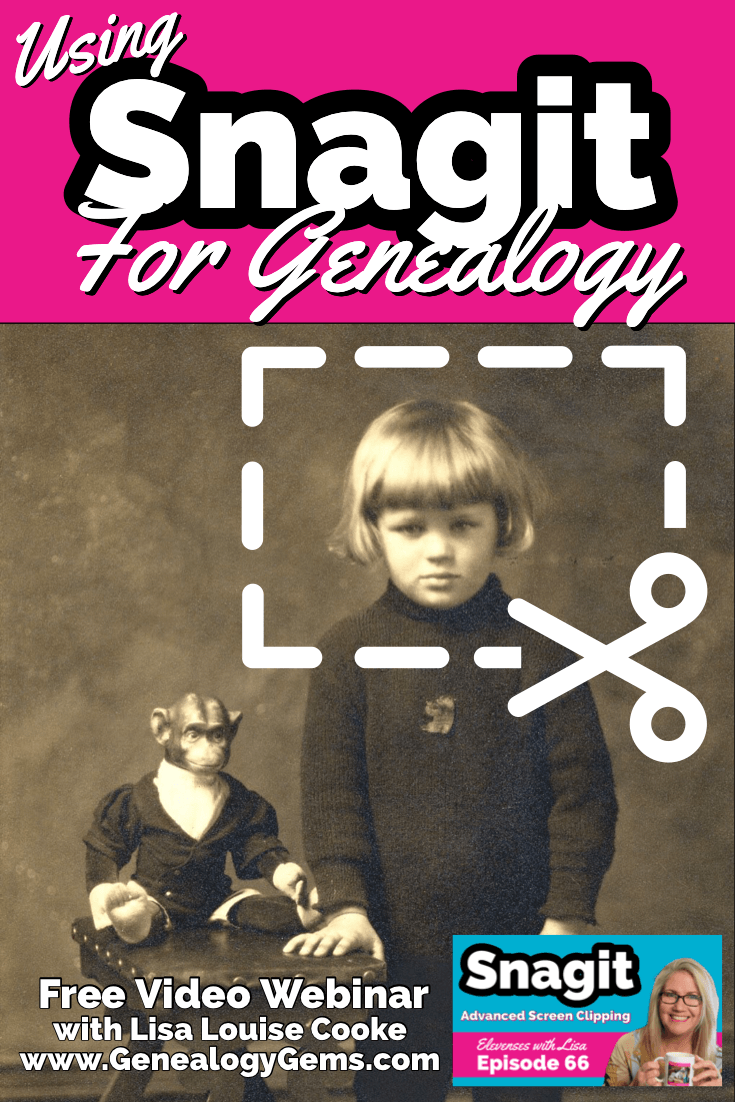
Even if you don’t use Snagit, or if you’re a newbie or still deciding whether you want to use it, this video will give you tangible examples of what it can do for you. If you are already using Snagit, this session will definitely take your skills to the next level.
Use coupon code GENE15 to get 15% off. Thank you for using my link for purchasing your copy of Snagit. (We will be compensated at no additional cost to you, which makes the free Elevenses with Lisa show and notes possible.) Don’t worry if it initially shows as Euros in the cart. When you enter your address including country, it will convert the currency appropriately.
In Elevenses with Lisa episode 66 Lisa Louise Cooke will discuss how to use Snagit:
You can also watch at the Genealogy Gems YouTube channel.
Elevenses with Lisa episode 61 was a tutorial for beginners on how to use Snagit, and specifically how I use it for genealogy. I think it really resonated with genealogists because accurately and completely capturing the family information that we’re finding is absolutely essential for good source documentation. It’s one of the most important things we do as genealogists.
So, this video is sort of a “Part 2” session where we dig into more ways to use this amazing screen capture tool and I answer some of your most pressing questions.
Even if you use a different snipping tool, I’m going to give you tangible examples of how you can clip more effectively.
I received the following email from Anne W.: “I very much enjoyed your recent Elevenses with Lisa episode on how to use Snagit. I love the screen clipper on my Mac but this does so much more. I used your link to purchase Snagit and I have found the tutorials very helpful as I figure out how to use it on my Mac with my files. The first thing I did was go back to several newspaper pages I clipped recently in chunks and used Snagit to capture the whole page. It worked like magic! I would love to see another episode about the features of Snagit. Thank you for your regular and premium podcasts. I listen to both regularly. I have learned so much that I can apply to my genealogy research.”
Oh I love hearing how you’re using what we talk about here at Genealogy Gems! And yes, Snagit is fantastic for clipping those squirrely newspaper pages, and so much more!
Let’s get started – I’m excited to show you 5 more problem-solving screen capture projects that you can do with Snagit, and then we’ll wrap up with answers to your Snagit questions.
Bill in San Antonio, TX wrote me last week and told me about a problem that he was having with his online family tree at Ancestry It turns out that some ancestors had duplicate profiles. He didn’t put them there. He asked Ancestry about it but was getting what he called “boiler plate” answers that didn’t solve the problem.
In situations where you’re trying to communicate a complicated problem to someone else, or you’re just trying to work through it yourself, it can really help to visualize the problem, and Snagit can help you do that very effectively.
Bill says: “I am seeing duplicate FACTS in profiles of siblings, parents, and children of a person and cannot figure out where they originate. I go to the profile which seems to be generating duplicate information, but it is not there.”
As I read through all the details that he wrote up about the problem, I found myself getting confused. I asked his for access to his family tree so I could take a look and he wrote back
Bill went on to say, “The duplications I see are all in my tree. I have reviewed each of them to be certain that the data is not coming from a profile, even though it appears in duplicated form elsewhere.
Here is a screenshot of one such issue, showing two siblings with repeated data. Note that in each case, the birth location is slightly different, as in “Texas” vs. “Concho County, Texas”.
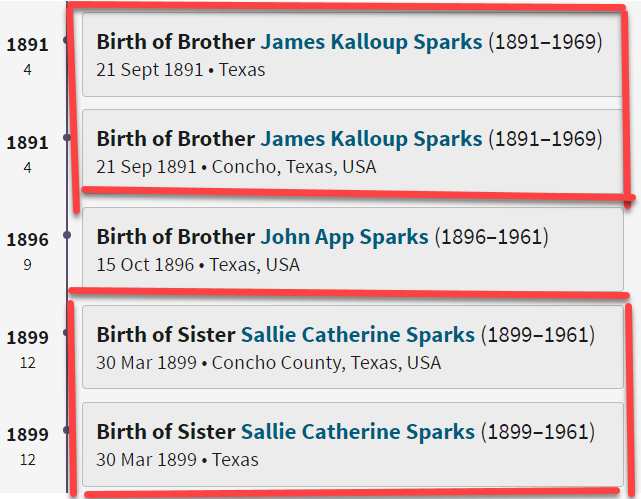
Ancestry Profile – problem of duplication
Bill had annotated his screen clipping to help me zero in on the problem. “(I used SnagIt for the screenshot — thanks for suggesting it!) I see this issue in other profiles, so your suggestions for solving it will be useful in other parts of the tree.”
Here are just three examples of ways you can highlight or call out an item in an image:
After you select and customization a style (such as a red outline shape) you will see that Snagit provides a “ghost” version of it in your list. It’s greyed out and ready to add. Simply click the plus sign to add the style to a theme. There are several themes available and you can create new themes.
I like to make it even faster to find the styles I use the most by adding them to my Favorites. It’s super easy to do. Just click the star on the style. You’ll find your Favorites in the star menu at the top of the screen.
As a side note, I do think this is a bug in Ancestry’s system. I recommended that he do the following to zero in on the problem:
Again, you can use Snagit to help work through things like this. Here’s how to see if you’re indeed looking at the same person: Right-click on each ancestor profile to open it in a new tab so you can compare and capture them. In this case it was Willie (the ancestor) and James and the duplicate of James. Each will have a URL address in your browser bar that will end in person/420009496764/facts. The number in red is the unique number for that person.
Had the tree number or person numbers been different, that would be the likely source of the problem. However, in Bill’s case, they are the same, so that’s more evidence that it’s a bug in Ancestry’s displaying of the information.
After screen capturing each profile they can be combined into one step-by-step document that can then be shared.
My guess is that at some point Bill viewed someone else’s tree or a hint that included this conflicting information, or he may have attached a record that had conflicting information, or rejected information from a record. In any case, some sort of action may have gotten “stuck” in the virtual stratosphere. The system has hung on to something it should not have. Bill says he’s finding more instances of this happening in the same tree, so it definitely needs to be addressed. It would be a shame to keep adding to the tree only to have that glitch continue to duplicate itself in other profiles.
I suggested looking through the records he has attached to James Kalloup Sparks to see if any of the attached records mention Concho, TX as his birthplace. I doubt there is one, but if there is, it is likely somehow linked to the problem.
It’s very odd that on Willie’s profile it shows James Kalloup Sparks’ birthplace as Concho in the duplication, but when you click that profile it doesn’t say Concho. It’s must surely be an Ancestry glitch.
If it were me, I would try downloading your tree and then creating a second tree by uploading it and seeing if the error still occurs. Here’s the Ancestry Help page.
Also, if by chance Bill was syncing his Ancestry online tree with genealogy software on his computer, there’s a possibility that could cause the problem.
Questions from Kelly: “Hi Lisa!, I would LOVE for you to create a very simple tutorial for adding in arrows and any text in “bubbles or boxes”. I have tried to do this and am missing something – I just LOVE Snagit but I am so technically challenged and would love to not become so annoyed when I am missing the simplest of steps.”
The most important thing to remember as you use annotations like text bubbles, shapes and text is you must select what you are working on. The font, color, sizing and other formatting features can be applied to every kind of annotation. You must select the item before applying the formatting.
If you’re ever confused about what “mode” you’re in, look at the top of the screen and note which tab is selected. In the example below, we are in “Shape” mode.
And if you try and try to make a change to an annotation and nothing seems to happen, you probably haven’t selected it. Click on the item to select it before attempting to make any changes.
If you want to move a item such as a shape or a selection of text, again you will need to click it to select it. You should see the “Move” selector handle that looks like this:
If you don’t or you’re having trouble, click “Move” in the toolbar at the top of the screen and then click on the item.
Most of the time if working with annotations or formatting them is presenting a challenge, it’s because the item hasn’t been properly selected before you begin.
Many of the most popular genealogy records websites offer a hinting feature that suggests records to you based on the information in your online family tree. Many of those “records” are quite unique. I recently came across a Photo Hint at Ancestry that was a screen capture of a story in a public Facebook group of the descendants of a particular couple. It was interesting information but I didn’t really want everything that was captured in the image. I used Snagit to capture and then edit the image the way I wanted it so I could then save it to my computer. This included erasing or removing unwanted areas. The following Snagit features can help you accomplish this easily:
Answers to your questions from episode 61 which was my beginning tutorial on Snagit. If you haven’t used it before stick with us in this video to see all the cool things it can do and then go back and watch that episode which is perfect for beginners.
Pat M.: Will OCR work for non-English newspapers?
Answer: Snagit doesn’t translate, but the OCR will Grab non-English text. Learn more here. You can then copy and paste it into Google Translate.
SHB: Don’t see Evernote on the list, how easy is it to save to EN?
Answer: If you have Evernote installed on your computer you should see it in the Share list. You can also download Evernote to add it as a Share destination. In fact, there are loads of programs you can download.
Cyndy B.: Are all these features in older versions?
Answer: No, like all software, each version introduces additional features.
SHB: Curious about printing… if you print a long article, will it print out readable?
Answer: Yes! You can set the resolution. And use Print Preview to make adjustments so it prints exactly the way you want it.
CA Sanders: if I bring a photo into Snagit and work with it will save IN Snagit, not in my original placement…so I would have to “save” or “move” to the folder it was in to begin with my changes.
Answer: After making your edits, use File > Save As to save it in the desired format to the desired location on your computer hard drive. You can also save it to replace the original if that’s your goal.
B Latham: How do we keep the SnagIt program up to date? It sounds as if other viewers here are saying they purchased the program a few years ago and may be outdated. Isn’t there a way to keep it up to date?
Answer: Yes, you can buy a maintenance plant that will include future updates at a reduced fee. Use our link and discount code, and the option will be available at checkout.
Barbara C.: For 2 different laptops, would we need to purchase Snagit twice?
Answer: TechSmith software is licensed per user, so how many computers can I install it on?
Each user may install and use one copy of the software product on up to two computers for their sole use, provided only one computer is in use at any given time. This includes home and work, or a laptop and desktop.
Here’s our link for purchasing your copy of Snagit (screen clipping tool) Thank you for using our link. Use coupon code: GENE15 (We will be compensated at no additional cost to you, which makes the free Elevenses with Lisa show and notes possible.)
These show notes feature everything we cover in this episode. Premium Members: download this exclusive ad-free show notes cheat sheet PDF. Not a member yet? Learn more and join the Genealogy Gems and Elevenses with Lisa family here.
The manufacturer price is going up August 31, 2021. Now’s the perfect time to get your official Elevenses with Lisa mug.
Click here to sign up now and you get your free bonus ebook.
Leave a Comment or Question Below