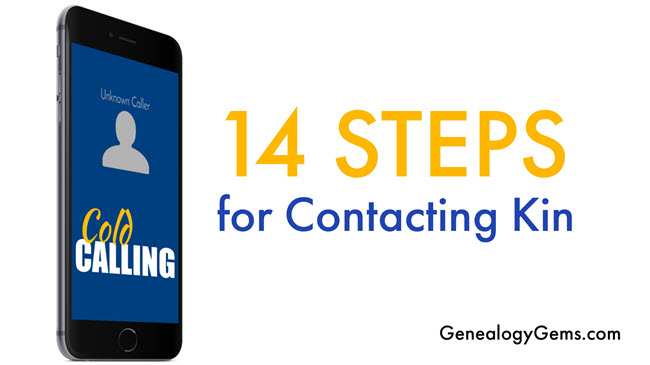
Need to contact distant relatives? Got cold feet? Follow these steps and you’ll warm right up–and hopefully, so will those you contact!
Today, online trees, social media, and email make it easier than ever to find relatives you don’t know well (or at all). And there are SO many reasons to contact them: to collaborate on research, swap photos or stories, or even request a DNA sample.
In these cases, you may need to make what salespeople refer to as a “cold call,” or an unexpected contact to someone you don’t know. I’ve done it successfully many times myself, so I can tell you this: it does get easier. Follow these steps to make it a smoother experience.
1. Identify the person you want to call. Common ways to identify a new relative include:
Another relative tells you about them
Family artifact, such as an old greeting card, address book, captioned photograph, letter, etc.
On a genealogy message board
In an online family tree (with enough information showing to identify them)
As the author of a book, article, or blog post with information about your family
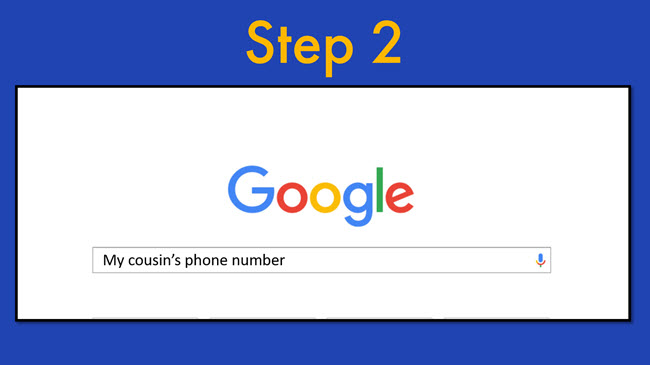
2. Locate the person’s phone number, address, and/or email address.
Here are some great websites for locating people you don’t know, or at least learning more about them (as you can on LinkedIn):
TIP: When looking through a geographically-based directory, don’t forget to search the entire metro area, not just one city. Try just searching their first name, particularly if it’s not a really common first name. Try and track down their number through other relatives or researchers.
3. Prepare ahead for making the call. Every tough job gets just a little easier when you do your homework first!
Take into account a possible difference in time zones.
Choose a time when you are not too rushed
Set yourself up in a quiet place, where there will be minimal background noise or disruptions
Do a brief review of the family you are researching so it’s fresh in your mind
Make note of specific questions you would like to ask.
Have your genealogy software program open or your written notes at your fingertips
4. Adopt a positive mindset. It’s natural to feel some apprehension when calling someone you don’t know. Before you pick up the phone, give yourself a little pep talk. Remind yourself how valuable this person’s information could be to your research. If he or she is quite elderly, remember that none of us will be around here forever so you need to make the call today! Say to yourself, “I can do this. This is important!” Be positive and remember, all they can do is say, “No thank you.”
5. Introduce yourself. Give your first and last name and tell them the town and state where you live. Then tell them the family connection that you share. Tell them who referred them to you or how you located them. Cover these basics before launching into why you’re calling or what you want.
6. Overcome reluctant relatives. Be ready to share what you’ve learned, and to share your own memories of a relative that you have in common. Mention something of particular interest in the family tree that might pique their interest. If they are very hesitant or caught off-guard, offer to mail them information and call back once they’ve had a chance to look at it. That way they can get their bearings, too.
7. Do these things during the call:
Take notes: try a headset or use speakerphone, which will help to free up your hands for writing.
Ask for new information and confirm what you already have.
If you have a way to record the call, then you won’t have to take notes and you can focus all your attention on the conversation. You can then transcribe the recording later. However, in some places, it’s illegal to record a conversation without telling them first and/or getting a person’s permission (not to mention discourteous). It can be very off-putting to start the first call by asking if you can record them. So, establish a connection first, make your request to record, and then press the record button.
8. Leave a detailed voice mail message if there’s no answer. State your name clearly, and that you would like to talk with them about the family history. Leave your phone number and tell them that you will call them back. Consider leaving your email address and suggesting they email you with a convenient time to call back. These days many people are more comfortable with email for the first contact.
9. Ask questions like these:
“Do you or anyone else in the family have any old family photographs or a family Bible that I could arrange to get copies of? (Reassure them that you are happy to pay for copies and shipping.)
“Do you know anyone else in the family who has been doing family research?”
“May I have your permission to cite you as a source in print in the future?”
“Is it OK with you if I keep in touch from time to time? What is your preferred method of contact?”
10. Wrap up the call. Offer to give them your address, phone number, and email address. Ask for their mailing address and email address. Repeat or state your desire to share information you have, and tell them how you’ll send it. Let them know you would be pleased to hear from them if they come across any other information, pictures, etc.
11. Document the call. Keep track in your genealogy database of each time you call someone and the outcome (“left a message” or summary of conversation). Having a log of calls and voice mail messages you’ve left will help you know when it’s time to follow-up with whom—and who wasn’t so interested in chatting again.
After a conversation, sit down at the computer or your notepad right away and make detailed notes about the phone conversation while it’s fresh in your mind. Include the person’s name, address, phone number, and date of the conversation. Make notes regarding any items you think may be questionable to remind you to go back and do more research on those points. Enter their contact information into your genealogy database as well as your email contact list.
12. Enter new information into your genealogy database.
This is a must. Do it right away while it’s on your mind. Cite the conversation as the source of the information.
Remember to respect the privacy of those who prefer to remain “off-the-record” by not naming them in sources you post on public online trees.
13. Create an action item list. Create action items based on what you learned. Ask yourself “What are the logical next steps to take considering what you’ve learned through this interview?” The call is not the end goal. It’s a step in the research process, and it can really help to make this list now, and while it’s fresh in your mind.
Cold Calling:
“The call is not the end goal.”
Lisa Louise Cooke
14. Follow up. Send the person a written thank-you note or email. Remind them of your willingness to share your information, and acknowledge any willingness they expressed to share theirs (restate your willingness to help with copying expenses, postage etc. and consider including a few dollars). You never know: they might catch the genealogy bug and become your new research partner!
Next, put their birthday on your calendar and send them a card on their next birthday. Try this service: Birthday Alarm. If you don’t know their birthday but do have an address or email, send a greeting card for the next major holiday or on your shared ancestor’s anniversary or birth date. It’s another way of keeping the connection alive and expressing that you really do appreciate their help.
Occasionally make a follow-up call. See how they are doing, share any new family items you’ve come across recently, and ask whether they have they heard or found anything else.
Resource: Genealogy Gems Premium Members can learn strategies for finding living relatives with their exclusive access to my video class, “Unleash your Inner Private Eye to Find Living Relatives.” Class includes:
a handout summarizing 9 strategies and resources
a resource guide for online public records (U.S.)
a downloadable Living Relatives worksheet you can print (or open in Word) that will help you capture and organize what you learn about them
Click here to learn more about Genealogy Gems Premium website membership.
A major announcement from FamilySearch this week, launching the release of over 150 million Italian historical genealogical records online. Search now and learn about how you can help index. Also new this week: the 1901 Ireland Census, a beautiful image collection for...
Another brick wall…busted! We all have trouble spots in our family history research. Sometimes, we just need a little help breaking through. Here’s a tried-and-true method for using the genealogy FAN club principle to overcome brick walls in your family history research from guest author Amie Bowser Tennant.
A FAN club stands forFamily, Associates, and Neighbors. Using the FAN club principle is a process in which genealogists identify a list of people (family, associates, and neighbors) that lived and associated with a given ancestor. By researching these other people, you may flesh out some new hints for your own research. Ultimately, identifying our ancestors FAN club is an effective tool for overcoming brick walls in genealogy research.
Renowned genealogist and author Elizabeth Shown Mills, coined the phrase “FAN Club” for genealogical purposes. She points out the significance of not only searching records for an ancestor’s surname, but also paying attention to documents about the ancestor’s “FAN Club” (Friends, Associates, Neighbors). Historical information, she says, is like real estate: the true value of any piece of information is unknown until it is put into community context. Learn more in Elizabeth’s “QuickSheet: The Historical Biographer’s Guide to Cluster Research (the FAN Principle).”
Step 1: “F” Stands for Family
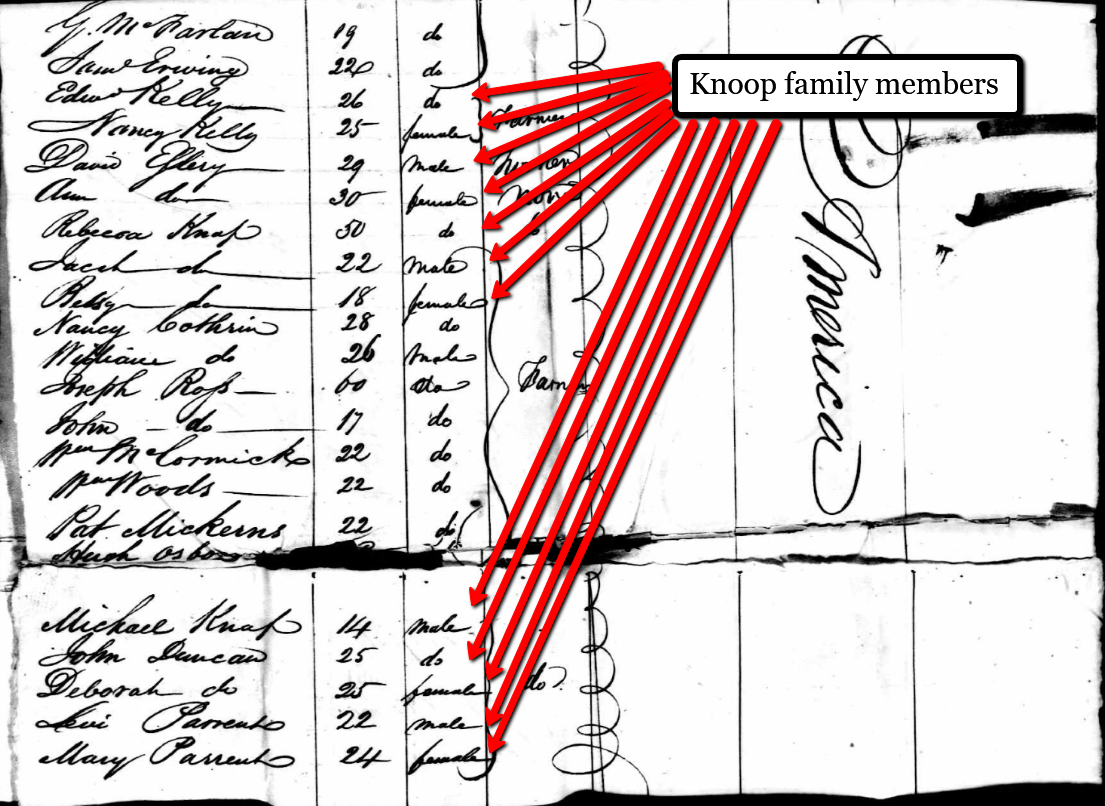
Searching out other family members may prove helpful. Like in the case of Michael Knoop of Miami County, Ohio, I noticed there was another man in the county named Jacob Knoop. What was even more unique is both Michael and Jacob were born in New Brunswick. How unusual, I thought! Two men with the same last name, both born in New Brunswick, living in a small, farming area in Ohio! They had to be related, and they were. Jacob was Michael’s older brother.
Because I was having trouble finding when Michael had come to America, I traced Jacob instead. I located the passenger list with Jacob’s name on it and in doing so, I viewed all the passengers and found Michael, their mother, and lots of siblings!
Image above: Creating a FAN club with Family
In the case of Catherine Fearer Coddington, wife of James Coddington, I was having difficulty finding who her parents were. By searching for other Fearer individuals in the area, I discovered a biographical sketch on a John Fearer, Jr. Historical Encyclopedia of Illinois, Volume 2, reads:
“In 1836[,]John Fearer [Jr.] brought his family to Illinois. From Wheeling, West Va., the journey was made entirely by water. A landing on the Illinois soil was made at Hennepin. James Coddington, from near the Fearer’s old home in Maryland had already settled north of Princeton, in Bureau County, and later married John Fearer’s sister Catherine. The family found a home at Coddington’s until Mr. Fearer rented land near by.”
Catherine had a brother! With this new information, I was able to easily trace John’s father to John Fearer, Sr. of Allegany County, Maryland and finally connect Catherine to her parents through a probate record.
It’s easy to see what a powerful strategy researching the relatives of your ancestors can be!
Step 2: “A” Stands for Associates
Creating a FAN club with Associates
An associate could be a business partner, a witness on a document, a pastor, a lawyer, or the man that bailed Grandpa out of jail! Associates are often related. To create a list of associates, you might start gathering all witnesses to vital events, such as baptismal or christening records, marriage records, probate, land, and affidavits.
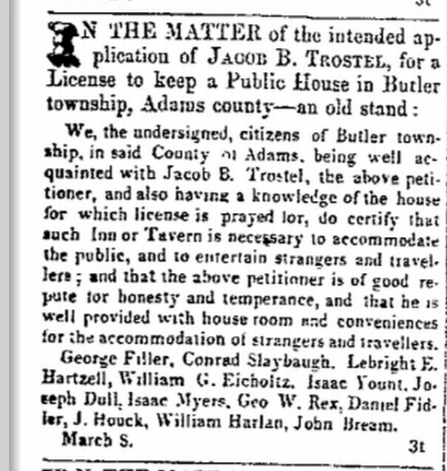
Were the courthouse records in your targeted area destroyed? Check the local newspapers for clues for possible associates. As an example, Jacob Trostelwas a signee and vouched for Harvey D. Wattles’ tavern license. The license and names of the vouchers were listed in the newspaper, too. Eleven other men of the community appear on that petition. Later, Jacob himself petitions for a tavern license. That petition is signed by twelve men: George Filler, Conrad Slaybaugh, Lebright E. Hartzell, William G. Eicholtz, Isaac Yount, Joseph Dull, Isaac Myers, George W. Rex, Daniel Filler, William Harlan, and John Bream.
In both of these examples, relatives of Jacob Trostel had been vouchers. By tracing them, we were able to find out more about Jacob and his family.
Step 3: “N” Stands for Neighbors
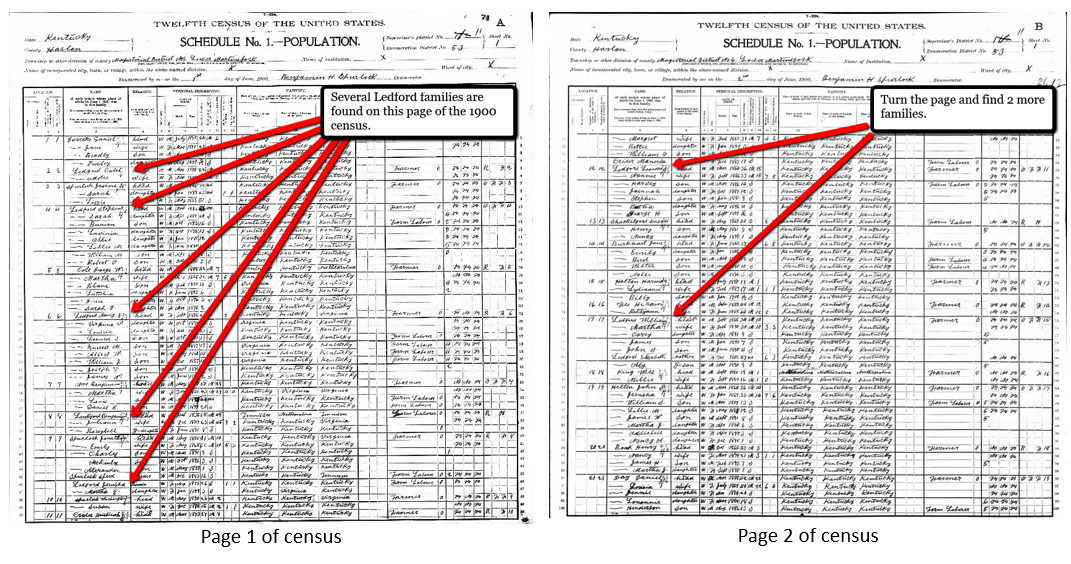
Where can we find a list of our ancestors neighbors? A census, of course! When looking at a census page, we look for other people on the page with the same surname as our targeted ancestor. There’s a good chance those folks could also be related. But, your ancestor’s neighbors may also hold rich clues that can help you in your research.Many neighbors intermarried, sold land to each other, and even migrated to new locations together.
Besides looking at individuals listed on the same census page as your ancestor, remember to turn the page! Sometimes, a neighbor is not on the same page as your ancestor, but rather the pages before or after. Just because a person appears directly after your ancestor on the census rolls doesn’t necessarily mean they were neighbors. This only indicates the order in which the census taker visited the homes. You might also be able to identify close neighbors by looking at land ownership maps for the area. In this way, you can easily identify who lived near-by.
If you are having difficulty determining where your ancestors came from, researching the neighbors may give the answer. Many neighbors migrated together. Always check at least one page before your ancestor and one page after your ancestor in any given census.
Image above: A FAN Club with Neighbors
Genealogy Fan Club: Comments and More Resources
There are likely dozens of successful ways for creating a FAN club for your ancestor. We would love to hear your examples in the comments below. For even more ways to break through those genealogy brick walls, enjoy these links below.
Even better: Genealogy Gems Premium Members can watch Lisa’s one hour video class Brick Walls: Cold Case Investigative Techniques. In this video you’ll not only learn how to apply criminal cold case strategies to your brick walls, but you’ll also get loads of fresh and innovative ideas you can try right away.If you are not a Premium Member yet, learn more about becoming a Genealogy Gems Premium Member here.
The free Ellis Island Passenger Search database is home to 65 million records of passengers arriving at the Port of New York from 1820 to 1957. Kathryn Marks, Manager at The Statue of Liberty-Ellis Island Foundation explains the best strategies for finding your ancestors’ passenger list records in the Passenger Search Database on the Ellis Island website. Along the way, you’ll learn some surprising facts about Ellis Island and these invaluable records that will have your genealogy jumping for joy!
Here’s a list of the type of information you may be able to find in passengers lists, depending on the year:
Name
Age
Place of Birth
Physical Description
Occupation
Last Place of Residence
Where they are going
Ship name
What Else You Can Find at the Ellis Island Passenger Search
Crew Manifests
Ellis Island Detention Records and Records of Special Inquiry
How to find Ellis Island records about detained passengers:
Find the manifest in the database.
Look to the left of the name for markings. X or SI stands for Special Inquiry indicates the person was probably held on Ellis Island. LPC: Likely to Become a Public Charge.
Detention records will tell you why they were detained. Detention records aren’t indexed. You can find them by locating the manifest first, and then scrolling through the carousel of images to find them at the beginning or end of the ship’s list.
Determine the length of your ancestor’s detention by counting the number of meals recorded.
Ellis Island Records Through the Years
Ellis Island records coverage: 1820-1957
Pre-Ellis Island AKA Castle Garden Era Records: 1820-1892
Before 1892: Castle Garden was the state-run immigration station. The federal government took over the process of immigration, they built Ellis Island in 1892.
Pre-1897: Records are technically customs records. That’s why they have a very limited amount of information. Manifests were destroyed in a fire in 1897.
Peak Years at Ellis Island: 1892-1924
After 1907: Passenger lists became 2-page documents containing approximately 30 questions.
1924: Ellis Island’s focus turned to detention and deportation. Therefore, most people wouldn’t have actually stepped foot on Ellis Island.
Ellis Island closure: 1954
Records available through: 1957
Records were created at the port of departure. Upon arrival, Ellis Island inspectors asked the passenger the same questions to make sure they were answered the same way.
How to Search for Ancestors at Ellis Island Passenger Search
Select from a variety of wild card searches. Kathryn recommends Close Matches, Sounds Like, and Alternative Spelling.
If you get too many results, click Filters, or use the Wizard or OnePageform. Kathryn recommends the One Page form.
On the One Page form, Kathryn recommends using age at arrival, year of arrival, port of departure and/or country of origin. Pad the years to allow for errors and deviations.
If you’re searching outside the peak year period, don’t use the filters. This is because the records after 1924 were indexed differently. Many passenger lists are only indexed by the year of arrival and are given a placeholder date of Jan. 1. Therefore, if you search for a month or day, you will not get results.
5 Search Strategies for Ellis Island Passenger Lists
Strategy 1: Start by running a broad search.
Strategy 2: Use the original ethnic name, because names were recorded at the port of departure. If you’re unsure of the first name, try entering just the first initial and checking the Contains wildcard. This often helps because the first letter of the name is often the same regardless of the language.
Strategy 4: Be persistent. There are many factors that could lead to not initially finding your ancestor.
Strategy 5: Consider other scenarios.
Name variations – try searching many variations.
Remember that the clerks may have spelled names phonetically.
Many passenger lists are handwritten so they may have been transcribed and/or entered into the database incorrectly.
Your ancestors may have arrived at a different port of entry, such as Philadelphia, Boston, or Baltimore. Many of those passenger lists are also available online.
More Ellis Island Search Tips:
Italian women travel with their maiden name. Children may be under either the father or mother’s last name.
Jewish people may be traveling under their Yiddish name.
Families are listed together. If you can’t find the head of the family, try searching for the children.
In pre-Ellis records names may be abbreviated. Example: Wm. for William, and women may be listed under their husband’s name, such as “Mrs. Adam Smith”.
Coming to the Ellis Island Passenger Search in the Future
The Statue of Liberty-Ellis Island Foundation is planning on expanding and adding the records of all the other ports to the database.
Alternative Search Tool for the Ellis Island Database
Elevenses with Lisa is our little slice of heaven where friends get together for tea and talk about the thing that never fails to put a smile on our face: Genealogy!
The National Archives is a wonderful resource of unique genealogical records. Though the archives are closed, the website is open, and it’s a great place to search for records and prepare for future genealogy research trips.
The National Archives website and online catalog can be a bit mystifying. If you’ve ever tried to search it and wound up frustrated, you’re not alone. This is often the case because the nature of the archives and the search function of the online Catalog are not genealogically focused. Armed with an understanding of how and why it is set up the way it is, and the know-how to search, refine, and download documents, you’ll be ready to add it to your genealogy toolkit.
In this video episode and article, we’ll be answering important questions such as:
What kind of genealogy records can be found at the National Archives website?
Which genealogy records are not available at the National Archives?
How do I search for records at the National Archives online Catalog?
How can I retrieve only digital items from the National Archives Catalog?
How can I get better search results in the National Archives Online Catalog?
How do I download files from the National Archives Website?
What Kind of Records Can be Found at the National Archives Website?
To understand the types of records we can expect to find we must first understand the role and mission of the National Archives. Their role is preserving and making available only the permanent Federal Government records. Some have genealogical value.
These records are arranged as the agencies created them, so there is no master subject or name index.
While they have 110 million + digitized pages in the Catalog, this represents just a small fraction of the holdings.
The Catalog contains descriptions for their nationwide holdings in the Washington, DC area, regional facilities, and Presidential Libraries.
The Catalog currently contains descriptions for 95% of the records, described at the “series” level.
You can find basic information about the records, including size and location, from the catalog description.
The National Archives is regularly adding more file unit and item descriptions, many of which include digital files.
Some traditional genealogy records can be found at the National Archives such as:
Census Records
Passenger Arrival Records (Immigration)
Land Records
Military Personnel Records
Court records
Fugitive slave cases
Naturalization records
Federal employees
Applications for enrollment in Native American tribes
Most if these records are available in person. However, all National Archives locations have been closed since March 13, 2020 and remain so as of this writing.
Genealogy Records You Will Not Find at the National Archives
Because the following genealogy records are not created at the federal level, they would not be cataloged or found at the National Archives:
Birth
Marriage
Divorce
Death records
Deeds and wills.
To obtain these records, check with the appropriate state or county.
What to do before you search the National Archives Catalog online
Before you begin your online search:
Write down your research question.
Decide what topic you want to browse.
Think of possible ways your ancestor interacted with the Federal Government.
On the National Archives website they provide a great example of a research question that a genealogist might have and how it can lead to records.
QUESTION: Why did my ancestor have a significant decrease in net worth between the 1860 Census and 1870 Census?|
ASK YOURSELF: How might your ancestor have interacted with the federal government that could help explain this discrepancy?
RECORDS TO SEARCH FOR: The Bankruptcy Act of 1867 allowed many people to file for voluntary bankruptcy. The genealogists could search in the National Archives Catalog for bankruptcy AND [state where you ancestor lived during that timeframe] to see if bankruptcy records are available that could help answer the question.
How to Search the National Archives Catalog Online
There are three key types of searches you can conduct in the catalog:
Keyword searches
Filtered searches
Advanced search
Let’s start with a keyword search:
Go to https://catalog.archives.gov
Enter keywords in the search box in the center of the page.
(If you are looking for an exact phrase using two or more words, put them in quotation marks example: “bounty land”)
Press the magnifying glass button to run your search.
The results will be returned starting with best results at the top.
To view a description, click on the blue title.
You can use the filters on the left side of the results page to narrow down your results.
Refine your search results by type if you know the type of material you want. Example of material type include photos, maps, or textual records.
It’s important to remember that just because the item appears in the result does not mean that it is available online. Many of the descriptions don’t include digital images of the records.
How can I retrieve only digital items from the National Archives Catalog?
You can dramatically narrow down your search results to include only digital items that you can review from home. To do this, on the search results page, click on the filter Archival Descriptions with Digital Objects. This will revise your results list so that you will only see descriptions of items with images attached.
How can I get better search results in the National Archives Online Catalog?
It never hurts to try searching by name, although many record descriptions will not name the people who are named in the records. You can improve these searches by using quotes around the entire name, or just the surname. This will restrict results to only items that exactly matches what appears in the quotes.
You’ll notice that there isn’t a specific search field for names in the National Archives Catalog. Here are several additional search strategies you can use when searching for the names of people:
Search on the person’s full name in first name-last name order.
Search for last name – first name within quotes
Search on the surname only. Again you can use quotes.
Search on spelling variations using the search operator OR. This works well when searching name variations such as: Burkett OR Burkette.
Search on variant spellings of the first name, including “Americanized” versions.
Example: Joseph Maggio OR Guiseppe Maggio.
Again, keep in mind that most descriptions in the National Archives Catalog do not include the names of people mentioned in the record. If you know an individual participated in event, search for related keywords and look within the records. You will need to read them to see if your ancestor is mentioned.
Another way to improve your search results is to shift your focus from people to topics. This is strongly recommended by the National Archives. You are much more likely to get a greater number of results because people aren’t usually named in descriptions. Be sure to read the description carefully to see if the item will be helpful and worth requesting.
When searching topics, think about and make a list of relevant phrases and keywords. For example, when searching for Land Records, try searching for phrases such as:
How to Download Files from the National Archives Website
After clicking the description on the search results page you will be on the record page. If there is a digital image, it can be downloaded. Look below to see if there are additional pages. You can click to select the desired page and then click the download icon just below the image.
If you would like to download all of the images, look below the list of images to see if a compiled PDF is available. This will allow you to download and save all of the images in one convenient file.
The Record Group Explorer at the National Archives Website
The Record Group Explorer offers a unique way of visualizing and finding records at the National Archives website:
Allows you to browse NARA’s holdings by Record Group
Use it to get a sense of the scale and organization of records
Explore what is available online via the Catalog
Provides an overview of the digital scans available online within a Record Group: textual records, photographs, maps and charts, electronic records, and more.
Records are grouped by specific government agencies. Each group is represented visually in a section. The section is light blue, signifying the total volume of textual records. If a dark blue bar appears in the section, it is an indicator that some of the records are digitized. The percentage or number (depending on the view you select in the grey Record Group Explorer Tools bar across the top) of digital images will be shown.
If the section is green, that indicates that there are records online but they are not textual records. They may be items like photographs or films.
If the section is grey, there are no records available online at all.
Click a section to learn more about that Record Group and explore the records.
Record Group Highlight: Motion Pictures
The National Archives holds a surprising number of motion pictures. As you browse or search, focusing on topic will likely be more helpful than searching by name. Consider looking for your ancestors’ homes, businesses, military service, events and associated locations.
“A series of films: 306-LSS, a group of more than 400 black and white reels of stock footage that ended up in the hands of the United States Information Agency (USIA).”
Answers to Live Chat Questions
One of the advantages of tuning into the live broadcast of each Elevenses with Lisa show is participating in the Live Chat and asking your questions.
From Sue M.: Do they hold WPA and CCC records? From Lisa: Yes to both!
From Steve S.: Can you use the * and ? as search operators in the NARA catalog? Also thanks for de-mystifying this site! you have made it much more understandable. From Lisa: After the show Steve did some searching and found this handy page providing additional search tips and operators supported by the website. Thanks Steve!
From Michael R.: Are the Naturalization records in the National Archives different from those in local courthouses? From Lisa: I haven’t looked lately, but about 15 years ago I filed a Freedom of Information Act (FOIA) request and received my great grandfather’s federal naturalization paperwork. It included a photograph that was not included at the county court level.
From Lynnette B.: I had my parent’s old home movies put on DVD’s several years ago. What is the next step in making them more available? Adobe spark video? YouTube? I want to identify each person on them? From Lisa: An easy way to get started is by making Adobe Spark Videos (see episode 16) which is free and easy. Use the Titles feature to add text explaining who is who. Uploading them to your free YouTube account channel is a super easy way to share them.
Resources
Get My Free Genealogy Gems Newsletter – click here.
 Here are some great websites for locating people you don’t know, or at least learning more about them (as you can on LinkedIn):
 7. Do these things during the call:
 This is a must. Do it right away while it’s on your mind. Cite the conversation as the source of the information.
 Resource: Genealogy Gems Premium Members can learn strategies for finding living relatives with their exclusive access to my video class, “Unleash your Inner Private Eye to Find Living Relatives.” Class includes: