Discover the essential search strategies that every genealogist should be using when searching for records at FamilySearch.org, the popular free genealogy website. In Elevenses with Lisa episode 64 Lisa Louise Cooke discusses:
Wild cards you can use when searching FamilySearch
Search strategies to help you get more results
Advanced Search strategies
Episode 64 Show Notes
FamilySearch.org is a free genealogy records and family tree website. You will need to be logged into your free account in order to search for genealogy records.
In this video and show notes I will outline strategies for searching for people by name in genealogy records. You can then apply these techniques to your genealogy research plan. Knowing what you’re specifically looking for will give you a better chance at success.
Elevenses with Lisa episode 64 – Share on Pinterest
Starting Your Search at FamilySearch
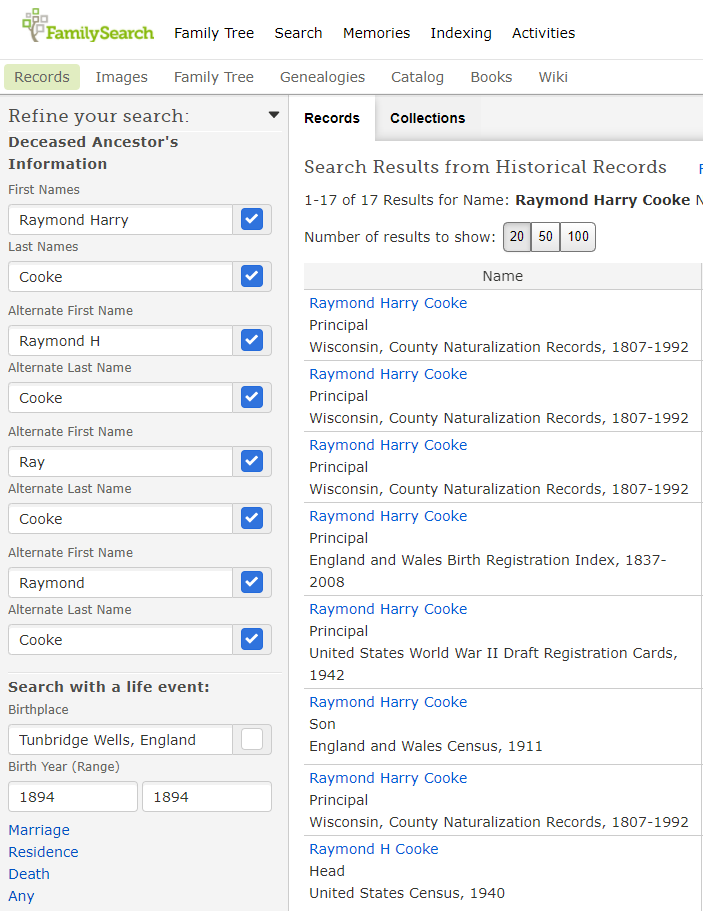
In the menu go to Search > Records (then use the form).
Start with a broad search.
Search results ignore the order of first names but will preserve name order if there are two last names.
Click the Exact Match box to start narrowing in on specific names and spellings.
Even if you are confident that you know exact names and places try variations. For example, add or remove a name and turn on and turn off Exact Match.
Strategies for Searching Names FamilySearch:
Add or remove middle names.
Try searching for nicknames.
Try spelling variations. Use the AlternateName You can search up to four alternate names at a time. Try clicking the Exact Match box for each alternate name.
example of Alternate Name search at FamilySearch
Try spelling the name as it would have been spelled in the old country. (Example: Sporan / Sporowski / Sporovsky / Sporowski)
Use wildcards to help with search variations.
Asterisk (*) replaces zero or more characters.
Question mark (?) replaces a single character.
Use cluster research techniques by searching on relationships.
A few words about searching on relationships: Try searching only with your ancestor’s first name and a known relationship such as a spouse, parent or other relative. In addition to specific people, try searching for a surname associated with the family.
Over time the spelling of a last name can change in a family. It’s important, even if you receive initial successful results, to try all variations, including language variations.
In the case of women, records will be under the last name they were using at the time the record was created. Therefore, try searching for them using their maiden name and then their married name (or names if they were married multiple times.)
Try leaving the last name field blank. This can be particularly effective when searching for female ancestors. This strategy works well in conjunction with entering additional information, such as the names of the spouse or parents.
Try just surnames, unique first names, and Other Person
Pro Tip: Use Snagit to easily create a search log
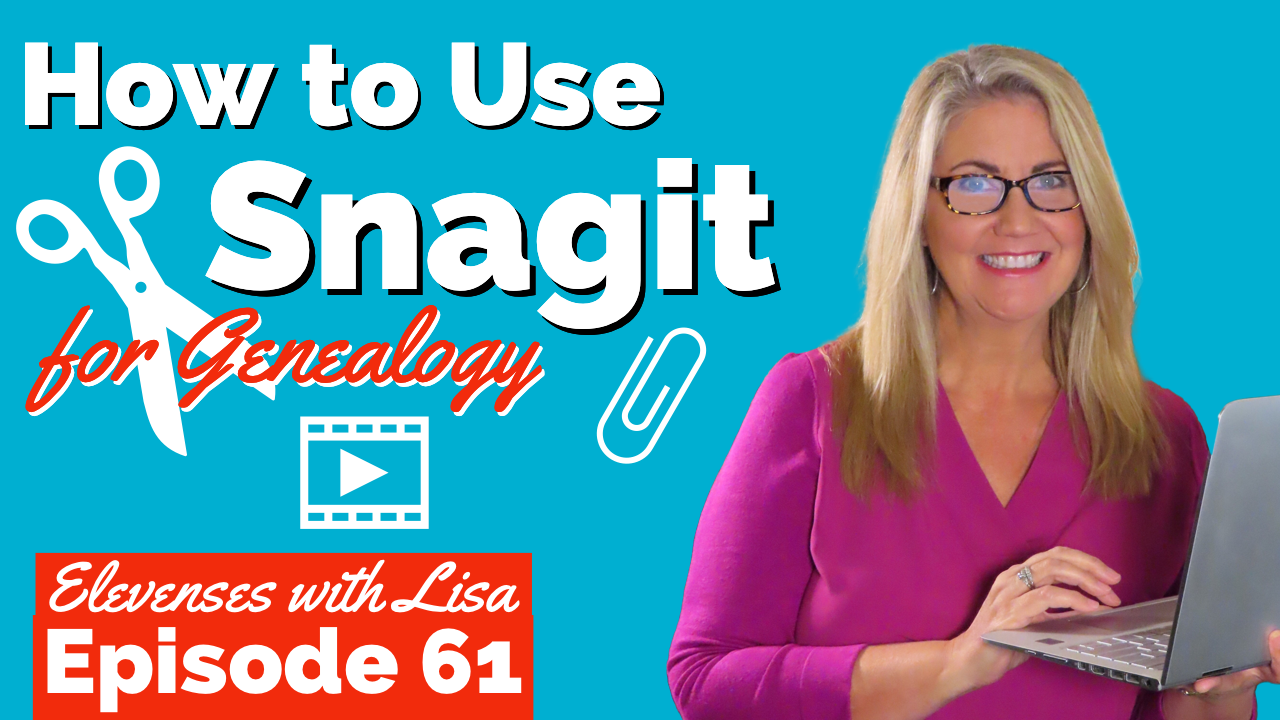
Learn more about Snagit: How to Use Snagit for Genealogy (episode 61) Save 15% on Snagit with our exclusive discount coupon code: GENEALOGY15
Have you been using Snagit? Leave a comment
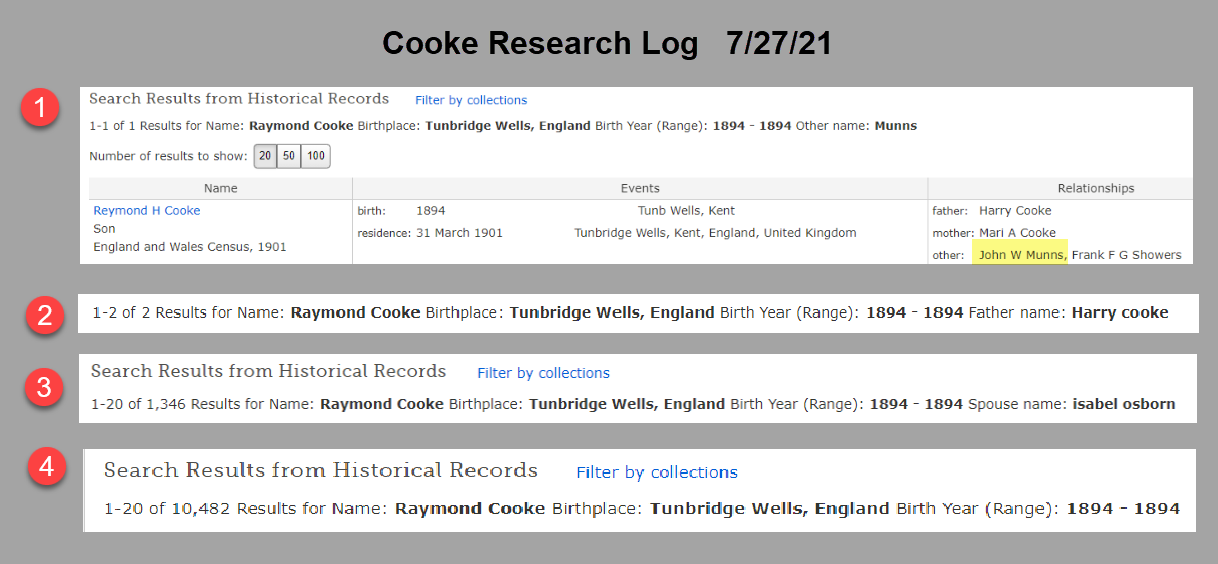
Here’s an example of a search log I created using Snagit. You can add custom text, symbols, highlighting and much more to create exactly the log that works for you.
Search log created with Snagit
Here’s how to quickly capture and keep a research log of your FamilySearch searches:
Run your search as usual.
Use Snagit to clip the number of results and the terms searched at the top of the results page. (Set Snagit to “Region” to precisely clip that portion of the screen.)
Continue searching and clipping. When done, go back to the Snagit Editor.
Click Control (Win) or Command (Mac) and click to select each clipping you made in order. You can also select all of your clippings by clicking to select the first clipping and then hold down the shift key on your keyboard and click the last clipping.
Right-click on the selected clipping to access the menu. Click Combine in Template.
In the pop-up Combinein Template box, select a template. I like to use Custom Steps for a research log.
Click the Next
Give your combined image a Title. (You can edit this again later.)
Select the font and canvas color as desired.
The NumberImages box will probably be selected. This will place a “step” number in front of each clipping showing the order in which you clipped. You can deselect this box if you don’t want to number your clippings.
Click the Combine
Edit the combined image as desired. You can click to select items to move and resize them. You may need to ensure you’re not in Text mode – click the Arrow at the top of the screen and then you’ll be able to click on items like the numbered steps and move them around. Grab the edges and drag them to crop if needed.
Save your image: File > Save As.
Search Strategy: Events
Try searching on known life events such as:
Birth
Marriage
Residence
Death
Any
Click the type of life event you want to include in your search. Enter the place and year range.
Life Events Search Tips:
Try your search with different events.
Try your search with no events.
Use the Residence option to find records identifying where a person was living. Some records contain an address or last place of residence. Birthplaces, marriage places, and death places are not the same as residence places.
Use the Any Event if you know a date and place for an event other than birth, marriage, death, or residence. For example, a search with an Any event can find dates of military enlistment or immigration.
Search Strategies: Places
In the place field try searching at a more or less specific place level. If you searched for a town, try the county, state, district or country.
Try using wildcards in place-names. (Enter * to replace zero or more characters. Enter ? to replace one character.)
Search Strategies: Years
In the year fields try adding a year before and a year after.
In the year fields, try searching with no years first, and then filter the results to narrow your search by year.
Advanced Search Strategies
Include multiple events in your search when you are looking for a record that likely contains all the events.
Death records – try searching with both birth and death events.
Birth record, include only a birth event, since birth records usually do not contain death information.
To search for a child’s birth records, enter the child’s name, then click Parents. Enter the parents’ names. If needed, try variations such as these:
Both of the parents’ full names.
The father’s full name only.
The mother’s full married name only; then her full married name only.
The father’s full name with the mother’s first name.
The mother’s full maiden name with the father’s first name.
To find all of the children in a family, leave the first and last name fields blank.
Then click Parents and conduct your search using only parents’ names. Try all the variations.
Searching for Marriage Records
To search for a marriage enter the name of one person in the first and last name fields. Click Spouses, and enter the name of the spouse. Try variations: the spouse’s first name and the wife’s maiden name. To limit your search results to marriage records only, click Type, and click the Marriage checkbox.
Search Best Practices
Have a specific search goal.
Start with a broad search. You do not have to enter information in all search fields. You often can get better results when you leave most blank, and then filter down.
FamilySearch doesn’t support Boolean Operators like Google does.
Expect records and indexes to contain errors, spelling variations, and estimations.
Try your search several times with variations.
Even if your ancestors had easy-to-spell names, expect spelling discrepancies. Anderson could be Andersen in some records. Try Anders?n in the Last Names search box.
Always look at the image, if possible. It often has more information than the index alone.
I’m going to share with you my 10 “DON’T MISS!” features of MyHeritage. If you don’t currently use the site, this is your chance to see what it can do for you. If you do use it, let me introduce you to some of the GEMS you should be using. Scroll down to watch the video replay and get the show notes.
Watch Episode 63
Video & show notes below
Episode 63 Show Notes
10 Awesome MyHeritage Features You May be Missing:
1. Instant Discoveries™
Want to get started fast? After you add what you know about your family, you can start taking advantage of instant discoveries. You’ll find Instant Discoveries in the menu: Discoveries > Instant Discoveries.
There are three types of Discoveries:
All Discoveries
Person Discoveries
Photo Discoveries
I particularly like Photo Discoveries:
Finds photos of people in your tree
Consolidates into packages of up to 10 photos from different family sites.
Photos will originate only from family sites where the privacy setting for allowing photos to be copied from Smart Matches™ is enabled.
Click the View Discovery button for a batch of photo discoveries. Click “View original photo” to see a larger version and who else is tagged in it. By default, all photos in a Photo Discovery will be
copied to your tree when you add the discovery. Exclude specific photos by clicking the checkmark to deselect it. Click Add to add all selected photos to your tree.
To reject a Photo Discovery, click Reject this Discovery at the bottom of the list of photos.
Rejected discoveries will not be offered again. After applying a discovery, your tree will change,
and new discoveries will need to be recalculated (up to 24 hours.) Unlike SmartMatches, once a person or photo discovery is added, you can’t “undo”. You’ll need to remove them manually.
PremiumPlus and Complete subscribers have access to unlimited Discoveries.
2. Tree Consistency Checker
No tree is perfect! That’s why MyHeritage provides this handy tool that accelerates your ability to find and correct problems.
You’ll find the Tree Consistency Checker in the menu under My Family Tree > Consistency Checker.
MyHeritage’s Consistency Checker flags three types of issues:
Errors: Obviously incorrect. (red triangle icon)
Warnings: Possible but unlikely. (orange circle icon)
Notices: Maybe OK but worth a look. (grey square icon)
To adjust what the tool searches for, click the gear icon to change the settings. The Consistency Checker searches for 37 types of issues. Make adjustments as desired.
As you review the found issues, you can:
dismiss individual issues
hide issues
dismiss checking for this issue.
3. U.S. Yearbooks
After starting with what you know, the next logical and honestly one of the most fun record to go after is yearbooks! MyHeritage has over 250,000 yearbooks. To find the yearbook collection, go to the menu Research > Collection Catalog > U.S. Yearbooks Name Index, 1890-1979. To find even more school related records head the to grey column on the left side of the page and click School & Universities.
Description from MyHeritage: “This collection contains almost 290 million records…A student or faculty member often appears in a yearbook several times. Part of the work conducted to produce this collection merges all occurrences of the same name in a yearbook into one record with references to the pages where the person is mentioned. Records in this collection will list the person’s name, often their gender, school’s name and location, and likely residence based on the location of the school. Additional work was done to identify the grade of the students to be able to infer their age and an estimated year of birth for some of the records.
The same person will often occur in previous or subsequent editions of the same yearbook and these related yearbooks are presented at the bottom of the individual’s record – to assist the researcher in finding other books where their person of interest might be found.
This collection is a name index produced by MyHeritage from the U.S. Yearbooks, 1890-1979 collection and is based on the same set of yearbooks…In case you didn’t find what you were looking for, we encourage you to check out the U.S Yearbooks 1890-1979 collection to search the entire free-text index of this amazing collection.”
Yearbook Search Tips:
Review the entire yearbook carefully for handwritten notes.
Look for people in their social circle.
Take a look at the Advertisers
Keep in mind that yearbook content had to be submitted early, often by early spring. Events occurring after that may be missing.
In the menu: Collection Catalog > U.S. City Directories
561,503,516 records in 25,468 directories
Description of the collection from MyHeritage: “City directories contain an alphabetical list of adult residents and heads of household, often with their spouse, with addresses and occupations and additional information. This collection is a huge genealogical compilation from 25,468 city directories published in 1860-1960 across the United States, created exclusively by MyHeritage using advanced machine learning technologies developed specifically for this purpose.”
“City directories, like census records, contain information that helps genealogists establish residences, occupations, and relationships between individuals. The added benefit of city directories is that they were published annually in many cities and towns throughout the United States.”
MyHeritage says that this collection will be updated soon to include pre-1860 directories as well as a large and unique set of directories published after 1960.
Snagit
In the video I showed you how I use Snagit to capture clippings. Learn more by watching episode 61. Get SnagIt here.
There’s a ton of data in your family tree, and MyHeritage has the tech tools to help you see it in many forms. One of the coolest and most fun is Family Statistics. You’ll find it in the menu under Home > Family Statistics. Here you’ll find stats on:
Gender
Living or Deceased
Marriage Status
Common Last Names
Common First Names – Male
Common First Names – Female
Places of Birth
Places of Death
Places of Residence
Age Distribution
Average Life Expectancy
Oldest Living People
Youngest People
Lived the longest
Lived the shortest
Birth Months
Zodiac Signs
When Were People Born
6. MyHeritage PedigreeMap™
PedigreeMap™ is a free feature on MyHeritage. It allows you to visualize and navigate information found in the Place field of the ancestors in your family tree from a geographic perspective. You’ll find PedigreeMap in the menu under Family Tree > More > PedigreeMap.
Use MyHeritage’s PedigreeMap to help identify errors and migration patterns over time.
At the center of the PedigreeMap screen, you’ll see a map of the world with circles indicating the locations listed in your family tree.
Gray circles = aggregations of locations in the same country or state
Orange circles = specific locations
To the left of the map you’ll see your ancestral places in list form, sorted by the number of references in your tree and grouped by country or state. By default, PedigreeMap™ will display places associated with your extended family, with you as the central person. In the field where you as the central person are name, type in the name of any family member to change the view to focus on them. Then use the filtering options in the bar at the top of the map to change which groups of people in your tree are displayed (ancestors, descendants, etc.)Click the funnel icon for even more filtering controls.
PedigreeMap™ Top Tips:
Click Heat Map in the bottom right corner. This displays concentration areas for your family. It is especially useful when combined with filtering by year and type.
Click Not Found in the list on the left to quickly find family members who need Place information added.
Look for grey exclamation marks which indicate that the place name needs more clarification.
Because PedigreeMap™ is based on Google Maps, it can be best to use the current country so you can accurately locate it on the map. For example, you could list the country as “Poland (formerly East Prussia).”
7. MyHeritage Relationship Report
Have you ever found a person in your family tree and lost track of how you are related to them? MyHeritage’s Relationship Report makes it quick and easy to visualize your connection to any person in your tree. In fact, it will show you the relationship between any two people in your tree.
You’ll find the Relationship Report in the menu under Family Tree > More > Relationship Report. Simply enter the names of the two people and click the Display Relationship button. Change the detail drop down menu to show the amount of detail you want.
8. Confirm or reject a Theory of Family Relativity™
The Theory of Family Relativity ™ helps provide theories about how you and your DNA matches might be related by incorporating genealogical information from MyHeritage’s records and family trees. Of course, some theories might not be accurate.
Until recently, you didn’t have the option to confirm or reject theories. Now you can review theories, marking the ones you have already processed so the new ones are easier to notice.
Status Options: Pending, confirm, or reject.
Go to the DNA Matches page and use the filters to see only those DNA Matches that have a Theory of Family Relativity™.
Theories can be confirmed or rejected in two places:
Review DNA Match page, which includes a summarized view of the theory.
2) Full theory view.
In the list of DNA Matches, once you’ve confirmed a theory, it will be displayed in the DNA Match card. Change your mind? Click View theory and then undo your confirmation or rejection, returning the theory to pending status.
Learn more about DNA at MyHeritage. Watch episode 42 on Genetic Groups at MyHeritage.
9. MyHeritage Photo Tools
Some of the most exciting advances coming from MyHeritage recently have been in the area of family photos. Currently they offer three outstanding tools:
Photo Enhancement
Photo Colorization
Animation
You try them a few times for free. Complete plan subscribers get unlimited usage. You will find the photo enhancement tool in the menu under Family tree > Enhance Photos. It works much the same way as colorizing your photos.
Use the Comments section under the photo to share information and collaborate with others.
How to colorize a photo at MyHeritage: Under Family Tree in the menu select Colorize Photo. Click the Upload photo button and select a photo from your computer. You can drag and drop it onto the screen. In a few seconds your colorized photo is ready.
After colorizing your photo you can:
Share the colorized photo to Facebook
Share to Twitter
Copy link to clipboard
Download the photo
Go back to your photos and click the photo. You can compare the before and after. You can click to view the photo full size and use the zoom tool for an even closer look. Click the edit icon to edit the photo title, date, and place. Click Apply to save the changes. You can also make manual adjustments to the colorization.
Animate photos: You can upload a photo by going to the menu: Photos > Animate Photos. If you plan on enhancing or colorizing the photo do that first. Then from the photo page click the Animate button for that image. Currently you can animate one face at a time in a group photo. Closeup faces animate better than smaller faces in a bigger photo. Once the animation has processed you in the animation window, you can download the video or select different types of animations.
Photo Tools as Research Tools: Sometimes colorizing and enhancing your photos can help you spot more information in the photograph than was originally visible. You can colorize both photos and documents to improve clarity, readability, and visibility.
MyHeritage recently published the following announcement about their commitment to privacy:
“Earlier this year, prior to MyHeritage’s acquisition by leading private equity firm Francisco Partners, we issued a press release in which we promised to expand MyHeritage’s strong privacy framework for the benefit of our users.
The current updates to our Privacy Policy fulfill this promise. The highlight of the updates is the unequivocal commitment not to license or sell genetic data to any third party. This is highly unique among the larger genealogy and consumer DNA industry…”
Have you thought about using Google Photos but just weren’t sure how it worked or where to start? This episode will answer your questions and give you the confidence to use it effectively. In this audio introductory tour to Google Photos we will answer the questions:
What is Google Photos? Is Google Photos private?
What features do I get with Google Photos?
How does Google Photos storage work? (Is Google Photos free?)
How do I start using Google Photos?
How do I upload my photos and videos?
How to search and retrieve photos and videos in Google Photos How would Google Photos benefit genealogists, archivists and others?
This audio comes from my YouTube video series Elevenses with Lisaepisode 23.
Listen to the Podcast Episode
To Listen click the media player below (AUDIO ONLY):
Watch the Original Video:
Genealogy Gems Premium Members Exclusive Download:
Don’t miss the Bonus audio for this episode. In the app, tap the gift box icon just under the media player. Get the app here.
Get the Free Genealogy Gems Newsletter
The Genealogy Gems email newsletter is the best way to stay informed about what’s available with your Premium eLearning Membership. Sign up today here.
MyHeritage is the place to make connections with relatives overseas, particularly with those who may still live in your ancestral homeland. Visit www.MyHeritage.com
(Please note: This interview transcription has been minimally altered for ease of reading and clarity.)
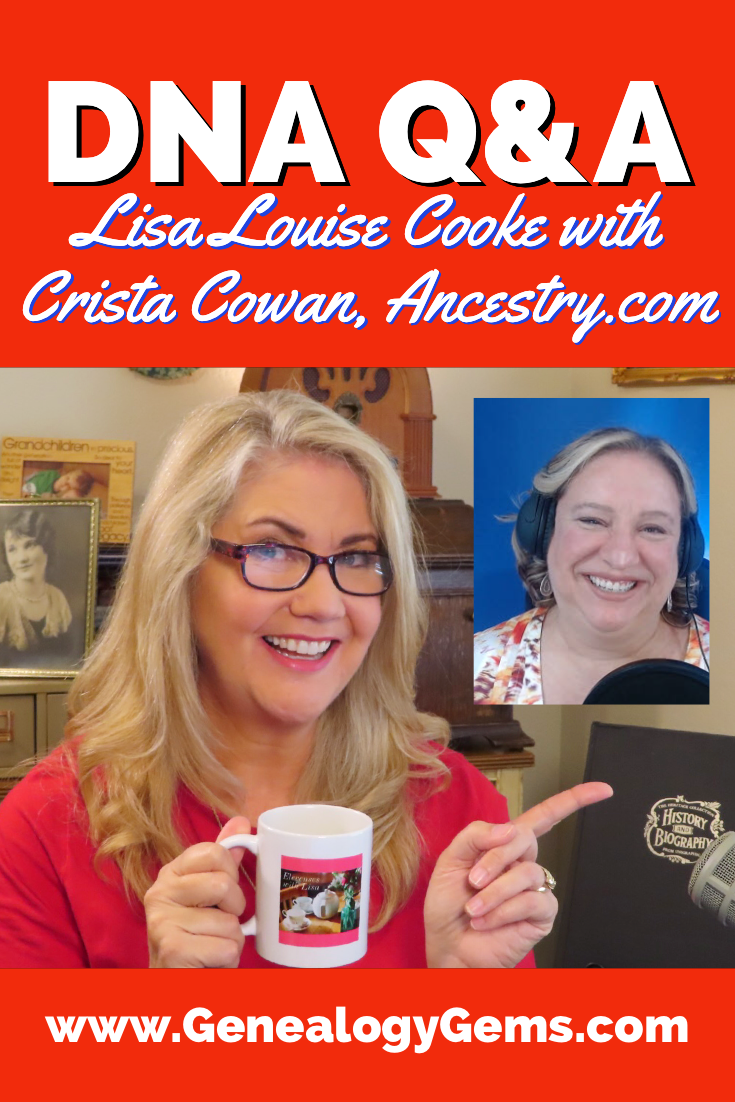
Lisa: AncestryDNA is one of the leading DNA testing companies that has added DNA science to our genealogy toolkit. If you’ve tested your DNA, those results have become one of the important records that you’re using to build your family tree. The interesting thing about these records is that they’re quite different from other types because they evolve and change over time. The results themselves aren’t changing, but our interpretation and the information that we’re able to glean from them is evolving and continues to do so as more people get tested. Here to give us insight into the latest innovations over at AncestryDNA is the corporate genealogist for Ancestry, better known as the Barefoot Genealogist, Crista Cowen.
Crista: Thank you.
Why Have My DNA Ethnicity Results Changed?
Lisa: Hey, happy to have you here. We love to get together and chat about genealogy here at Elevenses with Lisa, and DNA is always on people’s minds. I know that one of the really common questions that I get a lot is around ethnicity, and about changes to the ethnicity percentages. Sometimes people see the results and they’re really excited about them. But then Ancestry publishes a new update and things look different. It can be a big surprise. Tell us a little bit about how often these updates happen and what causes them. Why do they change?
Crista: In order to answer that question, you kind of have to back up a little bit and understand the concept of reference panels.
Understanding DNA Reference Panels
When AncestryDNA started in 2012, we hadn’t sold any DNA kits yet. But we had purchased scientific reference panels from others who had been studying DNA for about a decade at that point. This was a group of people with deep roots in a particular place in the world that we can compare customer DNA to. So, as a customer takes their DNA test, the first process we run it through is this ethnicity estimate. We compare them to this reference panel. As our research team has expanded their reach, and then now we have 20 million people who’ve taken the ancestry DNA test, we’ve been able to identify candidates in our customer pool who are eligible to be part of that reference panel. Then the reference panel grows. And so statistically as it grows, those results are going to get more refined. They’re going to change a little bit. As the science advances, we also learn new ways to compare the data so that it’s more accurate.
Ancestry has been releasing an ethnicity update about once a year, usually in the fall. It’s just because we keep growing that reference panel, and because of the advances in science about how those algorithms work. And you get a lot of new people, obviously, on a regular basis for testing, so they’re adding to it.
Lisa: You started with that initial reference panel that you got somewhere else. Do you ever bring in other reference panels that become available to kind of speed up the process of the growth?
Crista: Yeah, we do. We’ve purchased a few different reference panels from research groups. But primarily, the growth now is coming not just from our own customer base. Also our team of genetic scientists are looking for individuals in places around the world that are underrepresented in our reference panel in order to increase the sample size. They’re excellent.
Lisa: Sometimes, the updates, they come out and people look at and they go, “that looks different! And now it’s saying this and not that.” Tell us a little bit about that because there’s some rhyme and reason behind why that happens.
Two Reasons Why DNA Ethnicity Results Change
Crista: There is. There are actually two challenges that our science team faces. One has to do with place, and one has to do with time.
What we may know as a place right now, likely didn’t exist 300, 500, or 1000 years ago. The boundaries have changed. The people that have migrated in and out of that place have changed. And so one of our challenges is to label those ethnicity estimate locations as something that people will recognize and be able to associate with, but fully recognizing that 1000 years ago that place may have had people there who were called something very different.
The second challenge we have is that time-based challenge. We use this reference panel of living people. But what we estimate is with this data, we’re showing you where your DNA came from 500 to 1000 years ago, and most of us don’t have trays that go back that far.
Lisa: Right, exactly. So how do you zero in on that? How do people make sense of when they see it, that they understand the context of the time frame?
Crista: We try to provide a lot of contextual data and a lot of people don’t even realize it’s there.
When you’re looking at your ethnicity estimate, you can click on any one of those – there’s usually two or even three drill-down screens – that give you some of that historical background, and some of that information about the time period that we’re covering, and what the names of some of the people who lived there were.
Why Do My DNA Results Now Say I’m from Scotland?
For example, Scotland was a big one, in this last (AncestryDNA) update. A lot of people ended up with Scotland as an ethnicity. But really what we’re looking at is who were the Britons? Who were the Celts? Who were the Gauls? And how to all those people, so many hundreds of years ago, how did they migrate in and out of those places? And what would that admixture look like, so that we can tell you. But if we said, “Oh, you’re Celt, Gall, or Britain, even some people wouldn’t understand what that meant. So we label it, Scotland, and then we expect people to drill down into that other information that we’ve provided by clicking through.
Encouraging AncestryDNA Users to Use the Website
Lisa: Do you find that people fully utilize this site? I’m thinking about how folks go to so much trouble and expense to get tested, and yet may not be taking full advantage of the results and the website. I imagine you see a lot of backend data. What kind of usage do you see? I think I’ve seen some recent updates that you guys have been doing to kind of help prompt people to get more involved and drill down.
Crista: Yeah, for sure. One of the things that we’ve done is we have a mobile app. What we’re discovering is that for a lot of people, their entry point, both to family history and through DNA is through mobile. So we’ve made some of the mobile prompts a little bit more prominent and a little bit easier to navigate. And then of course, we’re learning from some of that and applying it to the desktop version.
Another thing that we have that wasn’t introduced when AncestryDNA was first introduced, it took several years, is what we call our genetic communities. And that helps to give some additional context to some of those ethnicities as well.
What are Ancestry Genetic Communities?
Lisa: I’d love to have you talk more about genetic communities. It’s fascinating to see them and to see their evolution. They’ve really moved along quite quickly, haven’t they? Just knowing that there are many people who maybe have never looked at this, tell us what they’re missing and how to take advantage of it.
Crista: Yeah, so that first algorithm that we run against your DNA is comparing your DNA to that reference panel of people to give you those ethnicity estimates. Those are the ones with the percentages. There’s always going to be a percentage next to it. But the communities are a total evolution based on who’s testing and the family trees that are available.
Ancestry has 20 million people who’ve taken the DNA test, and 100 million family trees on our site. And here’s kind of how this works. As you test, you’re matched to other people who have taken the test. And I think the average AncestryDNA test taker has something like 75,000 matches. It’s kind of mind-blowing! But the idea is that the data underneath all of that means that we’re able to really clearly see networks of matches. So even if we didn’t know anything about your family tree, or anything about your ethnicity, just based on the matching data alone, we start to see these clusters or networks of people who all match each other. And so then because we have this rich family tree data, we can go into that network of 1000s of matches, and we can say what do they all have in common? And what we start to see is, the data very clearly points to specific birth locations within their tree within the last 200 years. So, your ethnicity estimate is looking at 1000 years ago, but those communities are where members of your family have lived within the last 200 years. And we’ve now got more than 1500 of those around the world.
Lisa: That’s amazing. And of course, if the person is in the tree they have timeframe associated with them as well, not just place, because like you said it’s just lurching the whole thing closer in time to us, which is really exciting. Right?
Crista: Yeah. And if you start to think about that time piece, right, so we’re looking at tree data 100 to 200 years ago because of this network effect. But what’s possible is as the network continues to grow, and as the science continues to get better, we may not only be able to connect you to specific genetic communities, but also show you migration paths from your original ethnic origins over time, which then allows people to have an entire complete family history story without ever starting a family tree themselves. Hopefully, that then leads them into it because they want to know “which branch of my family tree does this represent?”
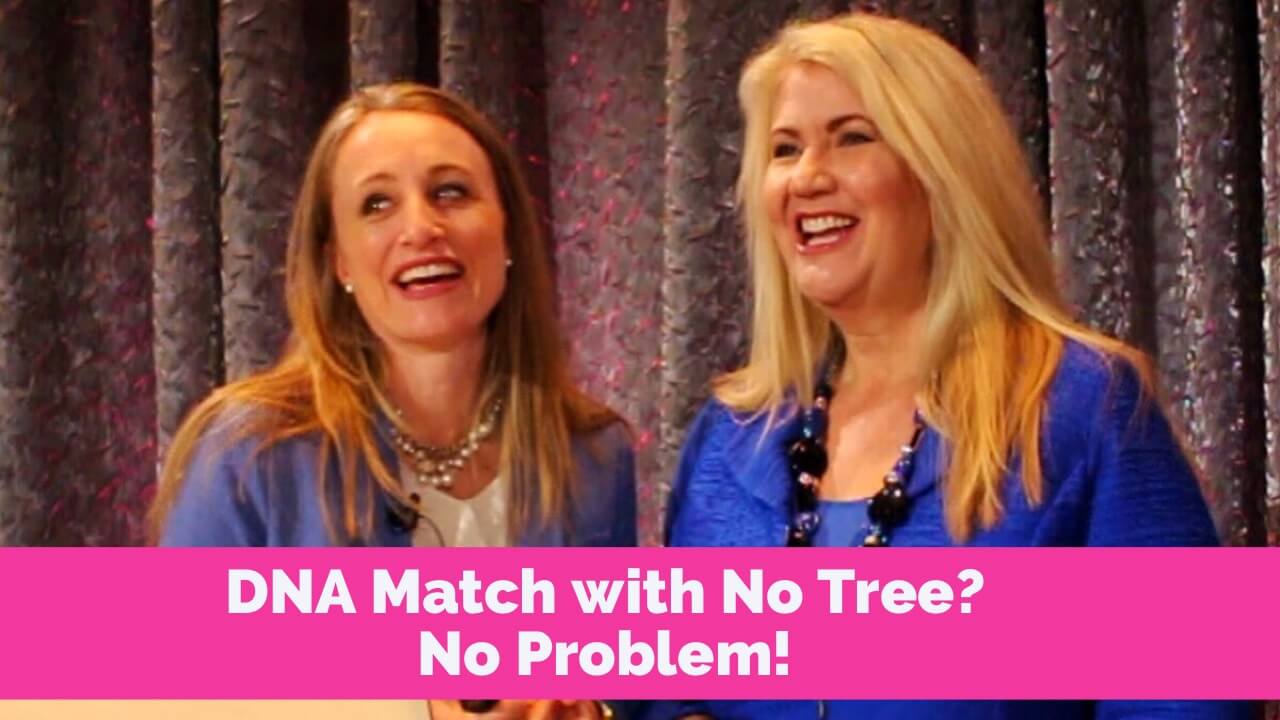
My AncestryDNA match doesn’t have an online family tree!
Lisa: You’re talking about some people don’t have trees. Of course, that’s just the bane of every genealogist right? They go and they look, and they say “this person doesn’t have a tree, and they’re my best match!!” I know you get a lot of people who test – maybe they saw the commercials on TV – and they go, “Oh, that looks really cool. I’m gonna do that.” But they were not doing genealogy. How does that break down?
Crista: Yeah, so you know, it’s so funny that you say that, because anytime anybody complains about matches not having trees, I always send them to your RootsTech presentation that you did with Diahan Southard about No Tree, No Problem. Because, because the reality is like, you can figure out a lot from a match even if they don’t have a family tree.
There are probably about half of my matches that do not have any tree at all. And we see that that’s pretty consistent across the board, which means those are most likely people who this is their first foray into family history.
I actually was just on a call this morning with a woman who took the DNA test about four years ago. She had no idea there even was a match list. She didn’t think she could build a tree because she thought she needed a subscription. So, she just took the test to get the ethnicity estimate, and somehow ignored all the emails Ancestry sent her to telling her to check out her new matches or startup a tree. But once she was contacted by a match. One of the best things you can do for those matches who don’t have trees, is send them messages. She got this message from one of her close matches. It piqued her curiosity. She’s like, “how does this person know who I am?” She discovered the match list, and she started a tree. And she’s now had this whole family history journey where she’s figured out who her biological father is. Uncles and half sibling…and so for those of us who have trees and who are involved in family history, recognize those people taking a DNA test. That’s their first step in the door. And it’s up to us, I think, sometimes to nurture them through that door by engaging with them through messaging or sharing information that we might have discovered, in a non-threatening way, hopefully.
Lisa: So they’re testing, and they’re thinking, “Oh, I want to find out my ethnicity is” and not even realizing that there’s this whole matching thing going on. Do you find that a lot of those kinds of folks eventually get bitten by the bug? And I wanted to re-emphasize what you said, that you don’t have to have a subscription to add the tree. Tons of people don’t realize that.
What You Can Do for Free at AncestryDNA
Crista: Yeah, if you’ve taken a DNA test, and that’s the only thing you’ve paid for, you haven’t paid for an Ancestry subscription to access the 80 billion records on the site, then you can still start a family tree. That’s a free service on Ancestry. For anybody who has a free registered guest account, or anybody who used to have a subscription and cancelled it at some point, you can still work on your family tree. And yeah, that’s something that a lot of people don’t realize.
You can also and this is something else people don’t realize, respond to messages from other users. The Message Center is a free service. You can send messages, you can initiate contact with any of your DNA matches without a subscription as well.
Lisa: So you’re really getting to take full advantage of the whole DNA thing, even if you aren’t currently doing the subscription and doing the genealogical records and all of that.
Ancestry Website Interface Updates
I was watching your video recently, I guess it was the June update, and you were talking about how you got to see some of that backend data, and you saw that people weren’t really interacting with the website. I love the new buttons and the ability to add this is a son, this is a nephew, etc. Tell people a little bit about that. And how is that going? Is the rollout done yet? And are you seeing some great response?
Crista: Yeah, so we do continue to make innovations to the match list and how people interact with it. Of course, two years ago at RootsTech we introduced the custom groups with 24 different colors. And it was innovative for those of us who were deep into family history. We had this hypothesis, though, that new users would find that fun and interactive as well. Unfortunately, new users, especially those who’d never considered family history before, didn’t have the mental construct around a pedigree chart or sides of the family, and didn’t even have any idea how to group their matches. And so that had really low usage. The usage it had was among really core hardcore genealogists and people into genetic genealogy.
So, we’ve been doing a lot of testing over the last year trying to figure out how to solve the problem of new users coming to the match list and looking at it and going, “That’s great.” Now what we wanted was to give them something actionable to do. This has been released, and it’s been rolled out to all users, I think, as of last week. Every match has a little button on it that just says, Do you know this person? Yes. And if you don’t, you can click learn more to find out more about that experience. But as soon as you click Yes, it then asks you to assign a side of your family. So, you can say, “Oh, yes, I know this person, they’re on my mother’s side.” And then once you do that, it asks you if you know the specific relationship.
Here’s another little nuance that we’re helping train people into, in both in interaction, but also what family history really means. We give them a list of the possible relationships based on how much DNA they share. One of the things that DNA sometimes uncovers a surprises, and you might think this person is your full sibling that the DNA says otherwise. Or you might think, you know, whatever the relationship might be. So, we give you those options to assign that relationship. And then that fills another customer request, which is when you select the relationship, it updates from a predicted relationship on that match, which is usually a range of cousinship, to what the specific relationship is based on your assignment.
Lisa: I love it. I mean, you guys are in the driver’s seat in terms of knowing and understand the technology. It’s wonderful that you’re helping to guide people to get more out of it, and to get onboard quicker.
How Accurate are Ancestry’s DNA Tests?
I have to ask you this question, because I imagine you have gotten this question a lot and I’d love to know how you answer it. How accurate are the Ancestry DNA test results? I heard somebody asked that at a conference once and I wanted to sit by and listen and see what the person said. What do you tell people when they ask you that?
Crista: You know, it’s such an interesting question, because accuracy can be measured any number of ways. And we need to know what you’re talking about when you say accuracy.
When you ask, “is this person on the top of my match list listed as my parent or child, how accurate is that?” It’s like 100% accurate that that is how much DNA you share with this person. And that that is either the nature of the relationship, or you’ve got a parent with an identical twin. So accuracy, in that case, we’re super confident.
When you ask about accuracy of ethnicity results, we call it an estimate for a reason. One of the things you’ll discover when you click through to view it is that there’s actually a range. That top level percentage you’re seeing is an average of 1000 different times that the algorithm has been run against your DNA and that reference panel. That’s because of just the nature of the way that those results are analyzed. And compared to that reference panel means there’s going to be some swing around an average. And again, we release those updates every year. Because again, as the reference panel growth, there’s more refinement possible.
Lisa: Yes, exactly. Good answer. I like that answer.
The Most Popular DNA Question
What are some of the most common questions that you get about DNA? I imagine there might be some folks watching her going, “yes, yes. Yes, that’s what I was wondering! What do you hear?
Crista: I will tell you what our number one question is. And I bet a lot of your viewers have the same question, and a lot of people at conferences have the same question. We see it on social media all of the time. The most popular DNA question is “where is my Native American?”
Lisa: They still want the princess they’re looking for?
Crista: It’s amazing to me how prevalent and pervasive that narrative is in so many families. They take a DNA test with full confidence that it’s going to tell them that there’s 17 or 12 or 8%, indigenous North American, when the reality is if they do have a Native American ancestor, it is most likely that that person lived three or 400 years ago, and that they just didn’t inherit those bits of DNA. The inheritance of DNA is random, and a lot of new people in family history haven’t really wrap their brains around what that means yet. They think they get half of everything and haven’t done the math to calculate what that means. Or they were told that a parent or grandparent was full Native. I grew up with that narrative in my family, my grandfather boasted of the fact that he was a quarter of a quarter Native American. He was born in Indian Territory, and I think that’s probably partially where that started from. And everybody claims the features. But the reality is, he was not, there is no evidence of that in the family tree once the research has been dug into. But I still have cousins taking DNA tests and fully expecting it to show up and kind of freaking out when it doesn’t.
Native American DNA
Lisa: Is Native America a large reference panel that is well represented?
It was not in the beginning, but we have been collecting additional samples. It used to be, back in 2012 when we started doing DNA testing, if you had Native American DNA, we would just tell you, Native American, and that was all of the Americas: North, Central and South. We now have, I think, nine different regions of native indigenous American, so we can split it out across the two continents. We’re starting to see some communities around some of those as well. So, the reference panel is growing, and the number of testers are growing as well. Here’s what I tell people, and they don’t always like this answer. But if you have Native American DNA, it will show up on an AncestryDNA test.
Lisa: You made such an important point that you could have a Native American ancestor and not have Native American DNA, right?
Crista: Yeah, absolutely. It just depends on how many ancestors have Native American DNA and how far back they were, whether or not you actually inherited those.
How Many Generations Back Can DNA Go?
Lisa: Give people a sense of how many generations back that the DNA becomes minute, in terms of what you might be inheriting from someone.
Crista: I am not a math person, but DNA has changed my world! And it amuses my accountant dad that I can do this now in my head. Everybody inherits exactly 50% of DNA from their parents. Those parents inherited 50% of DNA from each of their parents, but what they pass down to you is going to be about 25% of your grandparents DNA. And then it just gets cut in half every generation back. So, you’re going to have about 12 and a half percent of your great grandparents DNA, and about 6% of your two times great grandparents, and about 3% of your three greats, and about a percent and a half of your four greats! And by the time you get to your fifth great grandparents, it is possible when you consider all the people in that generation, that you did not inherit any DNA from one of them. Because you got all of it from one of the others. So five times great grandparents is the generation where we start to see some of that fall off. But that means that you’re getting it from somewhere, so some of those lines of your family tree will go back to the seventh and eighth, and sometimes even ninth great grandparents.
Which DNA Matches Should I Work On?
Lisa: That makes the case why when it’s focus, focus on best matches right? You were talking about that some people might have 75,000 matches, but we’ve got to start with identifying who the closest were and work on these because they probably have the most potential to give you information, right?
Crista: Not only the most potential to give you information, but also to build a solid foundation, so that you can explore those more distant matches. Because unless you’ve built that solid foundation and validated the relationships all the way back to third or fourth or fifth grade grandparents, the hope of connecting with the eighth or ninth cousin on one of those other lines further back is going to be a lot more difficult and a lot more shaky of a conclusion.
How to Approach a DNA Match
Lisa: You know, when people get a best match, they want to reach out. You were talking about the messaging system is free. It’s part of what you have access to when you test. You’re on the phone, you talk to people, I’ve seen you at the conferences, you know, you’re talking firsthand to your customers and really hearing from them. What kind of coaching do you give people on how to approach somebody, particularly if they get resistance? Is there one more thing they might be able to say just to kind of keep the door open or somehow nudge the match to interact? What do you recommend?
Crista: Okay, so Lisa, I am single, I have never been married. And that might seem like a funny segue into this. But that means I have a whole lot of experiences. And I approach communicating with unknown or unpreviously connected to cousins a little bit like I approach it. You’re not going to spill all of your deepest, darkest secrets on the first date, or you’re going to send them screaming into the night. Or they may just entirely ghost you, right? That’s a new term for people who just ignore you after a date. And that happens. Sometimes people just go on for paragraphs and paragraphs and paragraphs in that initial message they send a cousin. And my guess is those cousins are seeing some of those messages and just being like, “I don’t even know what to do with this information. It’s overwhelming,” right? So, you have to tone it down.
But by the same token, right, I’m not going to go on a first date, and just sit there and not answer his questions or not try to initiate a conversation. And so again, similarly, when you send out that first message, you’re gonna want to provide enough information that’s something they can respond to. I’ve seen people send messages that say something like, “Hi, we’re DNA matches, do you know how we’re related?” and they give them nothing to nothing to work with. You have to give them just enough that they will want to respond and that they have something to respond to, but not so much that you overwhelmed.
Lisa: And maybe something just a little intriguing. I know that when I’ve talked to people who we are sharing ancestors on my family tree, one of the things I’ll say is, “you know, I have some photos. I’d love to talk to you about that. Maybe you do too.”
I remember, in the old days, I would send them all my best pictures, and they would take them and they never respond. You don’t want to give away the kitchen sink, right? That’s what you’re saying. I think that’s a good strategy. And sometimes back then I would get a message from somebody, and they sounded like a scientist, and I felt intimidated, like, “I can’t keep up, I’m gonna say something and I’ll be wrong” and they’ll be able to say, “Oh, my gosh, you don’t know what you’re talking about.” So, there’s also that intimidation factor. I guess even if we do know all that stuff, we don’t want to necessarily wipe people out with it.
Crista: I used to have a thing about intriguing, but intriguing, but not overwhelming. That’s kind of the mic that runs through my head when I craft those messages.
Lisa: I like that. Anything else when it comes to AncestryDNA that we should be keeping our eyes out for? Anything you want to tell us about? What’s coming in the future?
What’s Coming to AncestryDNA in the Future
Crista: There’s a few things. We can kind of divide them into two categories around the ethnicity estimates and the communities. Just to make sure this is clear, we update ethnicities about once a year in the fall. So, watch for that. We usually send out an email or put a banner on the site. But one of the things that we’ve learned is that a lot of people don’t know that. And so, they don’t know to come check and see what’s been updated. So just watch for those announcements or those emails.
Genetic communities can be updated at any time for two reasons.
One reason is, you may all of a sudden just have enough matches, that you’re pulled into an existing network that has been labeled as an existing community. So those communities could just pop up at any time.
The other reason is that about every six or eight weeks or so we’re releasing new communities. Our science team has been working fast and furious to identify new networked clusters and make sure that we’ve got them labeled correctly, and that we’ve worked with history professors and others to understand the cultural and historical implications because we want to be accurate and informative, but also sensitive to all the nuances around race and ethnicity and history. Because history is messy. And as people dive into it, those of us who’ve been doing family history, understand that. But again, a lot of people are new to family history, and DNA is their first foot in the door. And we want to make sure that we’re a little sensitive to how we present some of that information. So always new communities. That’s on the DNA side of the house.
And then we are working on some additional features for the DNA match list. We’ve previewed them with some customer experience groups. We’ve previewed them with influencers like yourself. And so just we can say that those are coming but can’t talk a whole lot about them. We’re listening to our customers and we’re really trying to make sure that that DNA match list experience works for more casual customers just taking their first steps into family history, and those of us who are hardcore into this and trying to break through 40-year brick walls using our DNA results.
How to Contact AncestryDNA
Lisa: Well, and you said, you listen to your customers. What is the best way for somebody to get in touch with you or just share feedback or a question?
Crista: There’s two primary channels for that, though, we listen in a lot of ways.
Ancestry has a Facebook page. If you go to the official Ancestry Facebook page, you can send a direct message to us with your feedback or post it just there on the wall. Our product managers do follow that and keep tracking and put that into our feedback system.
The other way to contact us is to just do a Google search for Ancestry feedback. It’ll bring up a feedback form that’s in our Help Center. It’s a little easier to find it that way.
Lisa: I think I was just talking to my show about sometimes googling for a page is easier. Ancestry’s website is so well organized, it will grab exactly whatever page you’re looking for probably even faster than navigating.
Well, how fun it has been to get a chance to catch up with you on the latest with AncestryDNA. I know we recently followed each other over on Instagram, and over there I see that we share another passion which is gardening. How is your garden going this summer?
I always had aspirations, but with all of the genealogical conferences and the traveling that I do for Ancestry I’ve never been home until this last summer. And so last summer, I tried it. And I failed miserably. I grew one tomato, and a little bit of basil. That was what I did, but I made it again. Yes. This year, I’ve got some zucchini going and some little herb garden and we’re trying tomatoes again. We’ll see how that goes.
Lisa: Good job. Are you planting in the ground? Or are you doing containers?
Crista: Both. So I have a little garden patch in my backyard. But then I also built some standing like garden racks for my herbs and stuff.
Lisa: Very cool. I’ve been in the same boat as you. It’s like after 14 years of constant traveling – which has been great, I’ve missed it – I started all this container gardening. I’m doing the self-wicking tubs. I saw a guy on YouTube doing it, and it looked awesome. We’ll see how it pans out here in the heat of Texas. But anyway, there’s never enough time to do all the wonderful things that we would enjoy doing and certainly genealogy is that way!
Thank you so much Crista Cowan! If somebody wanted to get in touch with you, where should they go check you out?
Crista: The best place is on Instagram and it’s just my Instagram handle which is just my name Crista Cowan.
Here’s our link for purchasing your copy of Snagit (screen clipping tool) Thank you for using our link. Use coupon code GENE15 to get 15% off.(We will be compensated at no additional cost to you, which makes the free Elevenses with Lisa show and notes possible.)
You’re going to learn:
What Snagit does and the problems it can solve for you as a genealogist!
How to screen capture using Snagit
Amazing advanced new features you didn’t know Snagit had and how to use them.
How to do scrolling and panoramic screen clipping (perfect for family trees, historic maps, long web pages and so much more.)
How I specifically use it for my genealogy research.
Add my YouTube channel to your “Favorites” list on YouTube:
Click here to add my channel to your YouTube favorites. Clicking the red “Subscribe” button at the Genealogy Gems YouTube channel will add my channel to your YouTube library which makes it super easy to return to my channel and Elevenses with Lisa any time you’re on YouTube.
How to Use Snagit
One of the things that we all work really hard to do is solve family history mysteries. And as we do that, we are finding all kinds of goodies. But the trick is that we have to capture them. Right? If we don’t, then we may end up losing the trail.
Last week, we talked about citing the sources that we find. This week, we’re going to be capturing our findings in a very visual way, and actually incorporating those source citations. And we’re going to be doing it with the tool that I really absolutely use every single day. And that’s Snagit.
The Image-Capturing Challenges that Genealogists Face
To understand the value of a tool we need to make identify the problems we face and see how it solves them. Here are some of the challenges genealogists face when it comes to capturing images:
We don’t need or want to save the whole page. (Why waste all that ink printing it or storage space saving it?) We may not want to download or copy an image from an unknown website. (No one wants to accidentally put a virus on their computer!)
The page in its entirety is blurred when printed. (This often happens with newspaper pages.)
We need to capture a very long or wide page that can’t be displayed in its entirety on the screen.
We want to annotate or add a citation to the source image.
It takes extra time to save to items to your computer and then add them to other documents in other programs.
Do you identify with some of these challenges? I sure do.
Let’s say that you find an article, a document, or something else, and you want to add an annotation. Maybe you want to add the source citation, a watermark, or just notes to yourself directly onto the image.
It would be time-consuming to clip the image with perhaps the free snipping tool that comes on your computer and save it to your hard drive, and then pull it into another program to annotate it. I don’t know about you, but there’s never enough time for family history so anything that we can do to save time, means we’re going to be able to spend more time with ancestors.
The solution is using Snagit.
Snagit Functionality
Here are just some of the things that Snagit can do:
“Capture” items that appear on your screen
Create videos with audio (Create > Video from Images)
Edit images (You can edit clipped and imported images and photos. You can also send screen shots automatically when using your computer’s snipping tool.)
Convert text on an image to typed text (Grab Text)
Create documents using templates (Create > Image from Template)
“Share” items to other programs with one click.
I have found that snag is so robust, and it has so many different options, I still can’t exhaust all the things that it offers me. But it’s also simple. It’s simple in the way that you use it. It certainly solves simple, everyday problems. And most importantly, it is a program that I can use not just for genealogy, but also for my business and personal use. I like to have tech tools that serve me across the board, if possible, because it takes time to get up to speed on any program. If you’re just getting programs that are only for genealogy, then you end up needing a second program to be able to do similar things in other parts of your life. Why not find tech tools that can serve you across the board. That’s what certainly Snagit does. So, while I’m focusing on showing you genealogical applications for using Snagit, just know that if you’re new to family history, or you stumbled across us this article, and you don’t do genealogy, you’re going to be able to use Snagit for just about everything.
How to Get Started with Snagit
Purchase the software
Download and install
Open it and let it run in the background so you have easy access from your task bar
Yes, there may be a snipping tool built into your computer, and you can use Print Screen. Snagit can blow them away.
How to Capture a Screen Image with Snagit
Display the desired page on your screen
Click the orange Snagit icon in your task bar (Snagit should be running in the background on your computer.) This is the Capture If you don’t see it, click the blue Snagit icon to open the editor and then click the red circle Capture button at the top of the program. After your first capture, the orange Capture icon will then be open and available in your task bar.
Select the Image tab
Set the Selection to Region
Click the large red Capture button
Use your mouse to draw a box around the desired area. You may see flashing arrows. If you click one you will be ablet to scroll that direction to capture more of the page.
When you release your mouse the image will appear in the Snagit editor.
Sometimes we find an item that is larger than is visible on the screen. The page may scroll side to side or up and down. Use Scrolling capture to capture everything in one piece.
How to Scrolling Capture with Snagit
Display the desired page on your screen
Click the orange Snagit icon in your task bar
Select the Image tab
Set Selection to Scrolling Window
Click the large red Capture button
You will see flashing arrows. Click the arrow pointing in the direction that you want to scroll in Snagit will automatically scroll down and capture. Click Stop at any time if you don’t want to capture the entire page.
When you release your mouse the image will appear in the Snagit editor. You can then trim all sides by simply grabbing the handles and dragging.
In some situations you will need more flexibility in your scrolling. Panoramic capture allows you to select the region and then scroll manually, capturing exactly what you want to capture. Think of it as image capture and scrolling capture merged together. Panoramic capture allows you move both up and down and side to side.
How to Panoramic Capture with Snagit
Display the desired page on your screen
Click the orange Snagit icon in your task bar
Select the Image tab
Set Selection to Panoramic
Use your mouse to draw a box around the desired area
When you release your mouse a panoramic capture bar will appear. Click the Start button to being your panoramic capture.
Click in the captured image area and drag the image as needed. The more precise you are in your movement the better the final image will be. You can move in any direction.
When you release your mouse the image will appear in the Snagit editor. You can then trim all sides by simply grabbing the handles and dragging.
Panoramic captures work great for large items like maps, online family trees and newspaper articles just to name a few things. If you zoom out in order to capture these types of items in their entirety you will end up with a blurry item when you zoom in for a closer look. Panoramic solves this problem.
Let’s discuss a few more options for capturing hard to clip items like newspapers. Sometimes, the article you need is continued on a different page or column. With Snagit you can capture the individual pieces and then combine them.
How to Combine Captured Images with Snagit
Capture each section of the article individual using Image Capture (Region)
In the Snagit editor press Control / Command on your keyboard and click each item you want to be included in the combined image.
Press Control + Alt + C on your keyboard or at the top of the screen click Create > Image from Template.
Select the desired page layout. Custom Steps or Steps Portrait works well for articles.
Click on any items (such as numbered steps) and press delete on your keyboard to remove them.
The combined image can then be saved to your computer or shared to another program.
Editing and Highlighting Images
There are many ways to annotate and edit images (both captured and imported) in Snagit including adding:
arrows
text (perfect for adding source citations directly onto the image
call outs
shapes
stamps (Images on images)
lines
squiggles and drawing
step by step numbering
You can also modify images by cutting out portions, blurring and erasing areas, and even magnifying an area on the image!
Snagit Advanced Features and Strategies
Once you’ve mastered the basics there are many more ways to use this tool to power-up your genealogy research. Here are a few more ideas we covered in the video.
How to Grab Text from an Image with Snagit
Option 1 – Grab text from existing image:
Select the image in the editor so that it is displayed in the editing area
In the menu Edit > Grab Text. This will grab all of the text that appears in the image. If you only want a portion of it, click the Selection tool at the top of the screen and draw a box around the area you want to grab the text from.
The converted text will appear in a pop-up window
Copy the text to your computer’s clipboard by clicking Copy All.
Paste wherever you want the text to appear (another document, etc.)
Option 2 – Grab Text While Clipping:
Display the desired page / item on your screen
Click the orange Snagit icon in your task bar
Select the Image tab
Set the Selection to Grab Text
Click the large red Capture button
Use your mouse to draw a box around the desired area. You may see flashing arrows. If you click one you will be ablet to scroll that direction to capture more of the page.
When you release your mouse the image will appear in the Snagit editor. The converted text will appear in a pop-up window
Copy the text to your computer’s clipboard by clicking Copy All.
Paste wherever you want the text to appear (another document, etc.)
Grab Text from Windows Not Easily Copied
We’ll use the example of copying the titles of computer folders into an Excel spreadsheet. Open your file explorer and navigate to the desired folders. Since a mouse can’t be used to copy all the names in one swoop, we will use Option 2 – Grab Text While Clipping instructions above.
Create Videos with Snagit
You can compile separate images into a video and add voice narration.
In the editor select Create > Video from Images
Click to select the first image in the tray
Click the microphone button in the video recording bar if you want to record narration.
Click the Webcam button if you want to appear on screen
Click the red Record button to begin recording.
Click each image in the order desired for the amount of time you want it to appear on the screen.
Press the Stop button when done.
How to Create a Timeline with Snagit Templates
In the editor add images either by importing (File > Import) or capturing
Select the images to be include by holding down the Control / Command key and clicking on them
Create > Image from Template
Select the timeline template
Add a title and captions as desired
Click the Combine button
Productivity with Snagit
One of my favorite features of Snagit is how easy it is to share items to other programs directly instead of having to save them first to my computer. It’s easy to do. Simply select and display the image to be shared and in the menu go to Share > and select the program.