Inbox by Gmail app has some great features and if you’re willing to go all-in and are up for a big change, go for it. If not, here are some ideas for improving your regular Gmail experience.
About a year ago, Google announced the new Inbox by Gmail app. I didn’t cover it then because they had bugs to work out. But, I’ve been keeping an eye on it. It’s a bit overwhelming, however, if you are up for the change here’s a quick video summary of what it does.
As a recap, the Inbox by Gmail app can:
Bundle similar messages for you, like offers and promos;
Recognize emails about travel reservations and bundle those together; and lastly,
It allows you to browse photos in emails without opening the message.
You can also do a lot of housekeeping and organizing tasks yourself. For example, you can:
Pin messages that you want to come back to, then click on a thumbtack icon to show all pinned messages;
Snooze an email message by marking it to pop back up to the top of your list at the time and date you indicate;
Create easy reminder messages for things you need to do; and
Keyword-search your emails just like you do in Google. Sometimes, the search function is even smart enough to answer questions for you. Like when I type in “flight Indianapolis” for my upcoming trip to the Midwestern Roots conference in July, I get an email with my flight reservation in my search results. At the top, I will also see a nice summary of my flight information that Google extracted from that email and puts right in front of me.
These are pretty slick features, but they come with a price: Inbox by Gmail is a dramatic change from Gmail which some might find a difficult transition.
Improve Your Regular Gmail Experience without Using the Inbox by Gmail App
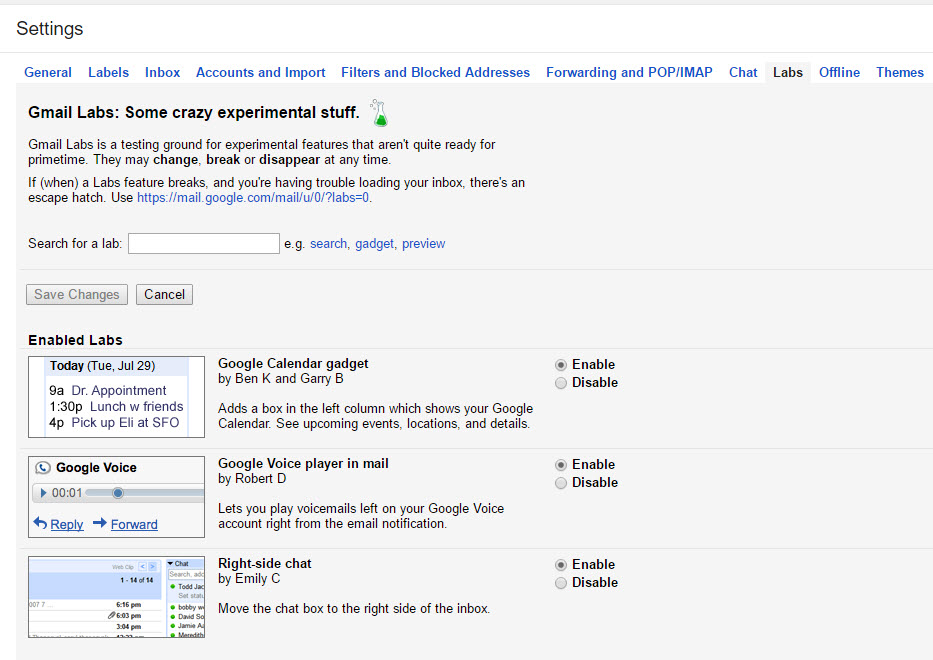
If you’re not quite ready to switch to Inbox by Gmail, there are ways to enhance and improve your experience using regular Gmail. I don’t know about you, but I don’t use the “Chat” feature on Gmail very often. However, that little chat box pops up right below the labels, and that means that when you select a label lower down on the list, it’s easy to accidentally open the chat box. Frustrating indeed!
Make your life just a little bit easier by changing the location of your chat box. Go to Settings, then click on Labs. Click to Enable the Right-side chat feature. Chat moves out of the way over to the right and the problem is solved.
For those of you who don’t use the Chat feature at all, you can completely turn it off. Simply go to Settings, Click the Labs tab, click to select Chat Off, and then click Save Changes. Ah, this gives you a cleaner, less cluttered, Gmail to work with. Nice!
An important thing to remember about changing any of your Gmail settings is that you must click the Save button on the page to apply the changes.
Switch to the new Inbox by Gmail app or just improve your existing email with this little tip, the choice is yours. Thanks for sharing this tip with your friends…it’s nice to share, isn’t it?
Here’s this week’s group of new genealogy records online. Though not all these databases are new, many have been updated and are definitely worth another look! Records for: England, Ireland, Australia, and the United States.
ENGLAND – WARWICKSHIRE – BURIALS.Warwickshire Burials, 1836-2006 at Findmypast now has over 175,000 new records. This collection contains more than 1 million records which include inscriptions from the Clifton Road Cemetery in Rugby.
ENGLAND – SURREY – MARRIAGE. New records have been added to the Surrey Marriage Index, 1538-1887 on Findmypast. Though it is only an index, it now offers over 755,000 records from 178 parishes in Surrey, England.
IRELAND – COURT REGISTERS. Findmypast has added Irish Petty Sessions Court Registers, 1828-1912to their collections. This database includes details of victims and witnesses, as well as those accused of a crime. The Petty Sessions were the lowest courts and often heard cases about money and domestic disputes. Another exclusive database for Ireland research is the Ireland Poor Law Reports, also found at Findmypast.
AUSTRALIA – BEACHPORT – RATE BOOKS.South Australia Rate Books is an index of about 4,000 records. This index was transcribed from rate assessments for the coastal district of Beachport between the years of 1882 and 1888. Information varies, but may include your ancestor’s name, assessment year, assessment number, occupier, owner, situation, and town.
UNITED STATES – HOMESTEAD RECORDS. Ancestry.com has updated their U.S., Homestead Records, 1861-1936 this week. These records currently only cover six states, which are: Ohio, Arizona, Indiana, Iowa, Nebraska, and Nevada. They will be adding more states in the future. These documents are part of the Records of the Bureau of Land Management. Many application and case files contain valuable pieces of genealogical data.
Be sure to check in next week to see what’s new in genealogy records and collections. Sign-up for Lisa’s free weekly e-newsletter so you are sure not to miss it. Just enter your email address in the sign-up box at the top of this webpage or scroll to the bottom if you are on your mobile device. You’ll also receive a free e-book with Lisa Louise Cooke’s best Google search strategies for genealogists!
The US Public Records Index can be useful for genealogy–if you understand what it is and how to use it properly. Here’s an example and some tips.
Not long Russ sent in this tip recommending the US Public Records Index for genealogy:
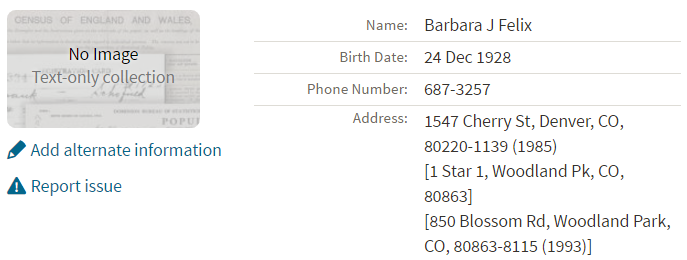
“I was listening to Genealogy Gems Podcast 181 [in which] you were talking about where do we search while we are waiting for the 1950 Census….I recently discovered a wonderful resource, on Ancestry.com, that I have used along with city directories. The name of the record group doesn’t sound interesting but it can be a Gem for you: the US Public Record Index, 1950-1993, Volume 1 and 2. Volume 1 is far more interesting with more data. A search will return a name AND birth date, along with more than one address, zip code and sometimes phone numbers.”
Here’s a sample search result:
Russ kindly sent me Ancestry’s description of its online database for Volume 1, which says that original data comes from public records spanning all 50 states, such as voter registration lists, public record filings, historical residential records and other household database listings.
Collection Profile
What: U.S. Public Records Index
Where: Ancestry, FamilySearch, MyHeritage
Years Spanned: 1950-2009
Source Type: Lacking original source citations.“Hints to go on and follow up with further research into verifiable sources.”
Then he shared the following example of using the US Public Records Index to find recent relatives that he can’t look up yet in the 1950 census:
“I had a hint for a cousin in a yearbook. I know that she recently lived in Philadelphia, Pennsylvania. I didn’t know where she went to college and I know her birthday. The name is not unique, not also not common. At the same time, I had the hint for the Public Record Index. You know those things we can’t use in a proof argument, but there [she] was in Philadelphia. The yearbook had her picture and only her name, not spelled the way I know it, but the Public Record Index puts her in Philadelphia at the right time and place.
I have seen 2 or 3 addresses for folks in the 1980s and 1990s in these indexes. Not all addresses have dates, but some do. I have one cousin with 5 addresses since 1983 and he won’t be in a census until the 1960 Census Records are released.”
The U.S. Public Records Index pops up in my search results sometimes, too. Both volume 1 and volume 2 are searchable on Ancestry.com, as Russ says, in separate databases. Each has over 400,000 records in it. There’s also a free partial version of this database for 1970-2009 at FamilySearch.org and yet a third version at MyHeritage, with 816 million records, with nearly the same time frame. The FamilySearch database says its data comes from “telephone directories, property tax assessments, credit applications, and other records available to the public.”
More on the US Public Records Index
Here are a few tips worth mentioning about the US Public Records Index. Some of these points come from the FamilySearch wiki:
Not everyone who lived in the U.S. appears in the index, and you’re more likely to find birth information for those born between 1900 and 1990. What you’ll find is primarily where someone lived, and often when they lived there.
It’s rarely possible to positively identify a relative in this index since there’s limited information and it spans the entire country for up to a half-century, and you can’t follow up on the record it comes from because the index doesn’t say where individual records come from. So as Russ says, this is a great resource to use in combination with other records. It’s a similar concept to the way you might consult family trees that lack sources: hints to go on and follow up with further research into verifiable sources.
When you find more recent listings, you can sometimes find telephone numbers for living distant relatives. If the thought of cold-calling distant relatives seems a little intimidating, listen to my Family History: Genealogy Made Easy podcast, episodes 14-15, for tips–and to get your courage up!
Genealogy is coming back to TV. TLC has renewed “Who Do You Think You Are?” and “Long Lost Family” for additional seasons.
TLC announced on June 9th that the network will have additional seasons of both “Who Do You Think You Are?” and “Long Lost Family.” Both series averaged over 1.8 million viewers.
The two-time Emmy-nominated WDYTYA follows celebrities as they take a personal journey of their family tree. Recent celebrities included Bryan Cranston, who uncovered an ancestor’s heroic dedication during the Civil War, and Molly Ringwald, who learned about the dangerous conditions of her coal-mining ancestors.
The “Long Lost Family” series features the emotional and touching stories of people who have had a separation from their family. The show reunites these individuals and shares their stories of adoption, mystery, and questions. This past season reunited several family members, including a mother and daughter who worked together and did not realize they were related. “Long Lost Family” is hosted by Chris Jacobs and Lisa Joyner, who also share their own stories of adoption.
Ancestry will be teaming up with TLC again as a sponsor for both series. As part of the sponsorship, Ancestry provides the family history research to help make discoveries possible on both series.
Are you a fan of these genealogy-themed shows? We’d love to hear which stories have touched you the most. Please leave a comment below:
In this blog and video series I’m showing you how you can create captivating videos about your family history quickly and easily with Animoto.
In the First Episode
In episode 1 we laid a foundation for the family history video that you are going to create. Doing this will save you time and ensure a cohesive, well-told story. We also:
defined your audience
identified and outlined the story that you want to tell
collected the content that you will include in your video
If you missed episode 1, you can watch it below:
Get a Free Animoto.com Account
The first thing to do is to go to Animoto here and sign up for a free trial account, which gives you the full power of Animoto Pro. No credit card is required. This trial period is the perfect opportunity to test drive Animoto and see just how easy it is to use. As I’ve said before, if you can click, drag, and drop, you can make videos with Animoto.
The videos you create during the trial will be watermarked, but still downloadable and shareable. If you decide to use Animoto beyond the trial period, there are several pricing plan options. You can purchase as little as one month for around $16 (check their site for current pricing). If you’ve done your prep work like we did in episode 1, you can create several videos in that time period.
OK, I know you’re anxious to get going, so let’s create a video!
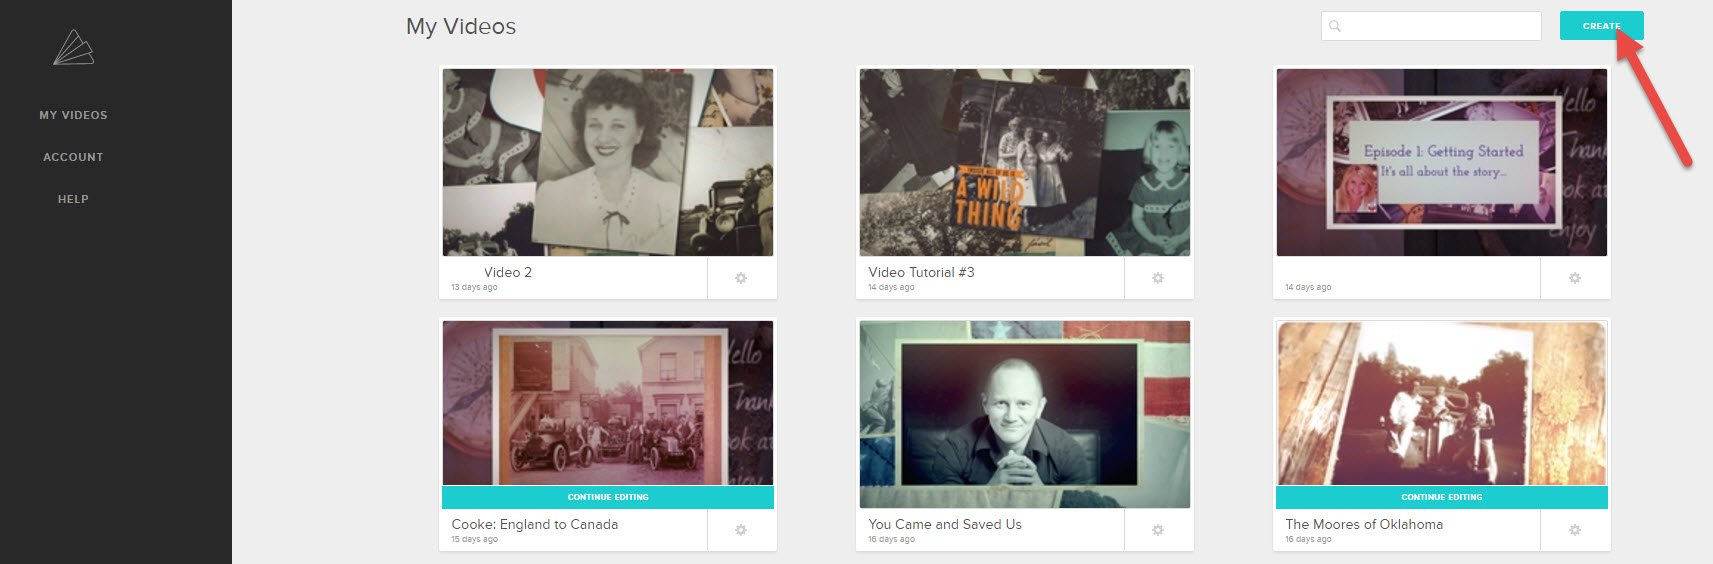
Create!
It’s super easy. Once you’re signed into your account, click the Create button.
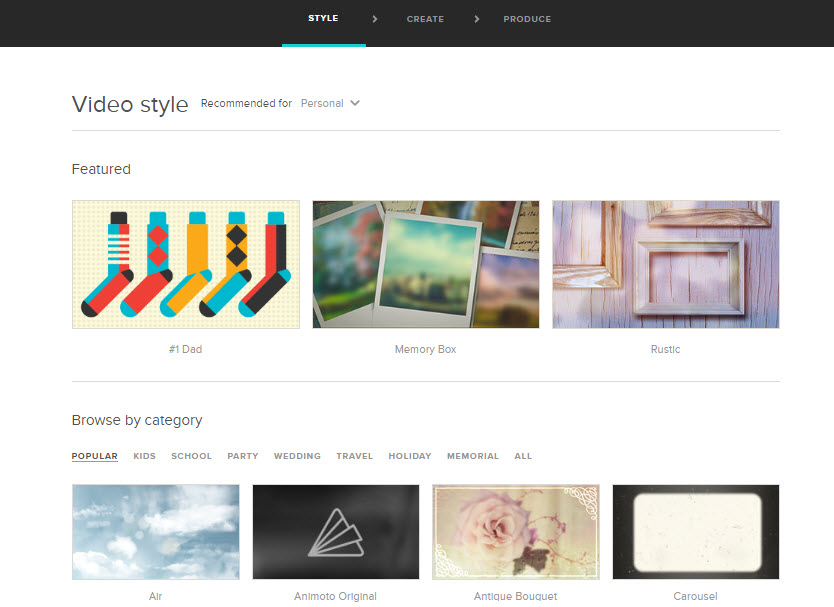
Style
First up, select a style that fits your story. Here are some of my favorites for family history:
Memory Box
Antique Bouquet
Remembrance
Vintage Voyage
Rustic
You’ll notice that some styles have a Premium banner. Those require a Premium subscription. However, if you’ve opted for a Personal level subscription you still have lots of wonderful styles to choose from.
Click on a style that catches your fancy and watch a preview of what it will look like. When you find the one you want, click the Create Video button on that style page. This will load the Video Creator.
Music
The style you chose will include a song, but you can change that if you want to. To select a new song, click Change Song, and you can pick a song from the Animoto library.
You can also upload your own music mp3 file from your computer. (Remember to keep copyright in mind, and make sure you have the rights to use the song.)
But wait, you can add more than music! You can also upload an audio file, such as a family history interview, or even an mp3 file that you created that includes both music and words.
Adding Pictures & Video
Now it’s time to add your photos, images, and video clips. Of course that’s easy because in episode 1 of this series you created an outline for your story, and you copied the files you wanted to use to illustrate that story into a folder on your computer. So you’re all set to go!
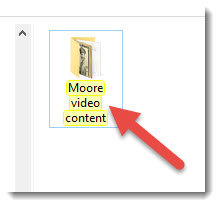
There are two ways to add files. From the menu, click AddPics & Vids, or on the timeline click the plus sign in the empty box. In the pop up window you’ll find lots of options for imagery, including stock photos from Animoto. But for now, let’s add the images you put in the folder on your drive (see episode 1).
Under Your Computer click Upload Pictures and Video. Navigate your way to your content folder on your computer’s hard drive. Click to select the first image, and then you can select them all by holding down the shift key on your keyboard, and clicking the last image in the folder. Press Enter on your keyboard to add them to your project.
You can rearrange the order of your images and videos by dragging and dropping them with your mouse. If you decide to eliminate an image, simply click to select it and from the menu click Delete.
Text
Next, we’re going to add text to your videos, creating title cards. Again you can do this from the menu, or just click the plus sign in the empty box on the timeline, and then click Add Text.
In the pop up box you’ll type a title (or the main text) and then you have the option to add a subtitle. This is where the outline we created in Video 1 comes in so handy! When you’re done, click Save. And don’t worry because you can always go back and change any text at any time.
Title cards are great for the beginning and ending of your video and also for transitioning to different parts of the story.
Simply click and drag the cards into the order that you want them.
You can also add text captions to each of your images. Hover your mouse over the image and click Caption under the image. In the pop up window containing your image, click to place your cursor in the text area, type in the desired text, and then click Save.
Spotlighting an Item
You may have a few images or title cards that you want the “camera” to spend a little more time on, thereby spotlighting it. To create that effect, just click to the select the image or title card, and then click Spotlight in the menu. I particularly like to Spotlight title cards so that the viewer has plenty of time to read them.
Previewing
So let’s see how this looks so far, and to do that we’re going to click PreviewVideo. You can preview your video at any time during the production process.
A low resolution version of your family history video will be created in about 15 seconds. Then you can watch and see what little tweaks and changes you want to make. Click Continue Editing to head back to the timeline and keep working.
Next Steps
I hope you’re getting excited about your video projects. Next time we get together, we’re going to bring our projects down the homestretch and produce them into glorious shareable videos.


 Here’s this week’s group of new genealogy records online. Though not all these databases are new, many have been updated and are definitely worth another look! Records for: England, Ireland, Australia, and the United States.
 More Gems on Researching Recent Relatives
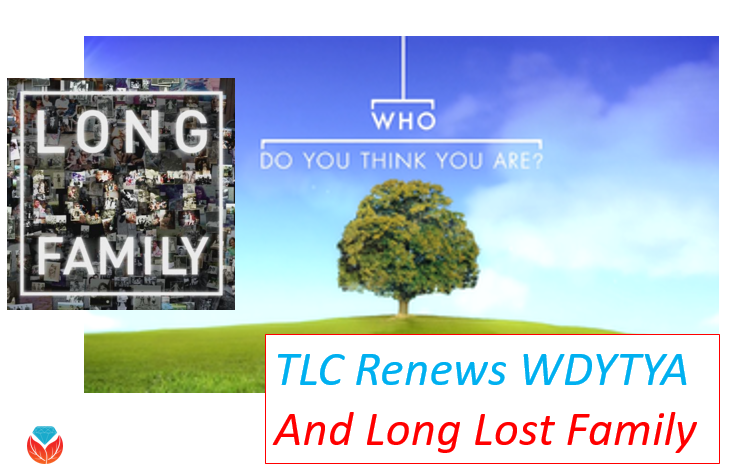 Genealogy is coming back to TV. TLC has renewed “Who Do You Think You Are?” and “Long Lost Family” for additional seasons.